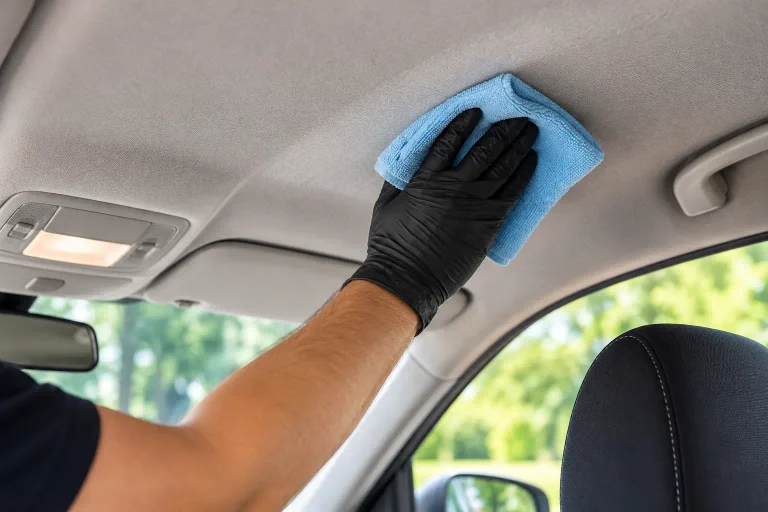
A dirty car headliner can make an otherwise clean interior look neglected. Dust, fingerprints, smoke residue, food splashes, and water stains can gradually build up on the fabric covering your vehicle’s ceiling. However, cleaning this area requires more care than cleaning car seats, carpets, or floor mats.
The safest way to clean your car’s headliner without causing damage is to use a small amount of an appropriate interior fabric cleaner, a clean microfiber cloth, and gentle blotting motions. Avoid soaking the fabric, scrubbing aggressively, or applying excessive heat because these methods can damage the delicate materials underneath.
In this step-by-step guide, you’ll learn how to clean a car headliner safely, which products and tools to use, how to treat common stains, and which mistakes to avoid to prevent sagging, discoloration, and permanent damage.
Quick Answer: How Do You Clean a Car Headliner Safely?
To clean a car headliner without damaging it, first remove loose dust with a gentle cleaning method. Test a suitable upholstery or headliner cleaner on a hidden area, apply a small amount to a microfiber cloth rather than directly to the ceiling, and gently dab the dirty fabric. Blot the area with a dry towel and allow it to air-dry completely.
The most important rule is to use as little moisture and pressure as possible. If the headliner is already sagging, bubbling, or separating from its backing, avoid wet cleaning because the adhesive may already be failing.
Why Cleaning a Car Headliner Requires Special Care
A car headliner is not simply a piece of fabric attached to the roof. Many conventional automotive headliners consist of a decorative fabric layer bonded to foam backing and a supporting panel.
This layered construction creates a comfortable, finished appearance inside the vehicle, but it also makes the ceiling vulnerable to excessive moisture and mechanical stress.
1. Excessive moisture can weaken the adhesive
When too much cleaning solution penetrates the fabric, it can reach the foam and adhesive underneath. Depending on the headliner’s construction and condition, this may contribute to fabric separation, wrinkles, watermarks, or sagging.
Once the fabric begins to detach, ordinary cleaning usually cannot restore the original bond.
2. Aggressive scrubbing can damage the fabric
Headliner fabrics are often relatively thin and delicate. Pressing hard with a brush or rubbing repeatedly in circular motions can distort the fibers, leave uneven patches, and make certain areas look rougher than the surrounding material.
3. The wrong cleaner can cause discoloration
Strong degreasers, bleach, solvent-based products, and unsuitable all-purpose cleaners may affect dyes, surface texture, or the materials beneath the fabric.
Even a product marketed as a general interior cleaner should not automatically be considered safe for every headliner.
4. Older headliners may already be fragile
Heat, aging, and deterioration of the original foam or adhesive can make an older headliner particularly vulnerable. A cleaning method that works on a newer vehicle may cause damage to an older one.
For these reasons, the objective should be to remove the visible contamination with minimal contact and moisture rather than attempting to deep-clean the material like carpet.
What You’ll Need to Clean Your Car’s Headliner
Gather your supplies before starting. Having everything within reach helps you work carefully without leaving a damp area untreated.
| Cleaning tool or product | Purpose |
|---|---|
| Clean microfiber cloths | Apply cleaner, lift dirt, and absorb moisture |
| Headliner-safe fabric cleaner | Loosen surface dirt and suitable stains |
| Soft detailing brush | Gently loosen contamination when necessary |
| Vacuum with a soft brush attachment | Remove loose dust if the fabric is firmly attached |
| Dry, absorbent towel | Blot away excess cleaning solution |
| Clean water | Lightly dampen a cloth when appropriate for the cleaner |
| Portable fan | Improve airflow during drying |
Choose a product specifically labeled as suitable for automotive headliners or compatible interior upholstery. Follow its label instructions and any cleaning recommendations provided by your vehicle manufacturer.
Avoid preparing a strong homemade cleaning mixture simply because a stain looks difficult. Unverified mixtures can leave residue, cause discoloration, or create additional cleaning problems.
Step-by-Step Guide: How to Clean Your Car’s Headliner Without Causing Damage
Follow these steps to remove everyday dirt while minimizing the risk of damaging the headliner.
Step 1: Inspect the Headliner Before Cleaning
Before applying any product, examine the entire ceiling under good lighting.
Look for:
- Dust and loose debris.
- Fingerprints around grab handles and sun visors.
- Small food or beverage stains.
- Yellowish or brownish discoloration.
- Watermarks and streaks.
- Sagging, bubbles, loose edges, or separated fabric.
- Signs of mold or persistent moisture.
Identifying the problem first helps you choose an appropriate cleaning method.
If the headliner is firmly attached and only has surface dirt, gentle cleaning may be sufficient. If it is sagging or separating, stop before applying moisture. Cleaning cannot repair a failing adhesive bond, and further wetting may make the problem worse.
Step 2: Protect the Interior
Remove unnecessary items from the seats and prepare the surrounding area.
Use a clean towel to protect the dashboard or seats if there is a possibility of cleaner dripping. Be especially careful around the rearview mirror, dome lights, microphones, sunroof controls, and other electrical components mounted in or near the ceiling.
Do not spray liquid around electrical fittings. Keep cleaning products away from exposed wiring, switches, and light assemblies.
Park the vehicle in a cool, shaded, well-ventilated place. Avoid working on a hot headliner because heat can make cleaning products evaporate quickly and may complicate even drying.
Step 3: Remove Loose Dust and Debris
Before introducing moisture, remove loose contamination from the fabric.
If the headliner is firmly attached and in good condition, use a vacuum with a clean, soft brush attachment on low suction. Move it lightly across the surface without pressing the nozzle into the fabric or pulling at the edges.
An alternative is to use a clean, dry microfiber cloth to lift surface dust with minimal contact.
Pay particular attention to the areas around the sun visors, grab handles, dome lights, and roof edges, where dirt often accumulates.
If the fabric is old, brittle, loose, or sagging, skip the vacuum and avoid manipulating it. Even suction can place unnecessary stress on an already weakened headliner.
Do not begin by rubbing a dusty surface with a wet cloth. Moisture can turn loose dirt into residue that spreads across the fabric.
Step 4: Choose the Right Headliner Cleaner
Select a cleaner that is explicitly suitable for your headliner material.
A dedicated automotive headliner cleaner or a compatible, mild upholstery cleaner is generally a more appropriate starting point than a strong all-purpose degreaser.
Before using the product, check the label for:
- Compatible fabrics and surfaces.
- Application instructions.
- Recommended dilution, if required.
- Necessary contact time.
- Rinsing or residue-removal instructions.
- Any ventilation or handling precautions.
Avoid bleach, harsh solvents, abrasive powders, and strong cleaning chemicals that have not been approved for the material.
Do not assume that a cleaner safe for automotive carpets or cloth seats is also safe for the headliner. These surfaces may use different materials, backing, and adhesives.
Step 5: Test the Cleaner on a Hidden Area
Never apply a new cleaning product to a large, visible section without testing it first.
Choose a discreet location, such as an inconspicuous edge of the headliner, provided the material there is firmly attached and can be cleaned safely.
Apply a small amount of cleaner to a microfiber cloth and gently dab the test area. Follow the product’s instructions, then allow the area to dry completely.
Check for:
- Color changes or fading.
- Dye transferring onto the cloth.
- Water rings or uneven patches.
- Changes in texture.
- Fabric separation or other visible damage.
If any adverse change occurs, stop using that product.
A successful spot test reduces risk but does not guarantee that every section of the headliner will respond identically, especially if the material has aged unevenly.
Step 6: Apply Cleaner to the Microfiber Cloth
This is one of the most important steps in the entire process.
Instead of spraying cleaner directly onto the car’s ceiling, apply a small amount to a clean microfiber cloth. The cloth should be lightly dampened with the product rather than saturated.
Direct spraying makes it easier for excess liquid to penetrate the fabric and reach the foam backing. Applying the product to the cloth gives you better control over the amount used.
Fold the microfiber cloth into a manageable pad and begin with a small, inconspicuous section.
Do not start with the entire roof. Cleaning a limited area at a time allows you to monitor moisture, lift the dirt, and dry the surface before moving on.
Step 7: Clean the Surface With Gentle Blotting Motions
Lightly press the cloth against the dirty area and lift it away. Repeat as necessary, using a clean part of the cloth when dirt begins transferring back onto the fabric.
For general grime, use gentle, short strokes in a consistent direction rather than vigorous circular scrubbing.
The objective is to loosen and lift the contamination, not to force the cleaner deep into the material.
Keep these principles in mind:
- Apply minimal pressure.
- Do not stretch or pull the fabric.
- Avoid repeated rubbing over the same spot.
- Work in small sections.
- Stop if the fabric begins to look distorted or unusually wet.
If a stain does not respond after a few gentle attempts, do not compensate by pressing harder. A stubborn stain may require a different treatment or professional attention.
Step 8: Treat Individual Stains Carefully
Once the general surface dirt has been addressed, inspect any remaining stains.
For localized marks, apply a small amount of the approved cleaner to a clean cloth and gently dab the affected area. Allow the product to work for the time specified on its label.
Avoid spreading the stain by wiping outward without control. Instead, use light, controlled dabbing motions and replace the cloth section as it becomes dirty.
If the product requires residue removal, follow its instructions using a separate, clean cloth that is only lightly dampened when appropriate. Never introduce additional water simply to rinse the whole ceiling.
After treating each stain, blot the area with a dry microfiber cloth to absorb remaining moisture.
More detailed instructions for common stain types appear in the next section.
Step 9: Remove Remaining Moisture
After cleaning, use a fresh, dry, absorbent microfiber towel.
Gently blot the treated area to pick up remaining moisture and loosened residue. Do not press so hard that the headliner becomes compressed or deformed.
Inspect the cloth as you work. If it collects visible dirt, switch to a clean section to avoid transferring the contamination back onto the ceiling.
The headliner should not feel saturated or appear heavily wet after cleaning. If you notice excessive moisture, stop applying products and concentrate on gentle blotting and drying.
Step 10: Allow the Headliner to Dry Completely
Proper drying is essential to finishing the job safely.
Leave the vehicle in a well-ventilated area and allow the cleaned material to air-dry naturally. A portable fan can improve airflow without applying excessive heat.
Avoid using a heat gun, a hot hair dryer, or intense direct heat in an attempt to accelerate drying. Do not use steam to compensate for a slow cleaning process.
Keep the car ventilated where practical and safe, while protecting it from rain and outside moisture.
Wait until the treated areas are completely dry before judging the final result. Damp fabric may temporarily appear darker than the surrounding material, and evaluating it too soon can lead to unnecessary additional cleaning.
Step 11: Inspect the Final Result
Once the headliner is dry, examine it under good lighting.
Check whether the original stain has faded, whether the fabric looks even, and whether any new watermarks or texture changes have appeared.
A faint stain may remain, particularly if it has penetrated the material or caused discoloration. Do not continue cleaning indefinitely in pursuit of perfect results.
If another treatment is appropriate, repeat the low-moisture method only after the fabric has dried completely and you have confirmed that the material remains stable.
The best outcome is a cleaner headliner with its original texture, color, and attachment preserved.
How to Remove Different Types of Car Headliner Stains
Not every stain responds to the same treatment. The safest method depends on what caused the mark and whether the stain is limited to the surface.
Fingerprints and Greasy Marks
Greasy marks often appear around sun visors, grab handles, and frequently touched areas.
Use a cleaner labeled as suitable for the headliner material. Apply it sparingly to a microfiber cloth and gently blot the mark.
Avoid using concentrated degreasers or scrubbing repeatedly. If the mark persists, allow the area to dry and reassess before attempting another light treatment.
Food and Beverage Stains
Coffee, juice, soft drinks, and food splashes may leave colored residue or sticky patches.
First remove any loose material without scraping or pressing it deeper into the fabric. Then use an appropriate fabric cleaner according to its label.
Blot gently and change to a clean cloth section as the residue transfers. If the product calls for residue removal, follow its directions carefully without soaking the surrounding fabric.
Sugary drinks can leave sticky residue, so simply drying the spill without cleaning may not be sufficient.
Water Stains
Watermarks may appear as light or dark rings after a leak, spill, or previous cleaning attempt.
Before treating the mark, determine whether moisture is still entering the vehicle. Check for possible leaks around the sunroof, windshield, door seals, or roof-mounted equipment when relevant.
If the headliner is stable, a suitable low-moisture fabric cleaner may help reduce a surface watermark. However, some marks result from contamination or discoloration beneath the visible fabric and may not disappear with ordinary cleaning.
Do not repeatedly soak a water stain in an attempt to make the color uniform. If the stain returns after drying, investigate its underlying cause.
Smoke and Nicotine Residue
Smoke can leave a film on interior surfaces and contribute to persistent odors.
Begin with gentle dust removal, then use a headliner-compatible cleaner in small sections. Several controlled, low-moisture passes may be safer than one aggressive cleaning attempt.
An interior odor treatment may be appropriate if it is approved for the affected material and used according to its instructions. Avoid masking the problem with heavy fragrance, which does not necessarily remove the source of the odor.
Persistent smoke odor can be difficult to remove because contamination may exist in other interior materials as well.
Mold or Mildew
Visible mold growth or a recurring musty odor requires extra caution.
Do not brush or vacuum suspected mold aggressively, since these actions may spread contaminated particles. Avoid soaking the headliner or applying random household chemicals.
Investigate and correct the moisture source first. Extensive mold growth, recurring contamination, or a headliner that remains damp should be assessed by a qualified automotive interior or remediation professional.
For significant contamination, ordinary surface cleaning may not be sufficient to address material hidden beneath the fabric.
Common Mistakes to Avoid When Cleaning a Car Headliner
Even a suitable cleaner can cause problems when applied incorrectly. Avoid these common mistakes to protect the headliner.
1. Spraying cleaner directly onto the ceiling
Direct spraying can distribute too much liquid over a vulnerable surface. Apply a controlled amount to a microfiber cloth instead.
2. Using too much water
Saturated fabric can allow moisture to penetrate the backing and adhesive. Use a low-moisture approach and stop if the area becomes excessively wet.
3. Scrubbing aggressively
Hard brushing and forceful rubbing can distort the fabric and create visible texture differences. Blot patiently instead.
4. Using a steam cleaner without manufacturer approval
Steam combines moisture with heat, which may be unsuitable for delicate headliner materials and adhesive systems. Avoid it unless the vehicle or material manufacturer specifically approves the method and the equipment can be used within its limits.
5. Applying bleach or strong household chemicals
These products may discolor the fabric or damage underlying materials. Choose a cleaner specifically compatible with the headliner.
6. Using an ordinary carpet extractor
Extractors designed for carpets can introduce substantial moisture and suction. That approach is generally inappropriate for a delicate, foam-backed headliner unless a qualified professional has equipment and a method specifically suitable for it.
7. Ignoring a sagging headliner
Cleaning cannot restore deteriorated foam or failed adhesive. Addressing an existing sagging problem may require a specialist rather than further cleaning.
8. Repeatedly cleaning a stain before the area dries
Treating the same damp section repeatedly increases moisture exposure. Let it dry fully, inspect the result, and decide whether another pass is justified.
How to Keep Your Car Headliner Clean for Longer
Once your headliner is clean, a few maintenance habits can help prevent heavy buildup.
Clean small marks early
Fresh, localized marks are often easier to address than old, accumulated stains. Treat them promptly using a safe, low-moisture method.
Keep hands clean when adjusting interior fittings
Fingerprints around grab handles and sun visors can build up over time. Avoid touching the fabric unnecessarily when using these features.
Maintain a clean interior
Regularly remove loose dust from the dashboard, seats, and surrounding trim so it is less likely to accumulate on the headliner.
Address leaks immediately
A leak can produce recurring watermarks, damp upholstery, and persistent odors. Inspect the cause instead of repeatedly treating the visible ceiling stain.
Avoid smoking inside the vehicle
Smoke residue can accumulate on the headliner and other interior surfaces. Preventing exposure is easier than removing deeply embedded residue later.
Use appropriate cleaning products
Keep a clean microfiber cloth and a suitable headliner cleaner available for occasional maintenance. Routine care should remain gentle rather than aggressive.
When Should You Hire a Professional Detailer?
DIY cleaning is suitable for many light stains and ordinary surface grime, but some situations require professional attention.
Consider consulting an automotive detailing or upholstery specialist if:
- The headliner is sagging or separating from the backing.
- Stains remain despite careful cleaning.
- Watermarks keep returning.
- Smoke odor persists after appropriate surface cleaning.
- Mold growth is extensive or recurring.
- The vehicle has a delicate suede-like or specialty headliner material.
- The fabric becomes discolored, distorted, or unusually fragile during cleaning.
A professional can assess whether the problem is a surface stain, contamination within the material, or deterioration of the backing and adhesive.
Replacing or repairing a damaged headliner may be more appropriate than attempting increasingly aggressive cleaning.
Frequently Asked Questions
Can you clean a car headliner with just water?
Water alone may help with some light surface contamination, but it can also leave rings or penetrate the backing if too much is used. A clean microfiber cloth with minimal moisture is safer than wetting the ceiling directly. For stains, use a suitable cleaner when appropriate.
Is dish soap safe for cleaning a car headliner?
Not every dish soap is suitable for headliner fabric. Some formulations may leave residue or affect the material. A cleaner specifically approved for automotive headliners is a more reliable starting point. Always follow the product label and test it in an inconspicuous area.
Can you clean a car headliner without removing it?
Yes. Most ordinary surface cleaning can be performed with the headliner installed. In fact, removing the headliner is unnecessary for light stains and may introduce additional work or risk. Severely damaged or inaccessible areas may require professional removal or repair.
Why does my car headliner look stained after cleaning?
The marks may be caused by excess moisture, cleaner residue, uneven cleaning, or contamination that remains beneath the surface. Let the material dry fully before assessing it. Avoid repeatedly wetting the area, as additional moisture may worsen the problem.
Can you remove cigarette smoke smell from a car headliner?
Gentle cleaning with a compatible product may reduce surface residue and some odor, but persistent smoke smells can be difficult to eliminate because contamination may also exist in the foam backing and other interior materials. Use only suitable odor treatments and address the broader interior if necessary.
What should you do if your car headliner starts sagging?
Stop cleaning and avoid pulling, brushing, or wetting the loose material. Sagging often indicates deterioration of the foam or adhesive, which cleaning cannot reliably repair. Consult an automotive upholstery specialist to assess repair or replacement options.
How often should you clean your car’s headliner?
There is no universal cleaning schedule because the rate of buildup depends on vehicle use, environmental conditions, and exposure to smoke or spills. Inspect the ceiling periodically and clean it only when necessary. Regular light maintenance is preferable to frequent deep cleaning.
Can you use a microfiber cloth on a suede-like headliner?
Some microfiber cloths may be suitable, but specialty headliner materials can respond differently from conventional fabric. Check the vehicle or material manufacturer’s instructions and test an inconspicuous area first. Avoid rubbing against the grain or changing the surface texture.
Final Thoughts
Learning how to clean your car’s headliner without causing damage comes down to three essentials: minimal moisture, gentle contact, and proper drying.
Start by identifying the headliner material and checking its condition. Remove loose dust carefully, test a compatible cleaner, apply it to a microfiber cloth, and lift dirt with light blotting motions. Finish by absorbing remaining moisture and allowing the material to dry naturally.
Most importantly, do not treat a car headliner like a carpet or a heavily soiled seat. If the fabric is already sagging, mold is extensive, or a stain does not respond to gentle treatment, stop before additional cleaning causes permanent damage.
With a careful approach, you can improve the appearance of your car’s interior while protecting the delicate materials that keep the headliner securely in place.