A long road trip can leave your car covered in road grime, bug splatter, brake dust, tar, bird droppings, dust, and interior debris. Even if your vehicle looks reasonably clean from a distance, hours of driving can leave contaminants on the paint, wheels, windshield, floor mats, seats, and dashboard.
Knowing how to clean a car after a road trip helps restore its appearance, protect the paintwork, improve interior comfort, and identify potential maintenance issues before they become more serious. The best approach is to clean the exterior first, carefully remove stubborn road contaminants, clean the wheels and tires, and then work through the interior from top to bottom.
This complete guide explains how to clean your car after road trips, which products and tools to use, how to remove difficult stains, and what to inspect before your next drive. Whether you have returned from a weekend getaway or a long-distance journey, these steps will help you detail your vehicle safely and efficiently.
Why You Should Clean Your Car After a Road Trip
Road trips expose your vehicle to different contaminants depending on the route, weather, traffic, and driving conditions. Highway driving can coat the front bumper with insects, while wet roads can spread dirty water across the lower doors and wheel arches.
Leaving these contaminants on your vehicle can make future cleaning more difficult. Some substances, including bird droppings, insect residue, and certain mineral deposits, may damage or mark automotive paint if left untreated.
Cleaning your car after a road trip also gives you an opportunity to inspect its condition.
Here are the main reasons to wash your vehicle after a long journey:
- Remove dirt, road film, and loose debris from the exterior.
- Reduce the time that potentially damaging contaminants remain on the paint.
- Clean brake dust and grime from wheels and tires.
- Restore visibility by cleaning the windshield, windows, mirrors, and headlights.
- Remove food crumbs, dust, and dirt from the cabin.
- Identify damaged tires, loose trim, chipped paint, or possible fluid leaks.
- Restore a comfortable driving environment before your next trip.
You do not necessarily need a complete professional detail after every journey. A thorough wash and targeted interior cleaning are often sufficient unless the vehicle has heavy contamination, persistent odors, or stains that require specialized treatment.
What You Need to Clean Your Car After a Road Trip
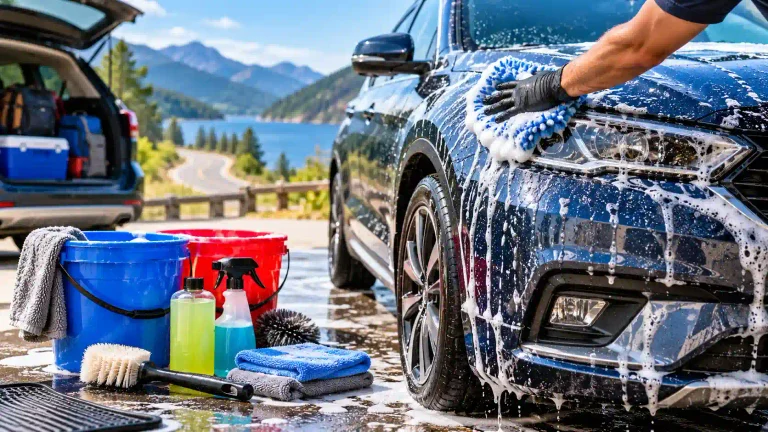
Gather your supplies before starting. Using the correct tools makes the cleaning process easier and reduces the risk of scratching paint, damaging interior materials, or spreading dirt from one surface to another.
| Cleaning supply | What it does |
|---|---|
| Automotive car shampoo | Removes ordinary dirt and road film |
| Two wash buckets and grit guards, if available | Helps reduce the transfer of abrasive dirt |
| Microfiber wash mitt | Cleans exterior paint gently |
| Garden hose or suitable pressure washer | Rinses away loose contaminants |
| Automotive wheel cleaner | Removes compatible brake dust and wheel grime |
| Dedicated wheel brushes | Clean wheel faces, barrels, and narrow gaps |
| Bug and tar remover | Targets stubborn insect residue and road tar |
| Automotive glass cleaner | Cleans windows, mirrors, and glass |
| Clean microfiber drying towels | Absorb water after washing |
| Interior vacuum with suitable attachments | Removes dirt from carpets and seats |
| Interior detailing brushes | Clean vents, seams, and small crevices |
| Interior-safe cleaner | Removes compatible stains from plastic, vinyl, and upholstery |
| Tire dressing, if desired | Improves the appearance of tire sidewalls |
Choose products that are compatible with your vehicle’s paint, wheel finish, upholstery, and other materials. Read the labels before applying specialized cleaners.
Avoid using household dishwashing liquid as your regular car shampoo, abrasive sponges on paint, or the same dirty towel on multiple surfaces.
Step 1: Park in a Suitable Location and Inspect the Vehicle
Before washing your car, park it on a stable surface in a shaded, well-ventilated location whenever possible.
Allow hot exterior panels and wheels to cool. Cleaning a vehicle in direct sunlight or while its surfaces are very hot can cause water and cleaning solutions to dry too quickly, increasing the likelihood of water spots or uneven residue.
Walk around the vehicle and inspect the areas most likely to collect road-trip dirt.
Check the following:
- Front bumper, grille, hood, and side mirrors for insect splatter.
- Lower doors, rocker panels, and wheel arches for road grime.
- Wheels and tires for brake dust and embedded debris.
- Windshield and headlights for insects, dirt, and reduced clarity.
- Rear bumper and tailgate for road film.
- Interior floor mats and carpets for mud, sand, and food debris.
Look for fresh paint chips, cracked lights, damaged tires, or loose exterior trim. Cleaning makes these issues easier to see.
If you notice a tire that appears damaged, a strong fuel smell, an active fluid leak, or a significant change in vehicle handling, address the safety issue before continuing with routine detailing.
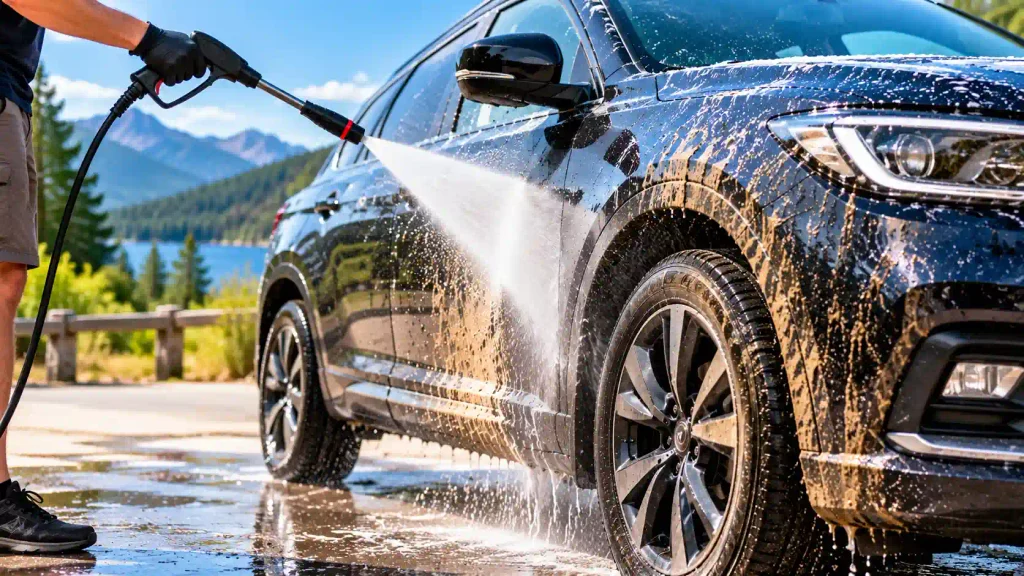
Step 2: Remove Loose Dirt With a Thorough Pre-Rinse
The first exterior cleaning step is to rinse away as much loose dirt as possible before touching the paint.
Road grime often contains fine particles that can scratch clear coat when dragged across the surface. A thorough pre-rinse reduces the amount of abrasive material that remains during hand washing.
Start at the roof and work downward. Rinse the hood, windows, side panels, rear of the vehicle, and lower bodywork.
Pay particular attention to:
- Wheel arches and mud flaps.
- Lower door panels and rocker panels.
- Front grille and bumper.
- Rear bumper and license plate area.
- Areas around mirrors, trim, and door handles.
If you use a pressure washer, choose an appropriate nozzle and maintain a safe distance from the vehicle. Avoid directing concentrated high-pressure water at damaged paint, loose trim, rubber seals, cameras, sensors, or electrical connectors.
Do not use a pressure washer to blast dirt into door seals or other openings.
For vehicles covered in heavy mud, continue rinsing until most loose contamination has been removed before beginning contact washing.
Step 3: Remove Bug Splatter From the Front of the Car
Bug splatter is one of the most common problems after highway driving. Insects collect on the bumper, grille, hood, windshield, and side mirrors.
Dried insect residue can adhere firmly to paint and glass. Aggressively scraping it away can scratch the surface.
To remove bug splatter safely:
- Rinse the affected area with water.
- Apply a compatible automotive bug remover according to its label.
- Allow the product to work for the recommended time without letting it dry.
- Gently wipe or wash the area using a clean microfiber mitt.
- Rinse thoroughly to remove loosened residue and cleaning solution.
- Repeat a compatible treatment if necessary rather than scrubbing aggressively.
For light contamination, ordinary car shampoo and a gentle wash may be sufficient.
For stubborn residue, use a dedicated bug remover that is safe for the affected surface. Check its compatibility with paint protection film, ceramic coatings, matte finishes, and plastic trim before application.
Never use a razor blade on painted panels or scrape dried bugs with a hard object.
If insect residue has already etched the clear coat, washing may remove the remaining material without eliminating the mark itself. Paint correction may be necessary to improve the appearance of the damaged finish.
Step 4: Remove Road Tar and Sticky Contaminants
Road tar commonly accumulates on rocker panels, lower doors, wheel arches, and the rear of the vehicle. It may appear as small black spots or sticky marks that remain after ordinary washing.
Standard car shampoo may not dissolve stubborn tar deposits.
Use a dedicated automotive tar remover that is compatible with your vehicle’s finish.
Follow these steps:
- Wash and rinse the vehicle to remove loose dirt.
- Identify the affected areas under good lighting.
- Test the tar remover on a small, inconspicuous area when appropriate.
- Apply the product according to the manufacturer’s instructions.
- Allow the recommended dwell time, keeping the product from drying on the surface.
- Gently wipe away loosened contamination using a clean microfiber towel if instructed.
- Wash and rinse the treated area as directed by the product manufacturer.
Do not use gasoline, paint thinner, or unapproved household solvents to dissolve road tar. These substances can damage paint, plastic trim, rubber, and protective coatings.
Avoid scrubbing tar spots with abrasive pads. If contamination remains, repeat the appropriate treatment rather than increasing pressure.
For more difficult bonded contamination, read our related guide on removing fallout and industrial rail dust from paint. Iron particles and tar require different removal methods, so identifying the contaminant is important.
Step 5: Wash the Exterior Using the Two-Bucket Method
Once loose dirt, bug splatter, and stubborn contaminants have been addressed, wash the vehicle using automotive shampoo.
The two-bucket method helps reduce the transfer of dirt back onto the paint.
One bucket contains the shampoo solution, while the second contains clean rinse water for the wash mitt. Grit guards can help keep settled particles away from the mitt, although they do not eliminate the risk of scratches.
Follow this washing procedure:
- Prepare the shampoo solution according to the product instructions.
- Rinse the vehicle thoroughly.
- Dip a clean microfiber wash mitt into the shampoo solution.
- Wash a small section using gentle, straight passes.
- Rinse the mitt in the clean-water bucket before collecting more shampoo.
- Continue across the upper body panels.
- Clean the lower panels and heavily contaminated areas last.
- Rinse the vehicle thoroughly before the shampoo dries.
Use separate tools for wheels and paint. A wheel brush that has collected brake dust should never be used on the hood or doors.
Avoid pressing the wash mitt firmly against the surface. Let the lubricating shampoo and gentle movement do the work.
If the vehicle has a matte finish, special paint protection, or manufacturer-specific cleaning requirements, follow the appropriate care instructions rather than assuming every standard wash product is suitable.
Step 6: Clean the Wheels, Tires, and Wheel Arches
Wheels often accumulate significant brake dust, road grime, mud, and oily residue during long-distance driving.
Clean the wheels separately from the painted bodywork. Ideally, do this before washing the body, because rinsing dirty wheels can splash contamination onto nearby panels.
How to clean road-trip wheels
- Ensure the wheels are cool to the touch.
- Rinse the wheel faces and wheel arches to remove loose dirt.
- Apply a wheel cleaner compatible with the wheel’s finish.
- Allow it to dwell for the period stated on the label.
- Use dedicated brushes to clean the wheel faces, lug nut recesses, and accessible barrel areas.
- Gently clean the tire sidewalls with an appropriate brush.
- Rinse thoroughly to remove cleaner and loosened contamination.
Different wheels have different finishes, including painted, clear-coated, polished, and specialty surfaces. Confirm product compatibility before cleaning.
Do not apply an acidic or strongly alkaline wheel cleaner without checking whether it is suitable for your wheels. Avoid cleaning hot wheels or allowing chemicals to dry on them.
Clean the wheel arches
The wheel arches collect mud, sand, road salt in applicable climates, and debris thrown up by the tires.
Rinse these areas thoroughly and use a suitable brush if necessary. Avoid directing high-pressure water at vulnerable liners, exposed wiring, or damaged components.
Apply tire dressing if desired
After the tires have been cleaned and dried, apply a compatible tire dressing if you want a darker, more finished appearance.
Use the product according to its instructions and wipe away excess. Keep dressing off the tread, brake components, and other surfaces where it could reduce traction or braking performance.
Step 7: Remove Water Spots and Dry the Paint Properly
Once washing is complete, dry the vehicle promptly to reduce water spots and streaks.
Water spots can form when droplets evaporate and leave mineral deposits behind. The likelihood depends on water quality, temperature, weather, and how long the water remains on the surface.
Use a clean, soft, absorbent microfiber drying towel.
Begin with the roof and glass, then move to the hood, upper body panels, doors, and lower areas. Use light pressure and turn the towel to a clean section as it becomes wet or dirty.
For tight spaces, gently absorb trapped water around mirrors, door handles, trim, and other exterior fittings.
Do not drag a towel that has picked up grit across the paint.
If you discover water spots after drying, first determine whether they are fresh mineral deposits or actual etching in the clear coat.
A compatible water-spot remover may help with surface deposits. Etched marks may require polishing, which removes a small amount of clear coat and should be approached cautiously.
For detailed instructions, see our guide on how to remove water spots etched into paint.
Step 8: Inspect the Paint and Restore Protection if Needed
After washing and drying, inspect the paint under good lighting.
Look for scratches, chips, tar spots, remaining insect residue, and areas where the finish appears dull or contaminated.
Do not assume every mark is dirt. Some marks may be scratches, oxidation, clear-coat etching, or other surface damage that requires a different treatment.
If the paint is clean and in good condition, consider applying a suitable spray sealant or compatible wax to maintain protection.
Follow the product instructions for surface preparation, application, and curing. If your vehicle has a ceramic coating or paint protection film, use products compatible with that protection system.
A protective product may help water bead and make future washing easier, but it will not repair deep scratches or remove existing etching.
For additional guidance, read our related article on choosing the right wax for your paint color.
Step 9: Clean the Windshield, Windows, Mirrors, and Headlights
Long drives can leave the windshield covered in insects, oily road film, dust, and streaks. These deposits may reduce visibility, particularly when driving at night or in bright sunlight.
Use an automotive glass cleaner and a clean microfiber glass towel.
- Remove loose dirt from the exterior glass.
- Apply a glass cleaner suitable for automotive windows.
- Wipe the glass using overlapping passes.
- Buff with a second clean, dry microfiber towel if necessary.
- Clean the side mirrors and accessible interior glass surfaces.
- Inspect the windshield from the driver’s seat for remaining streaks.
Avoid spraying cleaner directly onto sensitive electronic equipment or allowing it to run into dashboard openings.
If your windshield has aftermarket film, follow the film manufacturer’s instructions and avoid products that could damage its surface.
Clean the headlights
Remove dirt and insect residue from the headlight lenses using a compatible cleaner.
If the headlights appear cloudy or yellowed even after washing, the problem may be oxidation or deterioration rather than surface dirt. Restoring the lens may require a suitable headlight restoration process.
Cleaning alone will not correct every form of headlight haze.
Step 10: Vacuum the Interior From Top to Bottom
After the exterior is clean, turn your attention to the cabin.
Road trips often leave sand, dust, crumbs, leaves, and other debris in carpets, floor mats, seat seams, and storage compartments.
Start at the top of the interior and work downward. This helps prevent dust dislodged from higher surfaces from falling onto areas you have already cleaned.
Remove loose items from the cabin, then take out removable floor mats.
Vacuum the following areas:
- Seats and seat seams.
- Front and rear footwells.
- Carpets beneath removable floor mats.
- Trunk or cargo area.
- Gaps around seat rails.
- Under accessible seats.
- Carpeted storage compartments.
Use suitable vacuum attachments and avoid pulling aggressively on delicate upholstery or electrical wiring.
Move the seats as needed to access dirt underneath them, following your vehicle’s safety instructions. Do not interfere with airbag wiring or other electrical connectors.
For stubborn sand, work slowly with a suitable brush attachment to loosen debris before vacuuming.
Step 11: Wash and Dry the Floor Mats
Floor mats often collect more dirt than any other part of the cabin after a road trip.
The correct cleaning method depends on whether your mats are rubber, thermoplastic, carpet, or another material.
Rubber and all-weather mats
- Remove the mats from the vehicle.
- Shake off loose dirt.
- Rinse with water where permitted.
- Use a compatible cleaner and brush to remove embedded grime.
- Rinse thoroughly.
- Allow the mats to dry completely before reinstalling them.
Carpeted mats
- Vacuum both sides where practical.
- Treat stains with a compatible carpet or upholstery cleaner.
- Agitate gently if the material permits.
- Extract or blot moisture according to the cleaner’s instructions.
- Allow the mats to dry fully.
Never reinstall wet mats, and make sure the driver’s mat is secured properly using the vehicle’s intended retention system. An unsecured or incorrectly positioned floor mat can interfere with the pedals.
Step 12: Clean the Dashboard, Center Console, and Door Panels
Dust and fingerprints commonly accumulate on the dashboard, center console, door handles, armrests, and other high-touch surfaces.
Use a soft microfiber towel and an interior cleaner that is suitable for the material.
Follow this process:
- Remove loose dust with a dry microfiber towel.
- Apply cleaner to the towel when the product instructions permit it.
- Wipe the dashboard and console gently.
- Use a soft detailing brush to loosen dirt around buttons, seams, and trim.
- Wipe away remaining residue with a clean towel.
- Dry the cleaned surfaces as directed.
Be especially careful around screens, instrument clusters, gloss-black trim, and touch-sensitive controls. These surfaces can scratch easily or react poorly to unsuitable cleaners.
Avoid spraying liquid directly into switches, air vents, charging ports, or electrical controls.
Do not apply glossy dressings to the steering wheel, pedals, gear selector, or other surfaces where a slippery finish could create a safety hazard.
Step 13: Clean the Air Vents and Small Interior Crevices
Air vents, cup holders, door pockets, and console gaps can collect dust, crumbs, and sticky residue during a long journey.
Use a soft detailing brush or an appropriate vacuum attachment to remove loose debris.
For cup holders, remove detachable inserts if the vehicle design permits it. Clean compatible surfaces with a lightly dampened microfiber towel and a suitable interior cleaner.
Avoid allowing liquid to pool in cup holders or run into nearby electronic controls.
Clean air vents carefully without forcing debris deeper into the ductwork. If needed, use a soft brush and vacuum to capture loosened dust.
For more detailed instructions, see our related guide on how to clean air vents in a car and our article on cleaning car cup holders for a spotless result.
Step 14: Clean the Seats According to Their Material
Seats can collect sweat, food crumbs, dust, spilled drinks, and body oils during long journeys.
The appropriate cleaning method depends on whether the seats are cloth, leather, synthetic leather, or another material.
Cloth seats
Vacuum the seats thoroughly, including seams and gaps.
Treat stains with an upholstery cleaner that is suitable for automotive fabric. Apply the product according to its instructions, work gently, and remove excess moisture as directed.
Avoid soaking the foam beneath the fabric. Excess moisture can contribute to lingering odors and may be difficult to dry completely.
Leather seats
Remove loose dirt using a soft microfiber towel or a suitable vacuum attachment.
Use a leather cleaner approved for your seat material. Test it in an inconspicuous area and follow the product instructions.
Wipe gently rather than scrubbing aggressively. If a conditioner is appropriate for the leather and recommended by its manufacturer, apply it sparingly as directed.
Avoid household oils and unapproved products that can leave a slippery or sticky surface.
For a complete walkthrough, read our related guide on how to clean and condition leather to help prevent cracking.
Synthetic leather seats
Use a cleaner compatible with the specific synthetic material. Avoid assuming that a product intended for natural leather is automatically suitable for synthetic upholstery.
After cleaning, remove residue as directed and allow the surface to dry.
Step 15: Remove Interior Odors After the Trip
Food spills, damp clothing, wet floor mats, and accumulated debris can leave unpleasant smells in a vehicle.
Before using an air freshener, identify the source of the odor.
Start by removing rubbish, vacuuming the cabin, cleaning affected surfaces, and ensuring that wet materials are completely dry.
Check the trunk, under the seats, cup holders, and floor mats for forgotten food or spilled liquids.
If the odor is musty, inspect for moisture intrusion, damp carpeting, or water leaks. A fragrance spray may cover the smell temporarily without addressing the underlying problem.
If odors persist despite cleaning, investigate the ventilation system or consult a professional detailer. An inspection may be necessary if you suspect mold or moisture beneath the carpet.
Avoid using ozone generators in an occupied vehicle. Any specialized odor-treatment method should be used only in accordance with appropriate safety guidance.
Step 16: Inspect the Tires, Lights, and Vehicle Exterior
Cleaning gives you an opportunity to check for problems that may have developed during the trip.
Before putting the vehicle back into regular use, inspect the following:
Tires: Look for cuts, bulges, exposed cords, embedded objects, or unusual wear. Check tire pressure when the tires are cold and follow the vehicle manufacturer’s recommended specifications.
Lights: Confirm that the headlights, brake lights, turn signals, and other required lights are clean and functioning.
Windshield and wipers: Inspect the glass for chips and the wiper blades for damage or streaking. Clean the blades with a suitable method recommended by the manufacturer.
Exterior trim: Look for loose pieces, damaged seals, and fresh scratches or chips.
Under the vehicle: If you notice a new fluid puddle or unusual dripping, identify the source rather than assuming it is harmless.
Cleaning does not replace routine vehicle maintenance. If you notice a warning light, unusual vibration, tire damage, or a possible mechanical problem, arrange an appropriate inspection.
Step 17: Finish With a Final Interior and Exterior Check
Once all cleaning steps are complete, walk around the vehicle and inspect the result.
Check that:
- No visible shampoo or cleaner residue remains.
- The paint and glass are free from obvious streaks.
- Wheels have been rinsed thoroughly.
- The floor mats are completely dry and correctly secured.
- Seats and interior surfaces have dried properly.
- Windows and mirrors provide clear visibility.
- No tools, towels, or cleaning supplies have been left in the vehicle.
- Any safety concerns identified during cleaning have been addressed.
If you applied wax, sealant, or another protective product, allow it to cure according to the manufacturer’s instructions.
Your car should now be cleaner, more comfortable, and easier to maintain before your next journey.
Common Mistakes to Avoid When Cleaning a Car After a Road Trip
Even with good products, incorrect techniques can damage the finish or make the cleaning process less effective.
Washing in direct sunlight on hot panels
Water and cleaning chemicals may dry too quickly, leaving streaks or mineral deposits. Work in the shade when possible and allow hot surfaces to cool.
Scrubbing dried bugs or tar
Aggressive rubbing can scratch paint and damage delicate surfaces. Use a compatible cleaner to loosen the contamination first.
Using the same towel everywhere
Wheel towels may contain abrasive brake dust, while interior towels can carry oils or cleaning residue. Keep separate tools for paint, wheels, glass, and interior surfaces.
Using excessive pressure
Hard scrubbing can damage clear coat, glossy trim, upholstery, and sensitive dashboard finishes. Start with gentle cleaning and increase treatment only when the material and product instructions permit it.
Ignoring hidden dirt
Debris often remains under floor mats, around seat rails, inside cup holders, and in door pockets. Inspect these areas before considering the job complete.
Applying too much interior cleaner
Excessive product can leave sticky residue or cause moisture to penetrate upholstery. Use controlled amounts and remove residue as instructed.
Skipping the final inspection
A clean appearance does not guarantee that every problem has been addressed. Check for remaining contamination, wet materials, tire damage, and other visible concerns.
How Long Does It Take to Clean a Car After a Road Trip?
Cleaning time depends on the vehicle’s size, the amount of contamination, the tools available, and whether you are performing a basic wash or a more detailed interior and exterior cleaning.
The following estimates are planning guidelines rather than guaranteed times.
| Cleaning task | Approximate planning time |
|---|---|
| Initial inspection and setup | 5–10 minutes |
| Pre-rinse and exterior wash | 20–35 minutes |
| Bug and tar treatment | 10–25 minutes |
| Wheels and tires | 15–25 minutes |
| Exterior drying and inspection | 10–20 minutes |
| Interior vacuuming | 15–30 minutes |
| Dashboard, vents, and cup holders | 10–20 minutes |
| Seats, mats, and glass | 15–30 minutes |
Some tasks can be combined, so these estimates should not simply be added together to predict every job. Heavy contamination, difficult stains, and the need for specialized treatment may extend the process considerably.
If you only need a quick post-trip cleanup, prioritize safety-related inspections, removal of harmful contaminants, clear glass, and dirty interior surfaces. You can address optional detailing tasks later.
How to Maintain Your Car Between Road Trips
Regular maintenance reduces the amount of work required after your next journey.
Use these simple habits:
- Remove rubbish and food packaging after each trip.
- Wipe up fresh spills promptly using a material-appropriate method.
- Rinse heavy mud and road grime from the exterior when practical.
- Remove insect residue before it becomes difficult to clean.
- Keep floor mats free from accumulated sand and debris.
- Inspect the windshield, mirrors, and lights regularly.
- Address water leaks and persistent odors early.
- Follow a suitable exterior protection and interior maintenance routine.
You do not need to perform a full detail after every short drive. Focus on visible contamination and any issue that could affect the vehicle’s finish, comfort, or safe operation.
Frequently Asked Questions
Should I wash my car immediately after a road trip?
You do not necessarily need to wash it immediately, but it is sensible to remove heavy contamination and address potentially damaging deposits as soon as practical. Bird droppings, insect residue, and certain other contaminants can mark paint if left untreated. Allow hot surfaces to cool before washing.
Is it safe to use a pressure washer after a long drive?
Yes, a pressure washer can be useful when used correctly. Use an appropriate nozzle and safe working distance, and avoid directing concentrated pressure at damaged paint, loose trim, rubber seals, electrical connectors, or sensitive vehicle components.
What is the best way to remove dried bugs from a car?
Rinse the affected area, apply a compatible automotive bug remover according to its instructions, and gently wipe away loosened residue. Avoid scraping or scrubbing aggressively because this can damage the finish.
How do I remove road tar from my car without damaging the paint?
Use a dedicated automotive tar remover that is compatible with the paint and any protective coating. Follow the product instructions, wipe gently when directed, and wash the treated area afterward as recommended. Do not use gasoline or unapproved solvents.
Should I wax my car after every road trip?
Not necessarily. Whether you need wax depends on the condition of the existing protection, the product used previously, and the manufacturer’s maintenance recommendations. If the paint is clean and the existing protection remains effective, another application may not be necessary.
How do I clean a car interior after a long road trip?
Remove rubbish, vacuum the seats and carpets, clean floor mats separately, wipe the dashboard and door panels with suitable products, and clean the glass. Treat stains according to the upholstery material and ensure damp surfaces dry completely.
How can I remove a musty smell after a road trip?
Remove rubbish, clean spills, vacuum the interior, and dry damp materials thoroughly. Inspect for water leaks or moisture beneath the mats and carpets. Persistent musty odors may indicate a hidden moisture problem that requires professional assessment.
Can I use one cleaner for the entire car?
It is better to choose cleaners designed for specific surfaces. Automotive shampoo, wheel cleaner, glass cleaner, and interior upholstery cleaner have different purposes. Using an incompatible product can damage paint, wheel finishes, glass coatings, or interior materials.
Do I need to clean the underside of my car after a road trip?
It depends on the conditions. Heavy mud, accumulated debris, or road salt in regions where salt is used may justify an appropriate underbody rinse. Avoid directing high pressure at vulnerable components, and follow vehicle-specific recommendations.
What should I check on my car after a long road trip?
Inspect the tires, lights, windshield, wipers, visible exterior damage, and any signs of fluid leaks. Check tire pressure when the tires are cold and follow the manufacturer’s specifications. Cleaning is also a useful opportunity to notice issues that need maintenance.
Final Thoughts
Cleaning your car after a road trip is about more than restoring its shine. It helps remove stubborn contaminants, maintain a comfortable interior, preserve the appearance of the paint, and identify visible problems before your next drive.
Start with a thorough pre-rinse, remove bugs and tar using suitable products, wash the exterior gently, and clean the wheels separately. Then vacuum the cabin, wash the floor mats, clean the dashboard and seats according to their materials, and finish with clear glass and a careful vehicle inspection.
The most important principle is to match the cleaning method to the surface. Use the least aggressive technique that works, avoid excessive pressure and unsuitable chemicals, and allow damp materials to dry completely.
With a consistent post-trip cleaning routine, you can keep your vehicle looking its best and make the next road trip more enjoyable.