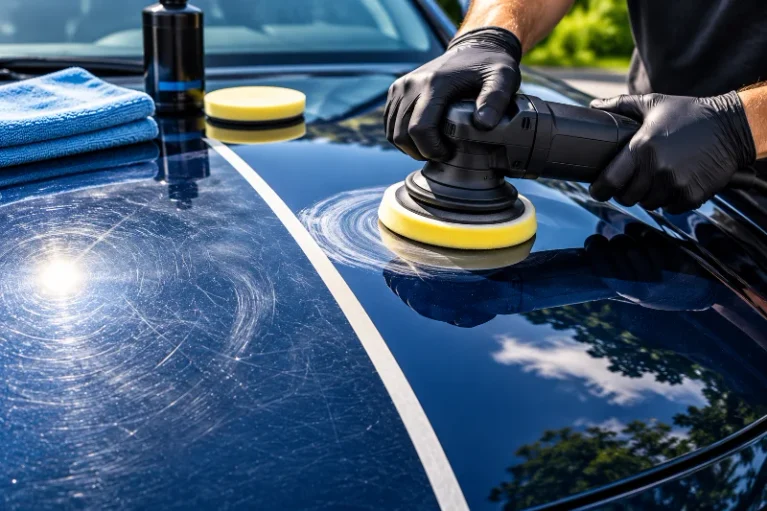
Learning how to remove swirl marks and light scratches at home starts with identifying the severity of the paint damage and then using the least aggressive correction method that can improve it. For light surface defects, the process usually involves thoroughly washing and decontaminating the paint, applying a suitable polish or compound with a clean foam or microfiber applicator, removing the residue, and protecting the corrected finish.
Many swirl marks and light scratches affect the clear coat, the transparent protective layer over the vehicle’s color coat. Polishing and compounding can reduce or remove some of these defects by refining the damaged surface, but deeper scratches may require touch-up paint or professional repair instead.
The key to getting good results at home is controlled correction rather than aggressive scrubbing. Using the wrong abrasive, contaminated tools, or excessive pressure can create additional marring instead of improving the finish.
What Causes Swirl Marks and How Do You Identify Them?
Swirl marks are fine surface scratches that often appear as circular or spiderweb-like patterns when viewed around a strong light source. They commonly develop from washing and drying practices that drag dirt or abrasive contamination across the paint.
Common causes include:
- Dirty or contaminated wash mitts
- Contaminated drying towels
- Excessive pressure while washing
- Reusing tools that have picked up grit
- Abrasive automatic car-wash brushes
- Aggressive wiping or polishing techniques
Swirl marks are usually easiest to see on dark paint under direct sunlight or a bright inspection light.
A light scratch may look different. Instead of a network of fine marks around a light source, you may see an isolated line or scuff caused by a particular contact event.
How can you tell how deep a scratch is?
A gentle fingernail test can provide a rough indication of scratch depth, but it is not a precise measurement. If your fingernail clearly catches in the scratch, the defect is deeper than a typical superficial mark and may not be fully correctable with polishing alone.
If the scratch is deep, exposes a different color underneath, or appears to have reached the primer or metal, stop aggressive polishing and consider professional repair or appropriate touch-up procedures.
What You’ll Need Before You Start
Before you begin paint correction, clean the surface thoroughly. Any dirt or grit left on the paint can interfere with polishing and may create additional marring.
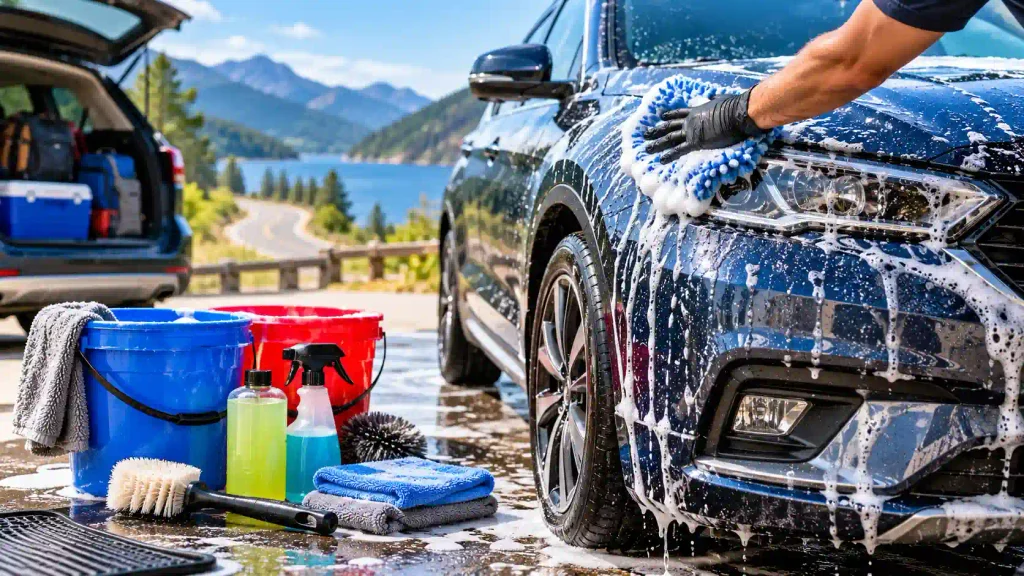
For a basic DIY correction, gather:
- Quality car-wash soap
- Clean wash mitt
- Two buckets
- Clean microfiber drying towels
- Clay bar or another suitable decontamination method when needed
- Automotive polish or compound
- Foam or microfiber applicator pads
- Clean microfiber buffing towels
- Painter’s tape for protecting sensitive trim
Working in the shade or indoors is also helpful because excessive heat can make some polishing products more difficult to work with.
If the paint still feels rough after washing, surface decontamination may be appropriate before polishing. A clay bar can help remove bonded contamination that normal washing does not eliminate.
How to Remove Swirl Marks and Light Scratches by Hand
Hand polishing is a practical starting point for small areas, isolated defects, and light swirl marks. It also gives beginners more control than immediately using a machine polisher.
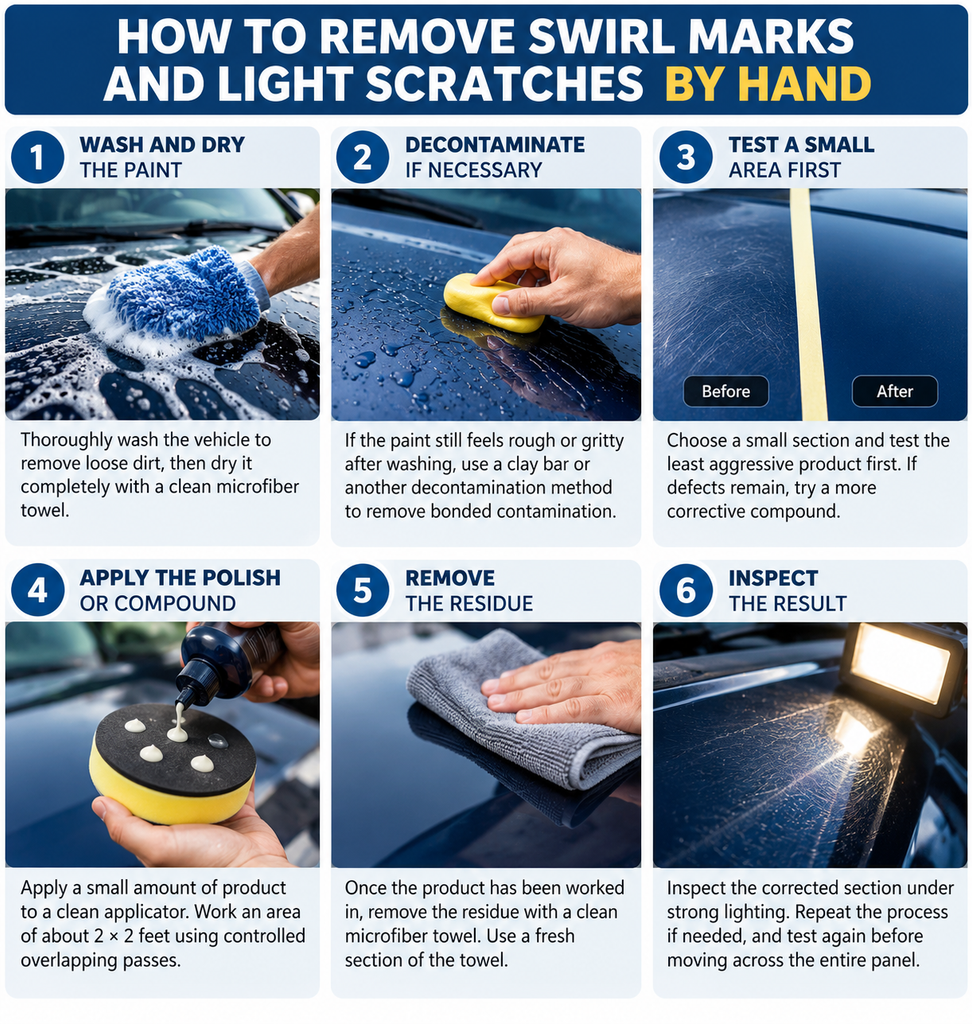
Step 1: Wash and dry the paint
Thoroughly wash the vehicle before touching the affected area with a polish or compound. A careful wash helps prevent loose dirt from becoming trapped between the applicator and paint.
For a safer wash routine, follow this guide to how to wash your car without scratching paint.
Dry the vehicle completely with a clean microfiber towel.
Step 2: Decontaminate the surface if necessary
After washing, lightly inspect the paint for bonded contamination. If the surface still feels rough or gritty after cleaning, additional decontamination may be necessary.
A clay bar or another appropriate decontamination method can help remove contamination that normal washing does not eliminate. Follow the product instructions and use sufficient lubricant when using detailing clay.
Step 3: Test a small area first
Choose a small section of the affected panel and perform a test spot.
Start with the least aggressive product that may solve the problem. For very fine swirls, a finishing polish may be enough. If the defects remain, a more corrective compound may be appropriate.
Testing first prevents you from using more aggressive correction than necessary across the entire vehicle.
Step 4: Apply the polish or compound
Apply a small amount of product to a clean foam or microfiber applicator.
Work an area of roughly 2 by 2 feet at a time. Use controlled overlapping passes, either in a crosshatch pattern or according to the product manufacturer’s instructions.
Avoid aggressive scrubbing. The objective is controlled correction, not maximum pressure.
Step 5: Remove the residue
Once the product has been worked according to its instructions, remove the residue with a clean microfiber towel.
Use a fresh section of the towel rather than repeatedly rubbing the same contaminated area across the paint.
Step 6: Inspect the result
Inspect the corrected section under strong lighting.
If the swirl marks have improved but remain visible, you can repeat the process if the product instructions allow it. If the improvement is minimal, do not automatically increase pressure. Instead, reconsider whether the product, pad, or correction method is appropriate for the defect.
Repeat the test-and-inspect process before moving across the entire panel.
How to Remove Swirl Marks and Light Scratches With a Machine Polisher
A dual-action, or DA, polisher can make paint correction faster and more consistent than hand application. A DA polisher moves the pad through an orbital motion rather than simply spinning it in one fixed rotation, making it a common choice for DIY paint correction.
The correct pad, polish or compound, machine speed, pressure, and number of passes depend on the paint condition and product system.
Basic machine-polishing process
- Wash and dry the vehicle thoroughly.
- Decontaminate the paint if necessary.
- Mask delicate trim where appropriate.
- Perform a test spot with the least aggressive combination likely to work.
- Apply a few small drops of product to the pad.
- Spread the product at a low speed.
- Increase to the manufacturer’s recommended working speed.
- Keep the pad flat against the paint.
- Move the machine slowly through overlapping passes.
- Stop and inspect the test area before continuing.
Do not rely on a fixed 30- to 60-second working time for every product. Different compounds and polishes have different working characteristics, so follow the manufacturer’s instructions.
A machine polisher can remove defects more efficiently, but aggressive compounds and pads can also remove more clear-coat material. Start conservatively and increase correction only when the test spot shows that it is necessary.
For a better understanding of polishing and paint refinement, see this guide to paint finishing and polishing.
How Do You Choose the Right Product for the Severity of the Damage?
The right product depends on the severity of the defect. The goal is to use enough cutting ability to improve the paint without performing unnecessarily aggressive correction.
| Paint condition | Starting approach |
|---|---|
| Very fine swirls or towel marks | Finishing polish or fine swirl remover |
| Noticeable light scratches and moderate swirls | More corrective polish or compound |
| Heavier defects | Stronger compound, followed by refinement when needed |
| Scratch catches strongly with a fingernail | Inspect carefully; polishing may not fully correct it |
| Paint or primer is visibly missing | Polishing will not restore the missing coating |
For very fine defects, a finishing polish can be a sensible starting point. More noticeable scratches and swirls may require a more corrective compound.
A compound can sometimes leave a finish that benefits from a subsequent polishing step, particularly when maximum gloss and clarity are the goal.
Always perform a small test spot before committing to a full panel. This lets you determine whether your chosen product and pad combination is producing enough correction.
Can You Remove Swirl Marks Without a Machine Polisher?
Yes. Light swirl marks can often be improved by hand with an appropriate automotive polish or scratch-removal product.
Hand correction is slower and generally less efficient over large panels, but it can make sense for:
- Small isolated areas
- Light defects
- Beginners without a machine polisher
- Vehicles that only need minor cosmetic improvement
For widespread or more noticeable defects, a DA polisher can provide more consistent correction with less physical effort.
How to Protect Your Paint After Correction
Once correction is complete, protect the clean paint with a suitable wax, sealant, or ceramic coating according to the product’s preparation and application instructions.
Protection does not make the paint immune to future scratches. Good washing technique remains important because repeated contact with dirt and contaminated tools can create new marring.
A useful maintenance routine includes:
- Pre-rinsing loose dirt before contact washing
- Using clean wash media
- Keeping wheel-cleaning tools separate from paint-care tools
- Using a separate rinse bucket when following a two-bucket wash method
- Drying with clean, dedicated microfiber towels
- Avoiding aggressive scrubbing
- Reapplying your chosen protection according to the product instructions
If you’re deciding between different paint-protection methods, see this comparison of wax vs. sealant vs. ceramic coating.
Can Ceramic Coating Prevent Swirl Marks?
A ceramic coating can add a protective layer and may provide some additional resistance to light surface marring, but it does not make automotive paint scratch-proof.
Dirt, grit, contaminated wash media, and excessive contact can still create scratches or marring after a coating has been applied.
That is why proper washing remains important even when the vehicle has a ceramic coating.
Common Mistakes When Removing Swirl Marks at Home
Using the most aggressive compound first
A stronger compound can remove defects faster, but unnecessary cutting can remove more clear-coat material than needed. Always start with a test spot and increase aggressiveness only when necessary.
Polishing dirty paint
Polishing over dirt or loose contamination can introduce additional scratches. Always wash and, when necessary, decontaminate the surface first.
Using dirty applicator pads
A contaminated pad can drag abrasive particles across the paint. Use clean pads and replace or clean them when they become contaminated.
Applying excessive pressure
More pressure does not automatically mean better correction. Excessive pressure can change how the pad and abrasive behave and may increase the chance of marring.
Skipping the inspection step
Paint can look better under one lighting condition while defects remain visible under another. Inspect your work under strong, direct lighting before deciding whether additional correction is necessary.
Frequently Asked Questions
Can toothpaste or baking soda remove swirl marks?
No. Toothpaste and baking soda are not recommended for removing swirl marks from automotive paint. Use a purpose-made automotive polish or compound because these products are formulated for painted surfaces and are available in different levels of abrasiveness for different types of paint defects.
For fine swirl marks, a finishing polish may be sufficient. More noticeable scratches or swirls may require a more corrective compound. Automotive manufacturers and detailing-product companies specifically formulate these products for correcting paint defects.
How do you know if a scratch is too deep to polish out?
A scratch may be too deep for polishing if your fingernail catches on it, especially if the damage has reached beyond the clear coat or exposed the underlying paint layer. A fingernail test is only a quick indication, not a precise measurement.
If you can see exposed primer or metal, or the scratch clearly catches your fingernail, avoid aggressive polishing and follow the vehicle manufacturer’s repair guidance or seek professional help. 3M’s scratch-removal guidance uses a similar fingernail test when determining whether its system is appropriate.
Can you make swirl marks worse by trying to remove them?
Yes. You can make swirl marks worse by using dirty pads or towels, contaminated wash tools, excessive pressure, or an abrasive product that is too aggressive for the defect.
To reduce the risk, wash and dry the paint first, use clean applicators and microfiber towels, start with the least aggressive correction method, and test a small area before polishing the entire panel.
How often can you polish a car to remove swirl marks?
There is no fixed polishing interval that is safe for every vehicle. How often you can polish a car depends on the amount of paint correction required, the condition and thickness of the paint, previous correction work, and how aggressive the polishing process is.
Because paint correction can remove some clear-coat material, polish only when correction is needed rather than using it as a routine maintenance step. A mild polish used to refine a finish is different from aggressive compounding that removes more material.
Does ceramic coating prevent swirl marks?
No. A ceramic coating does not make car paint completely resistant to swirl marks or scratches. It can add a protective layer and improve resistance to some forms of light surface marring, but improper washing can still damage the finish.
Even with a ceramic coating, use clean wash media, rinse away loose dirt before contact washing, and avoid dragging contaminated towels or tools across the paint.
How Do You Prevent Swirl Marks From Coming Back?
The best way to prevent swirl marks from returning is to reduce friction and contamination during washing and drying.
Use these practices:
- Pre-rinse the vehicle to remove loose dirt.
- Use clean wash media.
- Follow a two-bucket wash method when appropriate.
- Keep wheel-cleaning tools separate from paint-care tools.
- Use clean microfiber drying towels.
- Avoid aggressive scrubbing.
- Replace or clean contaminated wash media.
- Use proper paint protection after correction.
The two-bucket wash method can help organize the wash process and reduce contamination being transferred back onto the wash media.
If swirl marks keep returning shortly after polishing, changing the washing and drying technique is more useful than repeatedly correcting the paint.
What Is the Best Way to Remove Swirl Marks at Home?
The best way to remove swirl marks at home is to clean and decontaminate the paint first, then use the least aggressive polish or compound that produces the desired improvement.
For light swirl marks, a finishing polish can often be a suitable starting point. More noticeable swirls and light scratches may require a more corrective compound, either by hand or with a dual-action polisher. Manufacturer guidance confirms that automotive polishing compounds and finishing polishes are specifically designed to address different levels of surface defects.
Before correcting the entire vehicle, perform a small test spot. Inspect the result under strong lighting and increase the aggressiveness of the correction only if the initial method does not provide enough improvement.
After correcting the paint, protect the finish and use a careful washing routine to help prevent new swirl marks from forming.