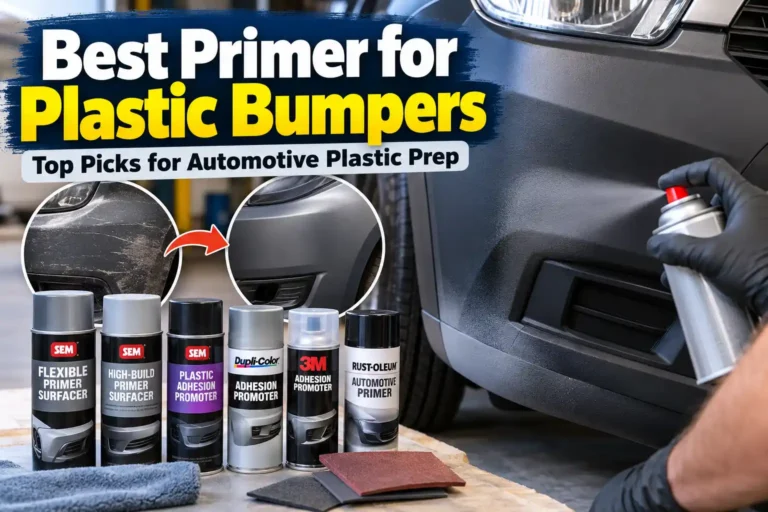
The best primer for plastic bumpers depends on what you are painting: bare plastic, a repaired area, a factory-primed replacement cover, or sound existing paint. A sandable primer surfacer helps refine minor surface defects. An adhesion promoter helps the approved coating bond to certain plastics. Buying one when you need the other can leave scratches visible or create a finish that does not hold properly.
For a suitable sandable bumper-primer layer, SEM Flexible Primer Surfacer is a strong starting choice. For supported raw olefin-based plastic, consider the adhesion-promoter step required by your chosen paint system. The complete preparation and coating sequence matters more than the words “plastic primer” on a can.
This guide compares six verified automotive primer and adhesion-promoter products, explains their different roles, and gives a clear buying decision for each. The recommendations are based on manufacturer information, technical instructions, and verified listings checked in October 2026; we have not performed hands-on adhesion, flexibility, or durability testing.
Plastic Bumper Primer vs. Adhesion Promoter: What Do You Need?
Choosing a plastic bumper primer starts with identifying the substrate and the job the next coating must perform. Primer surfacers and adhesion promoters can belong in the same repair system, but they are not interchangeable products.
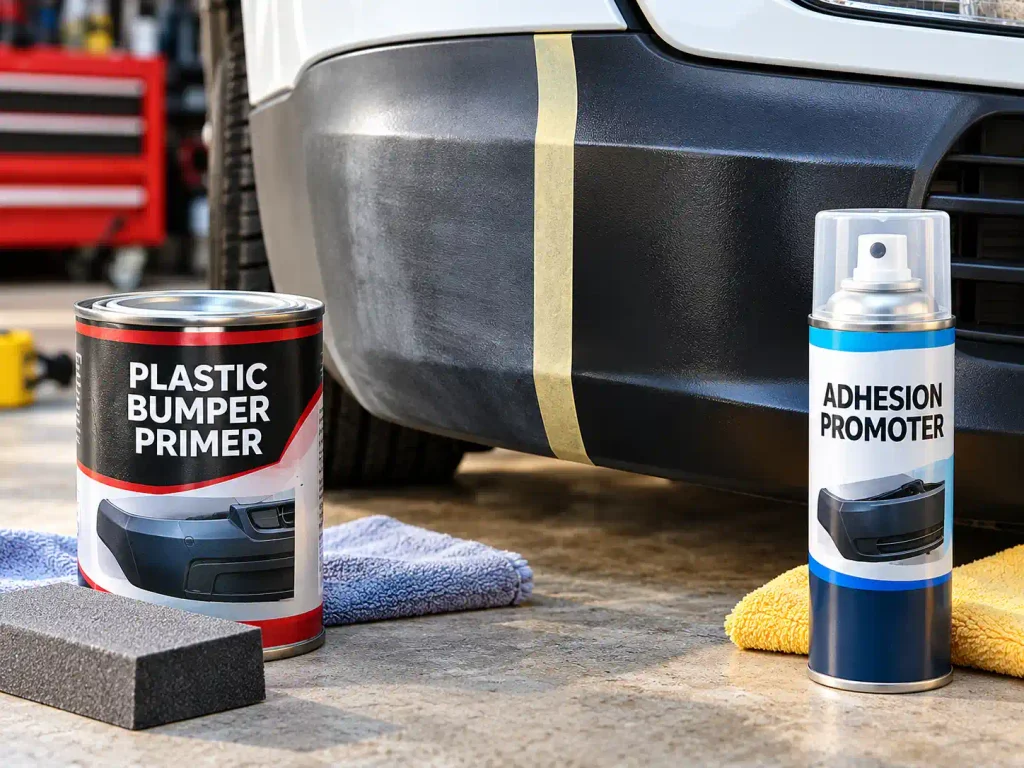
Adhesion promoter helps coatings bond to supported plastic
An adhesion promoter is typically a thin coating intended to improve bonding on the substrates its manufacturer names. It can be especially relevant to difficult-to-coat automotive plastics. It does not fill a gouge, repair a crack, or provide the same sandable build as a surfacer.
Some manufacturers call their clear adhesion promoters primers. That wording is not necessarily wrong, but the function still matters. Buy the product for adhesion when the approved system calls for it, rather than expecting it to smooth a repaired surface.
Primer surfacer helps refine minor surface defects
A suitable sandable surfacer gives you a layer to refine before the finish coats. It can help with supported minor defects and sanding marks when applied within its instructions. Deep damage still needs the appropriate repair process before priming.
Do not apply unlimited primer to hide an uneven repair. Film thickness, drying, sanding, and topcoat compatibility determine whether the next stage has a suitable foundation.
Bare, primed, and painted bumpers need different preparation
Bare plastic may need an adhesion step specified for that material. A factory-primed replacement bumper needs an assessment of the supplied primer and the paint system’s preparation directions. Sound existing paint is a different substrate again.
Inspect the actual surface before shopping. A bumper with peeling paint, exposed raw plastic, and repaired areas can contain several preparation conditions within one panel.
How We Chose the Best Primers for Plastic Bumpers
We compared plastic bumper preparation products by their supported substrates, coating role, flexibility or sanding function, application format, and finishing requirements. Each recommendation identifies a suitable use case rather than a universal winner.
- Actual primer-surfacer function versus adhesion-promoter function.
- Automotive-plastic applications identified by the manufacturer.
- Preparation, sanding, flash, and recoating requirements.
- Compatibility with the intended primer, color, and finish system.
- Aerosol convenience and the complete materials needed for the job.
- Verified direct Amazon listings for the selected products.
Best Plastic Bumper Primers and Adhesion Promoters: Comparison Table
Use this bumper-primer comparison to choose the correct coating role first. The two surfacers provide a sandable preparation layer; the four promoters address adhesion on supported surfaces and should be used only where the paint system permits them.
This article contains affiliate links. If you buy through them, we may earn a commission at no extra cost to you.
| # | Product | Best For / Category | Amazon |
|---|---|---|---|
| 1 | SEM 39133 Flexible Primer Surfacer | Best starting choice for a flexible, sandable primer | Check Price on Amazon |
| 2 | SEM 42013 High-Build Primer Surfacer, Gray | Best high-build alternative for minor defect refinement | Check Price on Amazon |
| 3 | SEM 39863 Plastic Adhesion Promoter | Best targeted adhesion step for supported raw olefin plastics | Check Price on Amazon |
| 4 | Dupli-Color Plastic Adhesion Promoter CP199, Clear, 11 oz | Best clear promoter for a compatible enamel/lacquer workflow | Check Price on Amazon |
| 5 | Rust-Oleum Automotive Adhesion Promoter 251572, Clear, 11 oz | Best promoter for a compatible Rust-Oleum automotive finish | Check Price on Amazon |
| 6 | U-POL GRIP#4 Universal Adhesion Promoter, Clear Aerosol | Best multi-substrate promoter for approved refinish work | Check Price on Amazon |
Top Plastic Bumper Primers Reviewed: Features, Pros, and Buying Decisions
These plastic bumper primer reviews explain what each product contributes to the repair. Check the substrate and complete coating system before buying, then use the features and limitations to choose the product that fits your preparation stage.
1. SEM 39133 Flexible Primer Surfacer: Best Flexible Sandable Primer
Best for: Owners preparing suitable plastic surfaces that need a sandable primer layer to refine minor defects.
SEM Flexible Primer Surfacer is the most direct answer here when your job needs a true sandable primer for plastic. The manufacturer describes a flexible formulation intended to adhere to difficult plastics and hide minor surface defects. It fits a preparation stage where the surface needs refinement before a compatible finish.
The aerosol format avoids mixing a bulk primer or setting up a spray gun for a small job. You still need the specified cleaning, surface preparation, drying, and sanding process. Convenient packaging does not turn a contaminated bumper into a paint-ready panel.
Choose it for minor-defect refinement, not structural repair. Cracks, torn tabs, and deep gouges need their own appropriate repair. Confirm the intended finish materials and any additional substrate treatment against the complete system’s instructions.
Key Features
- Flexible, sandable gray primer-surfacer formulation.
- Aerosol 39133 listing for manageable repair work.
- Intended for suitable plastic substrates and minor surface defects.
- Manufacturer identifies compatibility with most refinish materials, subject to the system directions.
Pros
- Provides a sandable layer rather than only a clear adhesion treatment.
- Aerosol packaging is convenient for selected small repairs.
- Flexible formulation makes it a relevant candidate for automotive plastic preparation.
Cons
- Preparation and sanding remain separate work stages.
- Does not repair cracks, mounting damage, or deep defects.
- Topcoat and substrate compatibility must be confirmed for the actual job.
Buying Decision
Choose SEM 39133 when you need a flexible, sandable primer on approved plastic and can complete its preparation process. Buy the required cleaners and abrasives with it. If the surface is already smooth and the system only needs raw-plastic adhesion, choose the specified promoter instead of adding surfacer unnecessarily.
2. SEM 42013 High-Build Primer Surfacer, Gray: Best High-Build Alternative
Best for: Suitable repaired or prepared surfaces that need the filling and sanding role of a high-build surfacer.
SEM High-Build Primer Surfacer is a flexible acrylic coating intended for several supported substrates, including plastics. Its appeal is the filling role: it provides a layer for refining supported minor defects before finishing. The linked product is the gray 42013 variant.
This is not an automatic direct-to-every-plastic shortcut. SEM’s technical instructions specify substrate preparation and call for XXX Adhesion Promoter on olefin-based plastics within this product’s process. Do not substitute another promoter merely because it is also listed in this guide.
A high-build primer helps refine a properly prepared repair; it should not be used to bury deep damage or skip sanding. Apply only the supported coats, allow the specified drying, and inspect the sanded result before continuing to the compatible topcoat.
Key Features
- Gray 42013 high-build primer-surfacer formulation.
- Flexible acrylic coating with a sanding and filling role.
- Manufacturer identifies multiple supported substrates, including plastic.
- Technical instructions include a separate specified adhesion step for olefin-based plastics.
Pros
- Useful when surface refinement is part of the job.
- Supports sanding before the finish coats.
- Can serve other approved repair substrates as well as plastic.
Cons
- Additional preparation products may be required.
- High build is not a replacement for correcting an uneven repair.
- Compatibility and film requirements limit how it can be used.
Buying Decision
Choose SEM 42013 when you need its high-build surfacing function and will follow the specified substrate process. Choose SEM 39133 when its flexible-surfacer procedure better fits your job. Budget for the complete system rather than selecting either can by primer color alone.
3. SEM 39863 Plastic Adhesion Promoter: Best for Supported Raw Olefin Plastics
Best for: Appropriate bare olefin-based plastic that needs an adhesion-treatment step under a compatible refinish system.
SEM Plastic Adhesion Promoter is a clear adhesion treatment, not a high-build primer. The manufacturer specifically identifies raw olefin-based plastics as suitable substrates. That targeted role makes it worth considering when the material and refinish procedure call for this product.
Cleaning and preparation are essential. SEM gives a sequence involving appropriate surface cleaning, drying, and removal of remaining contamination. Apply and flash the treatment according to the current technical sheet and container before the supported coating stage.
Do not spray extra coats to fill scratches. The purpose is bonding, and excessive material is not an approved substitute for the specified application. Also avoid assuming every SEM promoter is interchangeable within every SEM primer procedure; select the exact product the system names.
Key Features
- Clear Plastic Adhesion Promoter in aerosol form.
- Manufacturer identifies raw olefin-based plastic applications.
- Designed to increase adhesion of compatible topcoat materials.
- Requires the specified preparation and flash before further coating.
Pros
- A targeted option for a defined difficult-plastic application.
- Aerosol format is convenient for selected parts.
- Clear adhesion role helps separate bonding from surface filling.
Cons
- Does not provide a sandable filling layer.
- Substrate and coating compatibility require checking.
- Application and recoating directions are product-specific.
Buying Decision
Choose SEM 39863 when the raw plastic and approved coating system support this exact promoter. If you also need surface refinement, select the compatible surfacer and its required sequence separately. Do not buy it as a replacement for a sandable bumper primer.
4. Dupli-Color Plastic Adhesion Promoter CP199: Best for a Compatible Enamel or Lacquer Workflow
Best for: Prepared, supported plastic where the intended enamel or lacquer finish permits CP199’s clear adhesion layer.
Dupli-Color CP199 is an 11-ounce clear adhesion promoter positioned for improving the bond of enamel and lacquer topcoats to supported surfaces. It makes sense when you have already chosen a compatible finish and want a manageable aerosol adhesion step.
The timing is part of the purchase decision. Dupli-Color’s current directions call for light coats and topcoating within the specified short window after the final promoter coat. Prepare the next coating and your work area before spraying rather than treating the promoter as an overnight holding primer.
The clear coating does not level gouges or disguise sanding marks. Clean and prepare the surface under the product instructions, then use it only where the full painting plan supports that adhesion layer.
Key Features
- Clear 11-ounce CP199 aerosol listing.
- Intended to improve supported enamel and lacquer topcoat adhesion.
- Manufacturer identifies interior and exterior applications.
- Light-coat application with a defined topcoat window.
Pros
- Practical format for a small compatible refinishing job.
- Clear coating suits a bonding role without a colored surfacer layer.
- The specified timing helps organize a continuous painting workflow.
Cons
- The topcoat window requires the next materials to be ready.
- Not a sandable filler or crack-repair product.
- Broad plastic wording does not replace checking the actual coating system.
Buying Decision
Choose CP199 if its adhesion role and enamel/lacquer compatibility match your plan. Have the topcoat ready before application. Choose a surfacer when smoothing is the missing step, or use another promoter when your selected paint system specifically requires it.
5. Rust-Oleum Automotive Adhesion Promoter 251572: Best for a Compatible Rust-Oleum Finish
Best for: Supported automotive plastic preparation in a workflow that permits this clear promoter and its finishing schedule.
Rust-Oleum’s 251572 is an 11-ounce clear automotive adhesion promoter. The manufacturer identifies polyolefin surfaces and applications including automotive plastics and bumpers, making it a relevant adhesion-stage candidate rather than a general metal-only primer.
Its any-angle spray system can help reach accessible curves and edges. That is an application convenience, not proof that every hidden area receives enough material. Mask the vehicle and maintain controlled spray movement to limit overspray and uneven application.
The current technical sheet specifies a short topcoat window and recommends an appropriate Rust-Oleum automotive finish for best results. Follow the actual label and data sheet supplied for your product. Touch-dry wording alone is not permission to postpone the next coat indefinitely.
Key Features
- Clear 11-ounce automotive adhesion-promoter listing.
- Manufacturer identifies supported polyolefin and bumper applications.
- Any-angle spray system and comfort spray tip.
- Defined preparation and topcoat sequence.
Pros
- Useful when the chosen automotive finish supports this promoter.
- Any-angle application helps with accessible contours.
- A clearly identified automotive bonding role.
Cons
- Not a high-build or sandable defect-filling primer.
- Overspray and coating timing need control.
- Compatibility should be checked before mixing it with another brand’s system.
Buying Decision
Choose 251572 when its substrate approval and compatible finishing sequence match the project. Buy the intended finish and preparation supplies at the same time. Do not use it as a universal first layer beneath every automotive primer or clear coat.
6. U-POL GRIP#4 Universal Adhesion Promoter: Best Multi-Substrate Refinish Option
Best for: Approved automotive refinishing work that includes plastic and other compatible substrates or hard-to-sand locations.
U-POL GRIP#4 is a clear aerosol adhesion promoter with a broad manufacturer-described automotive substrate range. Its U.S. guidance includes plastics, painted surfaces, fiberglass, and certain metals, which makes it useful to investigate for a mixed-substrate repair workflow.
The manufacturer positions it for hard-to-sand areas and describes compatibility with most water- or solvent-based paint systems. Those statements do not remove the need to clean, inspect, repair defects, or resolve compatibility. A hard-to-access corner is a different situation from a bumper that needs sanding and repair across its visible face.
Choose it for the approved adhesion stage and its flat spray application. It does not provide the same defect-filling role as a surfacer. Where the paint manufacturer specifies another primer or promoter, follow that system rather than assuming “universal” overrides its instructions.
Key Features
- Clear aerosol universal adhesion promoter.
- Manufacturer identifies multiple automotive substrates.
- Sprays flat under the specified application process.
- Positioned for suitable hard-to-sand locations and compatible refinish systems.
Pros
- Useful candidate for a defined mixed-substrate workflow.
- Can suit some awkward locations under its instructions.
- Compatibility positioning covers many refinish systems, subject to confirmation.
Cons
- Universal naming is not approval for every plastic or paint combination.
- Does not replace defect repair or surfacer sanding.
- Hard-to-sand claims should not be extended to skipping all bumper preparation.
Buying Decision
Choose GRIP#4 when the actual substrates and paint system approve its broad adhesion role. Choose a more specifically required product when your procedure names one. If sanding and surface leveling are the issue, buy the appropriate surfacer instead of expecting this promoter to solve them.
Plastic Bumper Primer Buying Guide: Match the Product to the Surface
The best primer purchase starts with the bumper’s actual condition and the complete paint system. Use these checks before placing an order so your coating materials work together and the preparation is achievable.

Identify the plastic and existing coating
Look for a molded material identification mark where accessible, and use the vehicle or part supplier’s information. Bumper covers can use different plastics and blends. Do not assume every bumper shares the same substrate or adhesion requirements.
Also determine whether the surface is raw, factory-primed, refinished, or partly repaired. Stable paint and exposed plastic can require different steps within one panel. If the supplied primer is uncertain or failing, resolve that before adding another coating.
Choose the full paint system before the first primer
Confirm the cleaner, adhesion treatment where required, surfacer or sealer, color, and clear coat as a compatible sequence. Read each relevant data sheet for substrate preparation and overcoating. Brand familiarity alone does not make any two products compatible.
This is especially important when a technical procedure names a particular promoter. SEM High-Build Primer Surfacer, for example, identifies XXX Adhesion Promoter for olefin-based plastics in its instructions. The separate SEM Plastic Adhesion Promoter pick is not an automatic substitute.
Decide whether you need bonding, filling, or both
A smooth supported bare-plastic surface may only need the adhesion stage specified by its finishing system. A repaired area with minor sanding defects may need a suitable surfacer. Neither role replaces repairing cracks or restoring damaged mounting features.
Buy the missing preparation stage rather than stacking products by habit. Extra layers increase work and can create compatibility or thickness problems without improving the result.
Check flash time, sanding, and topcoat windows
Flash time is the interval needed between coating stages under the specified conditions. Dry-to-touch, ready-to-sand, and ready-to-topcoat are separate milestones. Do not use one as proof of the others.
Temperature, humidity, application weight, and product instructions affect the workflow. Have the next materials ready when a promoter has a short overcoating window. If you miss it, follow the maker’s recovery procedure rather than guessing.
Choose primer color within the paint plan
Gray, white, black, and other primer shades can affect how the color coat reaches coverage. Use the color or sealer shade required by the paint system rather than choosing only by what is easiest to buy.
A gray primer is not a promise that the final bumper color will match the rest of the car. Color matching, application technique, and the existing finish are separate parts of refinishing.
Compare the complete project cost
Include cleaners, abrasives, masking, approved repair materials, towels, and the finish coats. An aerosol is convenient for a small job, but the required preparation supplies still matter. Buy enough material for the supported coats rather than stretching one can into an excessively thin film.
For a full bumper, consider whether your space, equipment, and finishing experience suit the job. A professional repair may be the better purchase when paint matching, sensor-area restrictions, or extensive damage make the process more involved.
Best Primer Choice for Bare, Repaired, and Painted Plastic Bumpers
Different bumper conditions call for different preparation decisions. This table helps you identify the missing step before buying a primer or adhesion promoter.
| Bumper condition | Sensible next step | Important limit |
|---|---|---|
| Smooth bare plastic | Required substrate preparation and approved adhesion treatment | Confirm the actual plastic and paint system |
| Minor defects after a sound repair | Compatible sandable primer surfacer | Primer does not fix deep or unstable damage |
| Factory-primed replacement cover | Assess supplied primer and follow its refinishing procedure | Do not assume it is ready for color immediately |
| Sound existing paint | Approved cleaning and sanding/refinish process | Raw-plastic promoter is not automatically needed everywhere |
| Peeling or incompatible old finish | Remove or stabilize under the approved repair plan | More primer does not fix a failing foundation |
| Sensor or radar-related area | Vehicle-specific refinishing guidance | Generic film buildup or repair advice may be unsuitable |
How to Prepare a Plastic Bumper for Primer and Paint
Proper plastic bumper preparation gives the coating system a suitable foundation and keeps different stages in the correct order. Use this sequence as a planning framework, then follow the exact vehicle and coating instructions for materials, timing, and application.
1. Inspect the damage and equipment areas
Check for cracks, torn mounts, peeling paint, and exposed plastic. Identify parking sensors, radar-related zones, brackets, and any areas with vehicle-specific repair restrictions. Do not treat a sensor-equipped cover as an unrestricted cosmetic panel.
2. Clean before sanding
Remove contamination with the approved plastic-cleaning process before working it into the surface with abrasives. Follow any required rinse and drying steps. Use the specified surface cleaner rather than assuming a household solvent is compatible.
3. Complete repairs and surface preparation
Repair permitted damage with the appropriate plastic-repair system. Remove failing coatings and sand only as the procedure requires. Preserve texture where relevant; ordinary leveling primer can change the appearance of a textured surface.
4. Apply the specified adhesion stage where required
Use the exact promoter approved for the substrate and coating sequence. Apply the prescribed film and allow its required flash. Do not apply a promoter everywhere automatically or substitute extra thickness for better cleaning.
5. Prime and refine the surface when needed
Apply a compatible surfacer if the repair requires its filling and sanding role. Allow the specified drying and use the required abrasive sequence. Inspect for unresolved defects before continuing, rather than hiding them beneath the color coat.
6. Apply the finish within the supported process
Follow the paint system’s requirements for color and clear, including any sanding or sealer stage. Use ventilation and protective equipment appropriate to every material’s safety data sheet. Aerosol convenience does not establish that a complete refinish system is safe for an ordinary enclosed garage.
Some activated coatings require more specialized exposure controls than a casual DIY setup provides. Resolve the workspace and safety requirements before buying the finish materials, not after the bumper has been primed.
Plastic Bumper Priming Mistakes That Cause Poor Results
Common bumper-primer problems come from contamination, unstable old coatings, incorrect timing, and incompatible layers. Avoid these mistakes to make the preparation purchase worthwhile.
- Using metal-focused self-etching primer as the default for bare plastic.
- Expecting clear adhesion promoter to fill scratches or repair cracks.
- Spraying over wax, dressing, oil, or failing old paint.
- Assuming every promoter works under every surfacer.
- Applying heavy coats to compensate for incomplete preparation.
- Treating dry-to-touch as ready for sanding or indefinite recoating.
- Skipping inspection around sensors and restricted repair areas.
- Choosing primer shade without checking the final paint system.
If a coat wrinkles, lifts, remains unsuitable for sanding, or otherwise reacts unexpectedly, stop and assess the cause. Applying another product over the reaction can make removal and refinishing harder.
conclusion
Choose SEM Flexible Primer Surfacer 39133 when suitable plastic needs a flexible, sandable preparation layer. Choose SEM High-Build Primer Surfacer 42013 when its surfacing role and complete substrate procedure better match the repair.
For an adhesion-only stage, choose the promoter required by your supported plastic and paint system. SEM 39863 targets raw olefin-based plastics; Dupli-Color CP199 suits an approved enamel/lacquer workflow; Rust-Oleum 251572 fits a compatible automotive finishing sequence; U-POL GRIP#4 is worth considering for approved multi-substrate work.
Before buying, identify the bumper condition, confirm the compatible layers, and purchase the preparation supplies needed to complete them. The right primer is the one that performs the missing job in a supported system—not the can with the broadest plastic claim.
FAQs
These plastic bumper primer FAQs explain adhesion, sanding, coating compatibility, and common buying errors. The exact product data sheet and vehicle repair guidance should determine the final application method.
What is the best primer for plastic bumpers?
SEM Flexible Primer Surfacer is a strong starting choice when approved plastic needs a flexible, sandable primer layer. A bare-plastic adhesion stage may require a separate specified product. Choose by the substrate, repair condition, and complete paint system.
Do plastic bumpers need adhesion promoter before primer?
Some systems and plastics require it, while others specify a different process. Check the surfacer’s instructions and the bumper substrate. Do not assume every primer needs the same promoter or that any promoter can be substituted.
Is adhesion promoter the same as high-build primer?
No, adhesion promoter improves bonding on supported surfaces, while high-build primer provides a surfacing layer for supported defect refinement. A promoter does not fill a gouge. A surfacer also needs its own substrate preparation and adhesion requirements followed.
Can I use self-etching primer on a plastic bumper?
Do not choose a metal-focused self-etching primer as the default plastic treatment. Use only a product explicitly approved for the substrate and paint system. Plastic preparation has different requirements from priming bare metal.
Should I sand adhesion promoter before painting?
Follow the specific promoter’s instructions. Many are intended to be overcoated after flashing rather than sanded like a surfacer. A missed coating window may require a particular recovery process, so check before sanding or recoating.
Can primer repair scratches and cracks in a bumper?
A suitable surfacer can help refine minor supported defects, but it does not repair structural cracks or torn mounts. Deep damage needs the appropriate repair process first. Do not hide an unstable repair under thick primer.
Does a factory-primed replacement bumper need more primer?
Not automatically. Assess the supplied primer and follow the part supplier and paint system’s preparation guidance. Extra primer is useful only when the supported process calls for it or the surface needs suitable refinement.
Can I mix different brands of promoter, primer, and paint?
Use mixed-brand products only when their compatibility and sequence are confirmed. Similar product names do not establish approval. A documented system is a better choice than assembling layers solely because each is labeled automotive.
Can I prime and paint over bumper sensors?
Follow the vehicle’s exact repair and refinishing instructions before coating sensors or related areas. Some procedures restrict repair locations, material, or film thickness. A generic primer recommendation does not override those limits.
How long should bumper primer dry before painting?
The required interval depends on the exact product, application, and conditions. Flash, sanding readiness, and topcoat timing can be different. Follow the current container and technical sheet instead of using one universal waiting period.