
Condition leather car seats as often as your vehicle’s care instructions recommend, not automatically every month. The right schedule depends on the upholstery’s finish, the products approved for it, and how the car is used. Some seats need a compatible conditioner; others call for cleaning without a separate conditioning step.
If your manual permits conditioner but gives no interval, a practical starting point is to review the seats’ condition every three months. That is an inspection reminder, not a requirement to apply more product. Clean away dirt first, then decide whether conditioning is appropriate. Regularly adding conditioner to an already clean, well-maintained surface can leave residue without solving a real problem.
What Determines Your Leather Seat Conditioning Schedule?
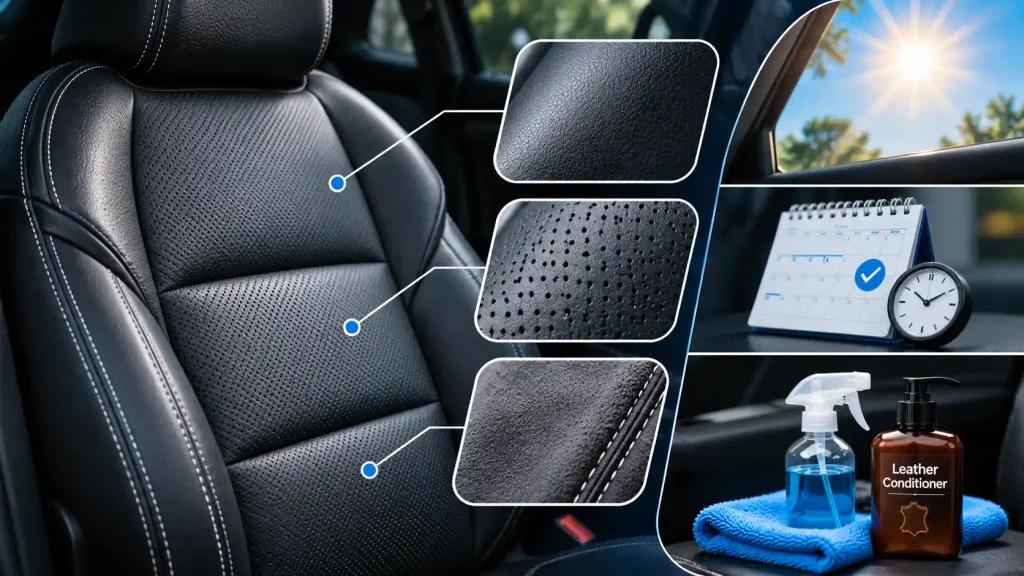
The word “leather” does not describe every surface on a car seat. A seat may combine finished leather, synthetic panels, perforated sections, and other materials, each with different care needs. Identify the upholstery before choosing a treatment or setting a schedule.
Seat Finish Matters More Than a Calendar
Many automotive leathers have a protective surface finish, so the product touches that finish rather than bare hide. A conditioner must be compatible with the finished surface; a product intended for unfinished furniture leather is not automatically suitable.
Synthetic leather, vinyl, and suede-like upholstery should not be treated as interchangeable with leather. Terms such as “vegan leather” describe alternatives to animal hide, not a promise that traditional leather conditioner is appropriate. Use the vehicle’s material description and care instructions rather than appearance alone.
Sun Exposure Changes the Care Priorities
A car parked outdoors in strong sun faces different conditions from one stored in a garage. Heat and sunlight make shade, window shades, and prompt attention to surface damage especially useful. They do not, by themselves, establish a need for monthly conditioner.
Do not assume that every conditioner provides UV protection. That benefit should be stated in the product’s instructions, along with compatibility with your upholstery. Conditioner is not a substitute for reducing prolonged exposure.
Daily Use Calls for Cleaning First
Driver’s seat bolsters, armrests, and steering-side edges collect body oils, clothing transfer, and dirt. Those deposits may make a seat feel slick, sticky, or stiff, which can be mistaken for a need for conditioning.
Cleaning addresses contamination; conditioning is a separate treatment. If the seats feel unpleasant, start with the approved cleaning method rather than covering the surface with another layer of product.
A Practical Schedule for Leather Seat Care
Separate routine cleaning from decisions about conditioner. The schedule below is a maintenance framework, not a manufacturer-required service interval. Your vehicle’s instructions take priority whenever they specify a product or frequency.
| Seat condition or situation | Cleaning response | Conditioning decision |
|---|---|---|
| Spill, visible dirt, or clothing transfer | Address promptly using the approved method | Do not condition over contamination |
| Clean seats with an even, comfortable feel | Continue routine inspection and gentle care | No automatic application is needed |
| Approved leather conditioner, but no stated interval | Review the surface every three months as a starting point | Follow the product directions and assess whether treatment is needed |
| Frequent use or extended outdoor parking | Inspect high-contact areas and exposed surfaces more often | Do not increase applications without considering finish compatibility and residue |
| Cracking, peeling, unusual stickiness, or color loss | Avoid aggressive scrubbing and strong chemicals | Seek repair advice rather than adding conditioner |
| Synthetic or unidentified upholstery | Confirm the material and approved cleaner | Do not assume leather conditioner is suitable |
Record the date and product whenever you condition the seats. A simple note makes it easier to spot whether a slick surface follows an application or whether one high-use area needs more frequent cleaning instead.
How to Condition Leather Car Seats Safely
Use one straightforward method: identify the material, clean it, let it dry, and apply a compatible conditioner sparingly. Work in shade on seats that are cool to the touch, and follow both the vehicle and product instructions if they specify different handling requirements.
Confirm Compatibility Before Applying Anything
Find the upholstery-care section in the owner’s manual or the manufacturer’s official care guidance. Look for restrictions involving leather cleaners, conditioners, perforations, and heated or ventilated seats.
Gather a vacuum with a suitable upholstery attachment, clean soft cloths, an approved cleaner, and the permitted conditioner. A leather care product should explicitly suit the seat material and finish. “Natural,” “premium,” or “all-purpose” is not enough to establish compatibility.
Remove Grit and Clean the Surface
Vacuum loose debris from seams, folds, and the gap between the cushion and backrest. Avoid dragging a hard nozzle across the upholstery. Removing grit first reduces the chance of rubbing it against the finish during wiping.
Clean according to the vehicle and cleaner instructions, using controlled amounts of moisture. Unless the directions say otherwise, putting cleaner on a cloth offers more control than spraying the seat directly. Pay particular attention to the driver’s outer bolster and other areas that receive repeated contact.

Let the Seats Dry and Test First
Allow the cleaned surface to dry before applying conditioner. Conditioner should not be used to disguise remaining dirt, dampness, or a sticky coating from an earlier product.
Test the conditioner on a small, inconspicuous area as directed. Let the test area dry fully, then inspect it for unwanted darkening, color transfer, tackiness, or a change in sheen. A successful spot test reduces uncertainty but does not override an explicit manufacturer restriction.
Apply a Thin Layer and Remove Excess
Use the amount and application method stated on the conditioner label. Where permitted, applying a small amount to a cloth helps control coverage and keeps excess product away from seams and perforations.
Work in manageable sections rather than saturating the whole seat. Observe the specified dwell time, if any, and remove excess as instructed. More product does not necessarily provide more benefit, and a shiny coating is not proof that the leather has been properly cared for.
Check the Finish Before Driving
Let the treatment dry or cure for the period stated on the label. Before using the car, confirm that the seating surface does not feel slippery or leave residue on a clean cloth.
If the seat remains slick or sticky, do not apply another coat. Follow the product’s removal guidance or contact its manufacturer for advice. Avoid using the same conditioner on the steering wheel, pedals, or other controls unless their specific care instructions permit it.
Signs That Conditioner Is Not the Answer
Changes in feel and appearance deserve attention, but they do not all point to dryness. Diagnosing the surface first can prevent a minor cleaning issue from becoming a buildup problem.
Shine and Stickiness Can Indicate Buildup
Body oils, dirt, and excess care products can change the seat’s appearance and feel. Adding conditioner may make those symptoms worse instead of restoring the original finish.
Return to the approved cleaning process. If gentle cleaning does not resolve the problem, stop experimenting with stronger household chemicals and ask a leather-care specialist or the vehicle manufacturer for guidance.
Cracks and Peeling Need Repair Assessment
Conditioner cannot replace missing color, rebuild a damaged protective finish, or repair a split. Peeling may also involve a coating or synthetic material rather than leather that simply needs treatment.
For visible damage, a qualified upholstery repairer can help distinguish surface-finish wear from deeper material failure. Early advice is more useful than repeatedly applying a product that cannot perform the repair.
Creases Do Not Automatically Mean Dryness
Seat upholstery flexes as people get in, sit down, and get out. A crease alone is not enough to establish that the seat needs conditioner.
Look at whether the area is clean, whether its finish is intact, and whether the manufacturer recommends treatment. Focus maintenance on reducing abrasive dirt and avoid treating every normal fold as a defect.
Choose a Routine, Not More Conditioner
The most useful leather-seat routine is prompt spill cleanup, regular removal of dirt, and occasional review of whether an approved conditioner is needed. If the manufacturer specifies an interval, follow it. If it permits conditioning without a schedule, use a three-month review reminder and adjust the care routine to the actual surface condition.
Keep the process simple and consistent. One compatible cleaner and, where recommended, one compatible conditioner are easier to evaluate than a rotating collection of treatments. Clean, dry, non-slippery seats are a better goal than maximum shine.
Frequently Asked Questions
Can I Use Coconut Oil or Olive Oil on Leather Car Seats?
Avoid cooking oils unless the vehicle manufacturer explicitly approves them. They are not formulated for automotive upholstery finishes and can leave unwanted residue or change the appearance. Choose a product with clear compatibility instructions instead.
Is Vinegar a Natural Leather Conditioner?
No, vinegar is not a leather conditioner. A homemade vinegar mixture is also not automatically safe for a seat’s finish, dye, or adjacent materials. Use the cleaning method specified for the upholstery rather than substituting a household recipe.
Can I Use Beeswax or a Homemade Leather Balm?
Do not assume a beeswax balm is suitable for car seats. A treatment intended for boots, saddles, or unfinished leather may leave an unwanted coating on automotive upholstery. Perforated seats especially call for careful product selection and controlled application.
Do Heated and Ventilated Seats Need Different Conditioner?
Heated or ventilated seats need a product and application method approved for their upholstery. These features do not automatically require more frequent conditioning. Keep liquids and excess product out of perforations, seams, and openings, and follow any feature-specific care restrictions.
Should I Condition New Leather Car Seats Immediately?
Not necessarily; being new is not a reason by itself to add conditioner. Start with the manufacturer’s care instructions and maintain the seats with the approved cleaning routine. Apply conditioner only when the guidance supports it, rather than adding a protective layer by assumption.