Preparing your car for a long trip involves checking essential components such as tires, engine oil, coolant, brakes, battery, lights, and windshield wipers. You should also inspect the vehicle for potential mechanical problems, pack emergency equipment, and make sure your luggage is loaded safely.
A thorough pre-trip inspection helps reduce the risk of unexpected breakdowns, improves driving safety, and makes long-distance travel more comfortable.
Long highway journeys place continuous stress on your engine, cooling system, transmission, tires, and other essential components. A minor issue that goes unnoticed during daily driving can become a serious problem after several hours on the road.
This guide explains how to prepare your car for a long trip, what to inspect before departure, which essential items to carry, and when to seek professional maintenance.
Quick Road Trip Car Preparation Checklist
Before starting your journey, make sure you have checked the following essential vehicle components:
| Vehicle Component | What to Check |
|---|---|
| Engine oil | Oil level, condition, and next service date |
| Engine coolant | Coolant level, condition, and possible leaks |
| Brake system | Brake fluid, pad condition, and pedal response |
| Battery | Battery health, terminal connections, and corrosion |
| Tires | Air pressure, tread depth, sidewalls, and spare tire |
| Belts and hoses | Cracks, wear, leaks, and loose connections |
| Lights | Headlights, brake lights, indicators, and hazard lights |
| Windshield wipers | Blade condition and washer fluid |
| Dashboard | Warning lights and unusual alerts |
| Emergency equipment | First aid kit, tire inflator, jumper cables, and flashlight |
How much time should you allow? Start preparing your vehicle approximately one week before departure. Most basic DIY inspections take around one to two hours, depending on your experience and the vehicle’s condition.
Why Is It Important to Check Your Car Before a Long Trip?
A pre-trip vehicle inspection helps identify mechanical issues before they cause problems during your journey. It allows you to address worn components, fluid deficiencies, tire problems, and potential safety concerns while you are still close to your regular mechanic.
During everyday driving, your vehicle may not experience continuous high speeds, extended engine operation, or prolonged exposure to high temperatures. However, long-distance travel can put additional pressure on several systems.
Here are some important reasons to inspect your car before a road trip:
- Prevent unexpected breakdowns: Identifying weak batteries, worn belts, leaking hoses, and other mechanical issues can reduce the chances of roadside trouble.
- Improve driving safety: Properly maintained brakes, tires, lights, and wipers help you maintain control in different driving conditions.
- Avoid unnecessary expenses: Fixing minor problems before departure can help prevent expensive emergency repairs and towing charges.
- Improve driving comfort: A properly functioning air conditioning system, clean windshield, and well-maintained suspension make long journeys more comfortable.
- Protect your vehicle: Maintaining correct fluid levels and addressing mechanical problems helps prevent unnecessary wear and damage.
A little preparation at home can save considerable time, money, and stress during your trip.
How Far in Advance Should You Prepare Your Car for a Long Trip?
Ideally, you should start preparing your car about one week before departure. This gives you enough time to identify problems, arrange professional servicing, and replace any worn components.
You can divide the preparation process into four simple stages.
One Week Before Departure
Start with the major maintenance checks. Review your vehicle’s maintenance history and determine whether an oil change, brake service, battery replacement, or tire replacement is due.
Book a professional inspection if you notice unusual noises, warning lights, fluid leaks, or changes in vehicle performance.
Two to Three Days Before Departure
Inspect smaller but equally important components, including:
- Drive belts and engine hoses.
- Headlights, taillights, and indicators.
- Windshield wipers and washer fluid.
- Engine coolant and other accessible fluid reservoirs.
- Spare tire and tire-changing equipment.
One Day Before Departure
Complete the final preparation:
- Check tire pressure when the tires are cold.
- Organize and secure your luggage.
- Confirm that your emergency kit is complete.
- Check your planned route and fuel or charging stops.
On the Morning of Departure
Perform a quick walk-around inspection, check for visible leaks, confirm that all lights work, and make sure no unexpected dashboard warning lights remain illuminated.
What Should You Check Under the Hood Before a Long Drive?
Checking essential engine components is one of the most important parts of preparing your car for a long trip. Engine oil, coolant, transmission fluid, belts, hoses, and the battery should receive particular attention.
Before inspecting anything under the hood, park on level ground, switch off the engine, and allow hot components to cool.
1. Check the Engine Oil Level and Condition
Engine oil lubricates moving engine components, reduces friction, helps control operating temperatures, and protects against premature wear.
Low or degraded engine oil can increase engine stress during extended driving.
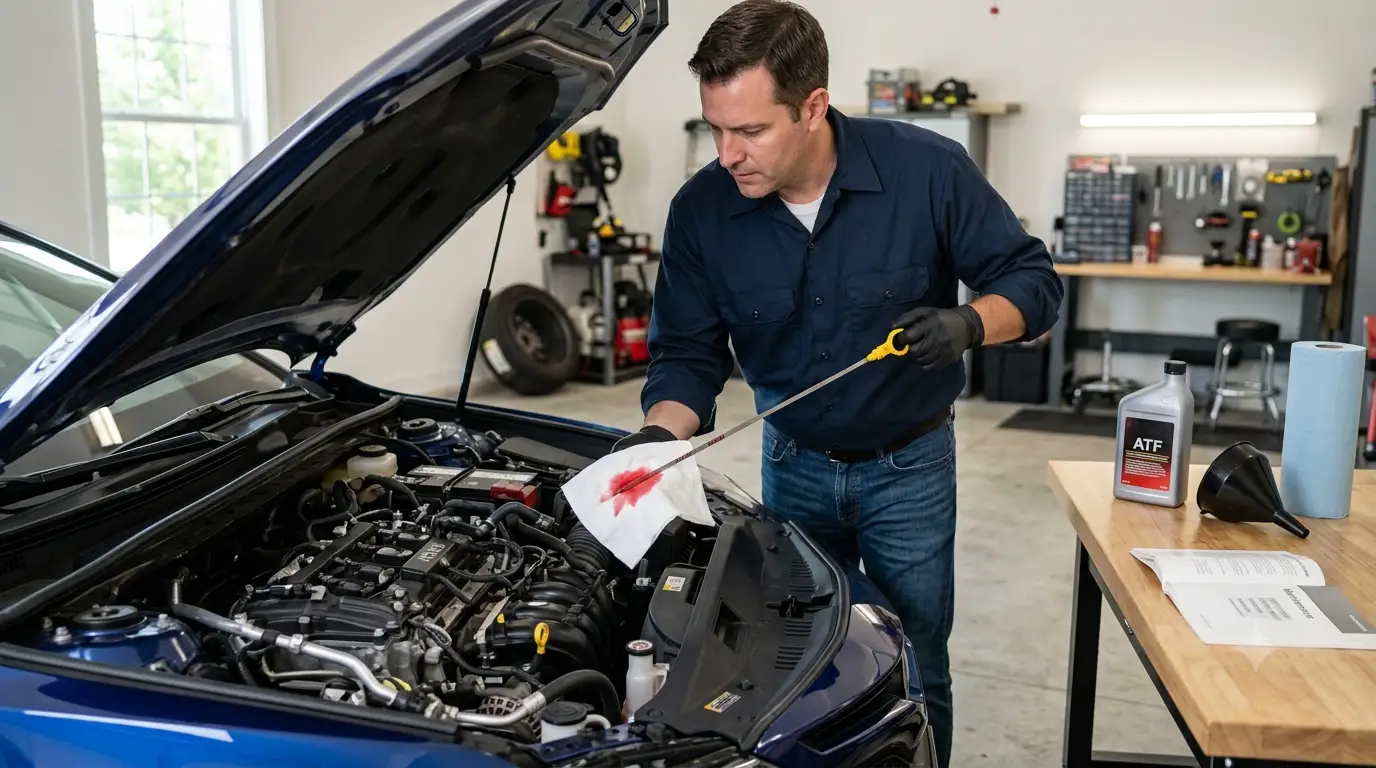
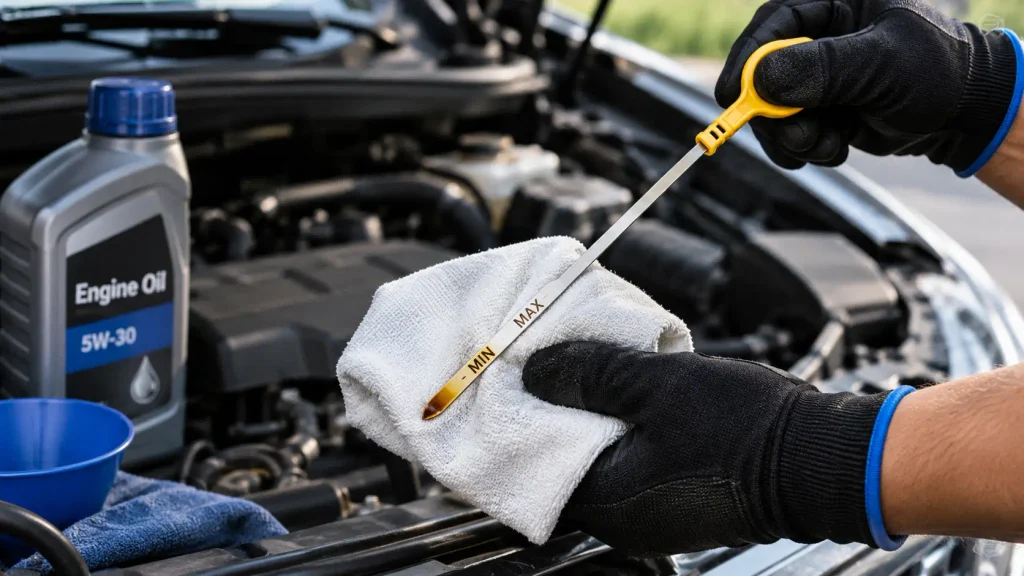
To check the engine oil:
- Park the vehicle on level ground and follow the manufacturer’s recommended conditions for checking oil.
- Locate the engine oil dipstick.
- Remove it and wipe it clean with a cloth.
- Insert it fully and remove it again.
- Check whether the oil level falls between the minimum and maximum marks.
If the level is low, add the recommended oil grade specified in your owner’s manual. Avoid overfilling the engine.
You should also check your vehicle’s oil change schedule. If an oil change is due soon, complete it before departure rather than delaying maintenance until after the trip.
A milky appearance, unusual contamination, or a sudden drop in oil level deserves further investigation. Oil color alone, however, is not a reliable way to determine whether it needs replacement.
Practical tip: If your vehicle regularly consumes engine oil, carry a small quantity of the correct oil for emergency top-ups.
2. Inspect the Engine Coolant
Engine coolant regulates engine temperature and prevents overheating during operation. It becomes especially important during long journeys, heavy traffic, hot weather, and uphill driving.
To inspect the coolant system:
- Allow the engine to cool completely.
- Locate the coolant overflow reservoir.
- Check whether the coolant level is between the minimum and maximum marks.
- Look for visible leaks around the reservoir, hoses, radiator, and connections.
- Check whether the coolant appears contaminated or unusually discolored.
Only use the coolant type recommended by your vehicle manufacturer.
Important: Never open a radiator cap or pressurized coolant reservoir while the engine is hot. Hot coolant can escape under pressure and cause serious burns.
If you notice repeated coolant loss, a leak, or signs of overheating, have the cooling system inspected before travelling.
3. Check Other Essential Vehicle Fluids
Apart from engine oil and coolant, several other fluids help keep your vehicle operating safely and efficiently.
Brake fluid: Check the reservoir level against the minimum and maximum marks. A low level may indicate worn brake components or a leak. Brake fluid should be inspected according to the manufacturer’s maintenance schedule.
Transmission fluid: Some automatic and manual vehicles provide a way to inspect transmission fluid, while many newer vehicles have sealed systems. Follow the manufacturer’s inspection procedure rather than attempting to open or remove components unnecessarily.
Power steering fluid: If your vehicle uses hydraulic power steering, inspect the reservoir and look for leaks. Electric power steering systems generally do not require steering fluid.
Windshield washer fluid: Fill the washer reservoir before departure. Long-distance driving can quickly cover the windshield with dust, insects, mud, and road grime.
Do not mix incompatible fluids. Always follow the specifications in your owner’s manual.
4. Inspect Engine Belts and Hoses
Drive belts and engine hoses support several important vehicle systems. A damaged belt can affect components such as the alternator, water pump, or air conditioning system, depending on the vehicle’s design.
Inspect accessible belts for:
- Visible cracks or fraying.
- Glazing or unusual surface wear.
- Loose or damaged sections.
- Unusual squealing noises during operation.
Next, inspect the engine hoses. Look for cracks, leaks, swelling, soft spots, or signs of deterioration.
Always perform visual inspections with the engine switched off and cool. Avoid placing your hands near moving components.
If a belt or hose looks damaged, arrange a professional inspection and replacement before the trip.
5. Test the Car Battery
A healthy battery is essential for starting your vehicle and supplying electrical power to important systems.
A weak battery may start the engine normally one day but fail unexpectedly later, particularly during extreme temperatures or after repeated short journeys.
Before leaving, check the following:
- Battery age and service history.
- Signs of corrosion around the terminals.
- Loose or damaged terminal connections.
- Slow engine cranking or difficulty starting.
- Battery warning lights or electrical problems.
You can use a suitable battery tester or arrange a professional battery health test.
Pay particular attention to older batteries, especially if you have noticed slow starting or inconsistent electrical performance.
Clean terminal corrosion safely and make sure the connections are secure. If the battery fails a health test, replace it before the journey.
How Do You Check Tires Before a Road Trip?
Tires are among the most important safety components to inspect before long-distance driving. They provide traction, support the vehicle’s weight, help maintain steering control, and influence braking performance.
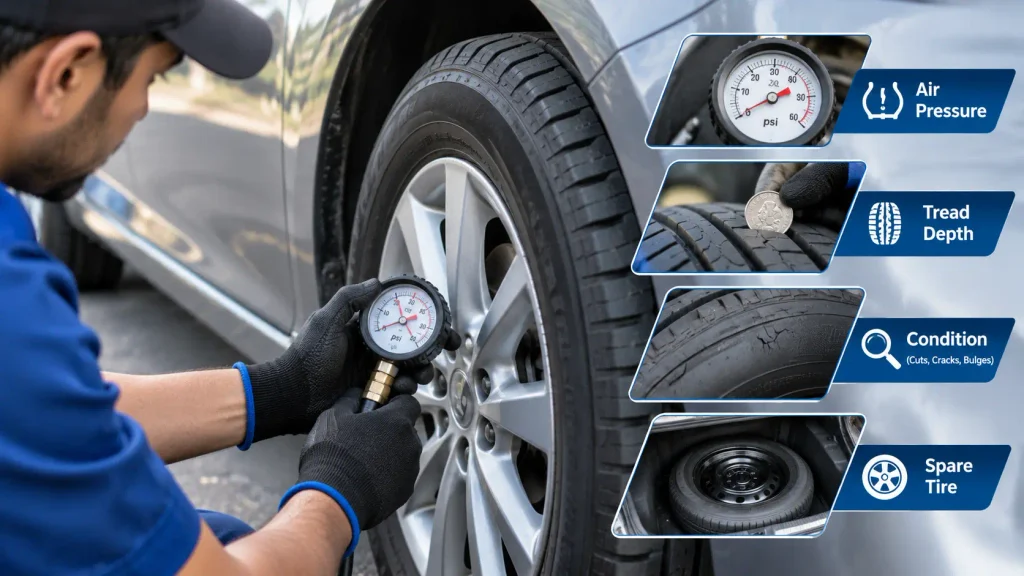
A proper tire inspection should cover air pressure, tread depth, physical condition, and the spare tire.
1. Check Tire Pressure
Incorrect tire pressure can affect handling, braking, fuel efficiency, and tire life.
Underinflated tires generate additional heat and may become more vulnerable to damage during extended driving. Overinflated tires can reduce the contact area with the road and affect ride quality.
Follow these steps:
- Check tire pressure when the tires are cold.
- Use a reliable digital or manual tire pressure gauge.
- Compare the readings with the recommended pressure on the driver’s door placard or in the owner’s manual.
- Adjust the pressure as necessary.
- Repeat the process for all four tires and the spare, where applicable.
Do not use the maximum pressure printed on the tire sidewall as your normal inflation target. That figure represents a different specification from the vehicle manufacturer’s recommended operating pressure.
Also, do not rely entirely on the Tire Pressure Monitoring System (TPMS). Manual pressure checks are still important.
2. Inspect Tire Tread Depth
Tire tread helps maintain grip, especially on wet roads. Worn tread can increase stopping distances and raise the risk of losing traction.
You can measure tread depth using a dedicated tread depth gauge.
Pay attention to the following:
- Check whether the tread is approaching the manufacturer’s replacement limit.
- Look for uneven wear across the tire surface.
- Inspect the built-in tread wear indicators.
- Consider replacing tires before they reach the legal minimum, particularly if you regularly drive in wet conditions.
A tread depth of approximately 1.6 mm (2/32 inch) is a commonly used minimum reference in some markets, but legal requirements vary by country and region.
For improved wet-weather performance, replacing tires earlier may be advisable.
3. Inspect Tires for Visible Damage
A tire can have adequate tread depth and still be unsafe because of structural damage.
Carefully inspect each tire for:
- Bulges or bubbles on the sidewall.
- Deep cuts and cracks.
- Exposed cords or damaged rubber.
- Nails, screws, or other embedded objects.
- Unusual wear patterns.
- Repeated air pressure loss.
A sidewall bulge can indicate internal tire damage and requires prompt replacement. Do not continue a long journey on a visibly damaged tire.
If you discover an embedded object or repeated pressure loss, have the tire inspected by a qualified tire technician. Not every puncture is repairable, particularly damage near the shoulder or sidewall.
4. Check the Spare Tire and Changing Tools
A spare tire is useful only when it is properly inflated and ready for use.
Before departure, confirm that:
- The spare tire has the correct pressure.
- There are no visible cracks or signs of deterioration.
- The jack and lug wrench are present.
- The wheel lock key is available, if required.
- You understand how to access and replace the spare safely.
Also check your vehicle’s manual for spare tire limitations. Some temporary spare tires have strict speed and distance restrictions.
How Do You Check Brakes, Lights, and Windshield Wipers?
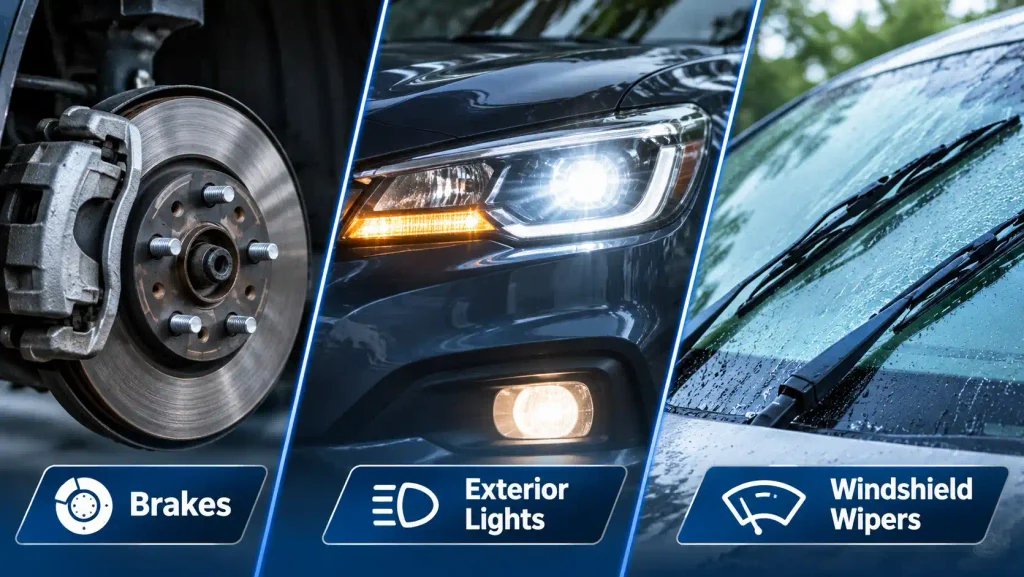
Brakes, exterior lights, and windshield wipers are essential safety systems. They help you respond to changing road conditions, maintain visibility, and avoid collisions.
1. Inspect the Brake System
Your vehicle’s braking system should be in good condition before any extended journey.
Check the following:
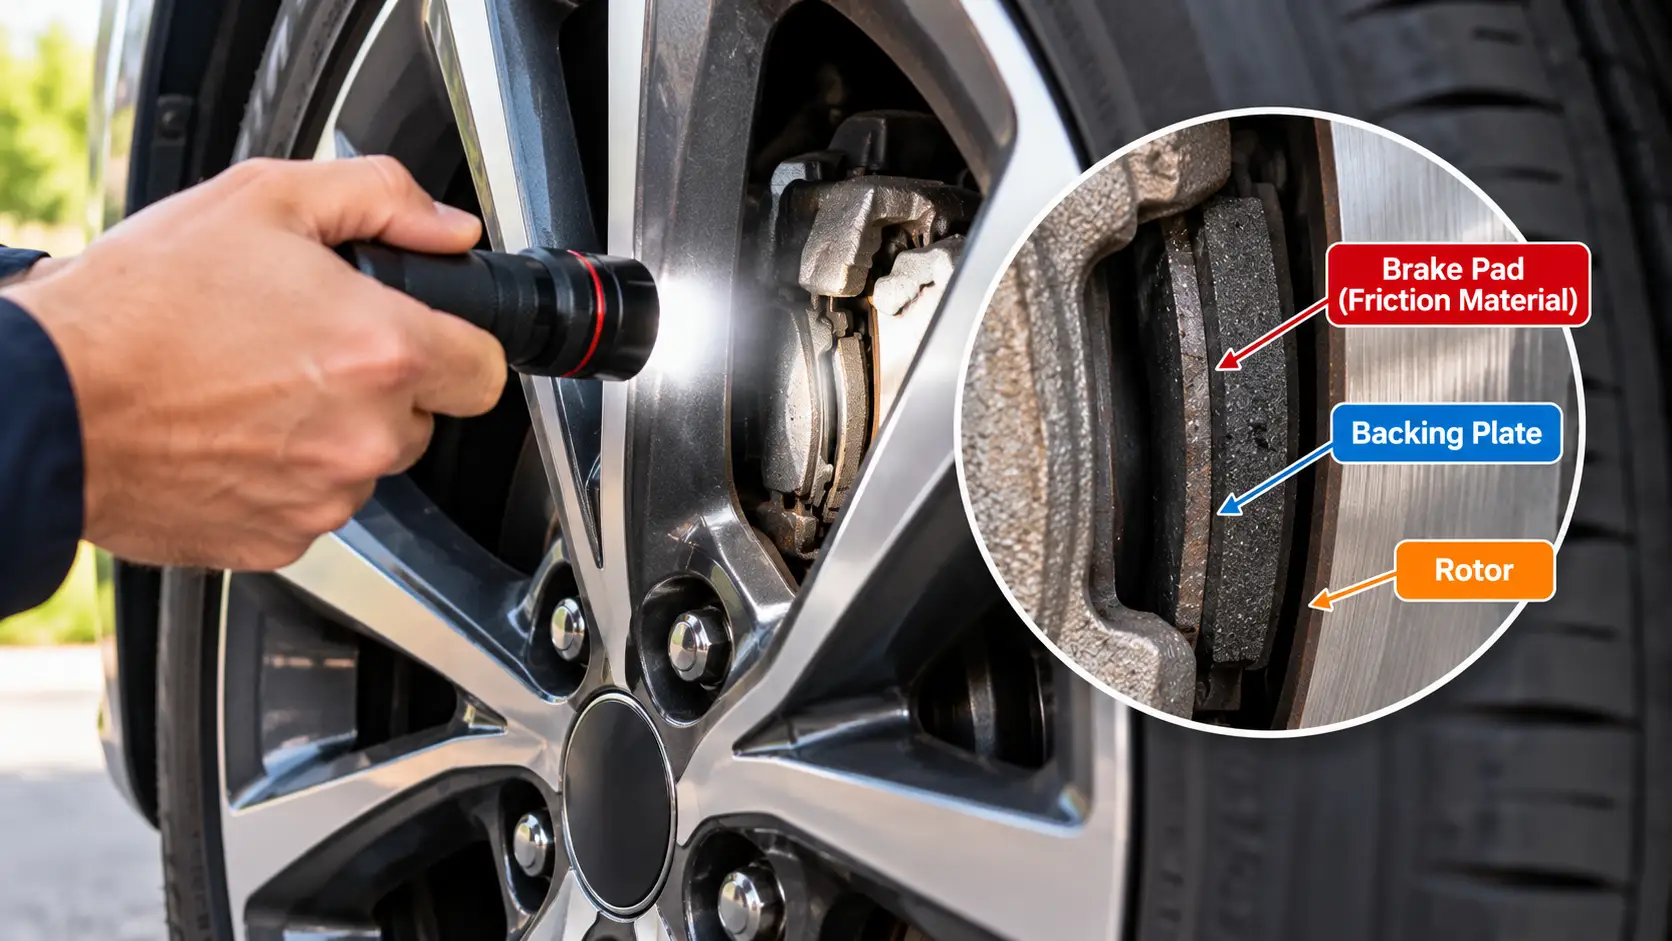
Brake pad condition: Look for signs of excessive wear. On some vehicles, brake pads can be inspected through the wheel openings.
Brake pedal response: The pedal should feel consistent. A soft, spongy, or unusually low pedal can indicate a serious problem.
Unusual noises: Grinding, persistent squealing, or clicking sounds may point to worn or damaged brake components.
Vibration: Steering wheel vibration or a pulsing brake pedal during braking can indicate a problem that needs professional diagnosis.
Do not start a long trip if your brakes feel abnormal or make unusual grinding noises. Have the braking system inspected first.
2. Test All Exterior Lights
Working lights help you see the road and allow other drivers to understand your intentions.
Ask someone to walk around your vehicle while you operate each lighting function.
Inspect:
- Low-beam headlights.
- High-beam headlights.
- Front and rear parking lights.
- Brake lights.
- Turn signals and indicators.
- Hazard warning lights.
- Reverse lights.
- License plate lights, where fitted.
Replace damaged or burnt-out bulbs before departure. Also make sure the light covers are clean and free from excessive dirt or condensation.
3. Inspect Windshield Wipers and Visibility
Clear visibility is essential during long-distance driving, particularly in heavy rain, dusty environments, or nighttime conditions.
Inspect your windshield wiper blades for:
- Cracked or hardened rubber.
- Streaks across the windshield.
- Skipping or uneven movement.
- Squeaking or chattering noises.
Replace worn wiper blades before travelling.
Also, clean both the inside and outside of the windshield. Dirt, grease, and fingerprints can increase glare from sunlight and oncoming headlights.
Finally, make sure the washer reservoir is filled with an appropriate windshield cleaning fluid.
What Should You Do About Dashboard Warning Lights Before a Trip?
Never ignore dashboard warning lights before a long journey. They can indicate problems involving the engine, brakes, battery, cooling system, tires, or other important vehicle components.
Start the engine and observe the dashboard. Some warning lights illuminate briefly during the normal startup self-check. However, warning lights that remain illuminated may indicate a fault that needs investigation.
Pay special attention to:
- Check engine warning light.
- Battery or charging system warning light.
- Engine temperature warning light.
- Oil pressure warning light.
- Brake system warning light.
- ABS warning light.
- Tire pressure warning light.
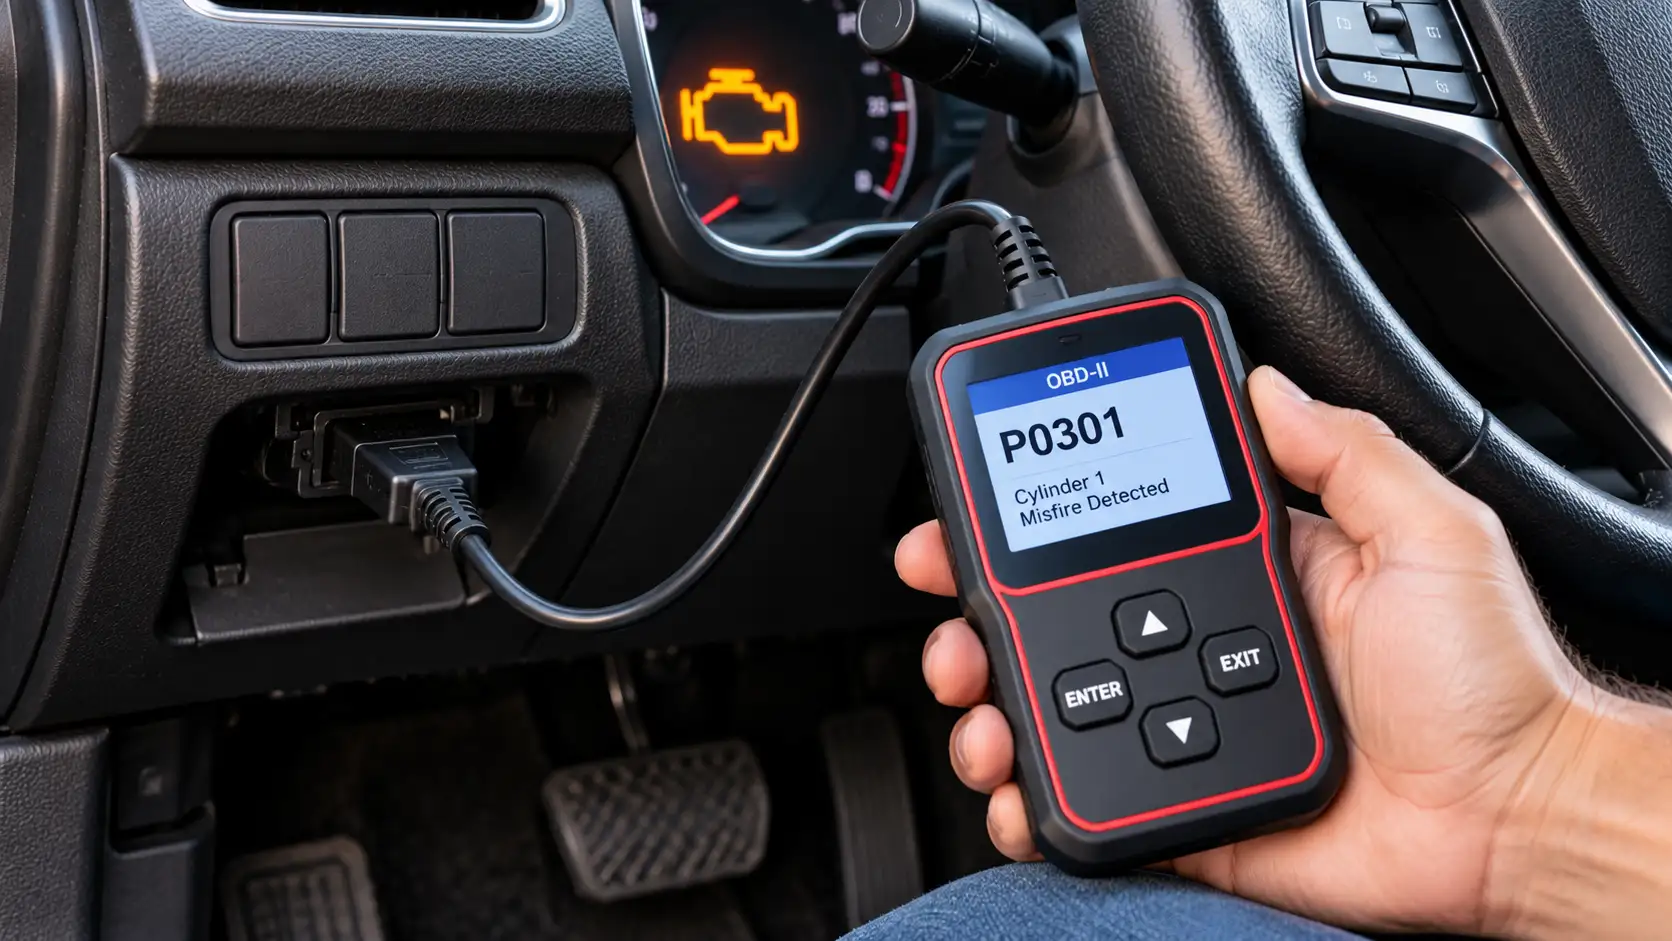
A steady check engine light generally indicates that the vehicle’s computer has detected a fault. Have the fault diagnosed before committing to a long journey.
A flashing check engine light can indicate an active engine misfire that may cause serious damage. Reduce speed, stop driving when it is safe to do so, and arrange a professional inspection.
An illuminated oil pressure or engine overheating warning also requires immediate attention. Stop safely and follow the instructions in your owner’s manual.
An OBD2 scanner can help retrieve diagnostic trouble codes from compatible vehicles. However, reading a code does not automatically identify the underlying cause. Proper diagnosis is important.
When Should You Get a Professional Car Inspection Before a Road Trip?
A professional inspection is recommended when your vehicle has not been serviced recently, has a complicated maintenance history, or shows signs of mechanical problems.
Although many basic checks can be completed at home, a qualified mechanic can inspect components that are difficult to assess without specialist tools.
Consider arranging a professional inspection if:
- Your scheduled maintenance is overdue.
- You have noticed unusual engine or suspension noises.
- The vehicle has fluid leaks.
- The brakes feel different from normal.
- The engine frequently overheats.
- The battery struggles to start the car.
- Your tires show uneven or excessive wear.
- You are planning a particularly long or remote journey.
- You recently purchased a used vehicle and do not know its maintenance history.
A technician can also examine suspension components, steering, wheel bearings, belts, hoses, and the vehicle’s overall mechanical condition.
It is also worth checking whether your vehicle has any outstanding safety recalls. Unrepaired safety-related defects should be addressed through the appropriate manufacturer or authorized service provider.
What Should You Pack in a Roadside Emergency Kit?
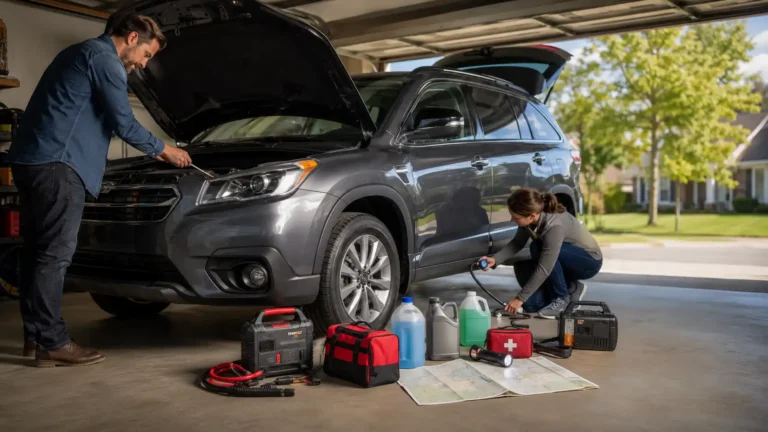
Even a well-maintained vehicle can experience unexpected problems. A roadside emergency kit helps you stay prepared while waiting for assistance or dealing with minor issues.
Here are the essential items to carry:
1. Jumper Cables or a Portable Jump Starter
These can help you deal with a discharged battery. A portable jump starter is especially convenient because it does not require another vehicle.
Always follow the manufacturer’s connection instructions and your vehicle’s battery safety guidelines.
2. Portable Tire Inflator
A portable air compressor allows you to restore tire pressure when it drops below the recommended level.
Some inflators include built-in pressure gauges, making them useful for routine tire checks.
3. Basic Tools and Work Gloves
Carry a small selection of appropriate tools, such as a screwdriver, pliers, adjustable wrench, and gloves.
These can help with simple tasks, but avoid attempting mechanical repairs you are not qualified to perform.
4. Flashlight and Spare Batteries
A reliable flashlight is important for inspecting the vehicle during nighttime breakdowns or in poorly lit areas.
A rechargeable flashlight is convenient, but carrying spare batteries or an alternative light source is also useful.
5. Reflective Warning Triangles
Reflective warning triangles help alert approaching drivers when your vehicle is stopped on the roadside.
Place them only when it is safe and permitted to do so. Always prioritize moving yourself and your passengers away from traffic.
6. First Aid Kit
A basic first aid kit can help you deal with minor injuries while travelling.
Check its contents before departure and replace any expired or missing supplies.
7. Phone Charger and Power Bank
A charged phone is essential for navigation, emergency calls, and roadside assistance.
Carry a car charger and a fully charged power bank. Download offline maps for areas where mobile network coverage may be unreliable.
8. Drinking Water, Snacks, and a Blanket
Water and non-perishable snacks can be helpful during unexpected delays. A blanket can provide additional comfort when you are waiting for assistance in cold weather.
How Should You Load Your Car for a Long Trip?
Loading your vehicle properly is just as important as checking its mechanical condition. Excessive or poorly distributed weight can affect handling, braking, tire wear, and fuel consumption.
Before packing, check your vehicle’s maximum permitted load in the owner’s manual or the manufacturer’s vehicle information label.
Remember that the total weight includes:
- The driver and passengers.
- Suitcases and travel bags.
- Food and supplies.
- Roof cargo.
- Other equipment and accessories.
Follow these loading practices:
Distribute weight evenly: Keep luggage balanced across the vehicle rather than concentrating everything on one side.
Place heavier items low: Store heavier bags close to the floor and as centrally as practical. This helps maintain vehicle stability.
Secure all luggage: Prevent bags and loose objects from moving during sudden braking or cornering.
Keep your visibility clear: Do not block the rear window, mirrors, or essential driver visibility areas.
Avoid overloading the roof: Roof carriers can increase wind resistance and raise the vehicle’s center of gravity. Secure roof cargo properly and follow the manufacturer’s weight limits.
If your vehicle is carrying a heavy load, check whether the manufacturer recommends different tire pressures for that condition.
What Extra Preparation Do Hot Weather, Mountain Roads, and Remote Routes Need?
Not every road trip presents the same driving conditions. Weather, road quality, elevation, and access to roadside services can affect how you should prepare your vehicle.
Preparing for Hot Weather Driving
High temperatures can increase the demand on the cooling system, tires, battery, and air conditioning system.
Before travelling in hot weather:
- Check the engine coolant level and condition.
- Inspect radiator hoses and visible connections.
- Make sure the cooling fan operates correctly.
- Check tire pressure when the tires are cold.
- Inspect the battery and charging system.
- Confirm that the air conditioning system works properly.
- Check the cabin air filter if airflow is weak.
Avoid beginning a long journey if your vehicle has a history of overheating.
Preparing for Mountain and Uphill Driving
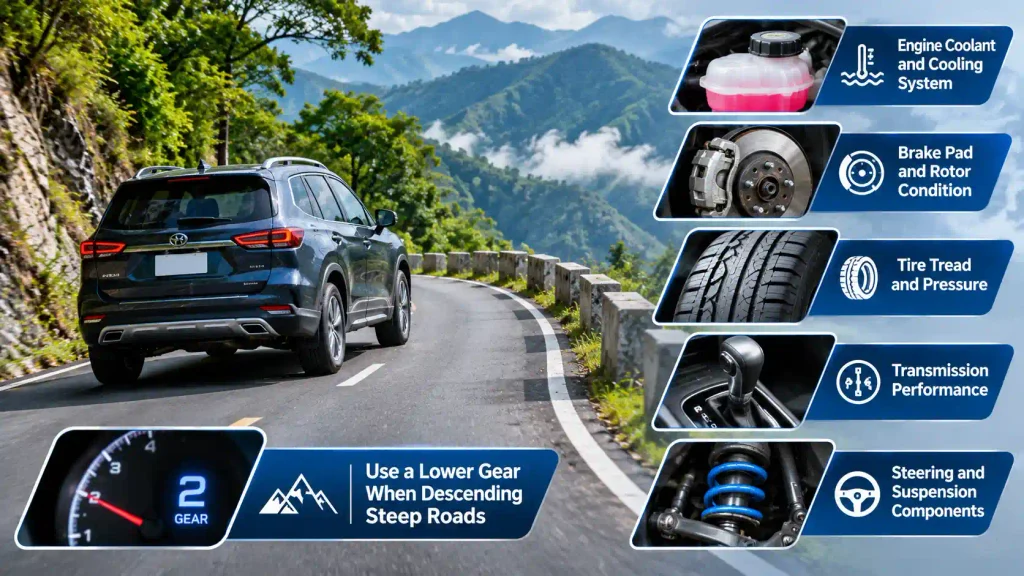
Mountain routes can put additional pressure on your engine, cooling system, transmission, and brakes.
Before travelling through steep or mountainous areas, pay particular attention to:
- Engine coolant and cooling system condition.
- Brake pad and rotor condition.
- Tire tread and pressure.
- Transmission performance.
- Steering and suspension components.
During the journey, use an appropriate lower gear when descending steep roads rather than relying continuously on the brakes. Follow your vehicle manufacturer’s recommendations for hill driving.
Preparing for Remote and Multi-Day Trips
Remote routes may have limited fuel stations, repair facilities, and mobile network coverage.
Plan ahead by:
- Identifying fuel stations along your route.
- Keeping enough fuel for the distance between available services.
- Checking roadside assistance and insurance coverage.
- Saving important emergency contact numbers.
- Downloading offline maps.
- Carrying additional drinking water and essential supplies.
- Sharing your planned route with someone you trust.
For multi-day trips, check your vehicle periodically rather than waiting until you reach your destination.
What Should You Check on the Day of Departure?
The final inspection should take approximately ten minutes. It is a quick opportunity to identify visible problems before you begin driving.
Use this departure-day checklist:
- ☐ Check tire pressure while the tires are cold.
- ☐ Walk around the vehicle and inspect for visible leaks or damage.
- ☐ Confirm that all exterior lights are working.
- ☐ Clean the windshield, mirrors, and windows.
- ☐ Check the engine oil and coolant levels if necessary.
- ☐ Confirm that the washer fluid reservoir is filled.
- ☐ Start the engine and observe the dashboard warning lights.
- ☐ Make sure the luggage is properly secured.
- ☐ Confirm that the spare tire and changing tools are accessible.
- ☐ Keep your registration, insurance documents, phone charger, and emergency kit within reach.
- ☐ Check your fuel level or planned charging requirements.
Once everything is ready, adjust your seat, mirrors, and head restraint before starting the journey.
What Should You Check After Returning From a Long Road Trip?
Vehicle maintenance should not stop when your journey ends. A post-trip inspection helps you identify wear or damage that may have developed during extended driving.
After returning home:
Clean the exterior: Remove accumulated dirt, insects, mud, and road grime from the bodywork, windshield, headlights, and wheels.
Inspect the tires: Check for new punctures, visible damage, uneven wear, or changes in tire pressure.
Check fluid levels: Look for unusual changes in engine oil, coolant, and other accessible fluid reservoirs.
Look for leaks: Inspect the parking area for fresh fluid spots that may indicate a developing mechanical problem.
Pay attention to unusual symptoms: If you noticed vibrations, pulling, unusual noises, warning lights, or overheating during the journey, arrange an inspection.
Also review your scheduled maintenance requirements. A long trip may bring your vehicle closer to its next oil change, tire rotation, or other servicing interval.
Conclusion
Preparing your car for a long trip is an important step toward safer and more reliable travel. Before departure, inspect the engine oil, coolant, battery, tires, brakes, lights, windshield wipers, and other essential components.
Do not overlook your emergency equipment, luggage arrangement, and route planning. These small preparations can make a significant difference when unexpected problems occur during a journey.
Ideally, start your vehicle preparation one week before departure. This gives you enough time to arrange repairs, replace worn components, and complete a professional inspection when necessary.
A well-maintained vehicle, combined with sensible driving habits and proper planning, helps you enjoy a smoother, more comfortable, and more confident road trip.
Frequently Asked Questions About Preparing a Car for a Long Trip
1. What should I check on my car before a long road trip?
Before a long road trip, check the engine oil, coolant, brake fluid, transmission fluid where applicable, tire pressure, tread depth, battery condition, brakes, lights, windshield wipers, belts, and hoses. Also inspect the spare tire, dashboard warning lights, and emergency equipment.
2. How far in advance should I prepare my car for a road trip?
You should ideally prepare your car about one week before departure. This gives you time to identify mechanical problems, arrange servicing, and replace worn components. Complete your final tire pressure and walk-around checks on the day of departure.
3. Is it safe to drive long distances without servicing my car?
It can be safe to drive long distances without an immediate service appointment if your vehicle is up to date on maintenance and has no mechanical or safety issues. However, do not ignore overdue servicing, warning lights, fluid leaks, unusual noises, or worn tires.
4. Should I get my car battery tested before a long trip?
Yes. A battery health test can identify a weak battery before it fails during your journey. Testing is particularly important if your battery is several years old, your engine cranks slowly, or you have experienced electrical problems.
5. What tire pressure should I use for a road trip?
Use the tire pressure recommended by your vehicle manufacturer. You can usually find this information on the driver’s door placard or in the owner’s manual. Check the pressure when the tires are cold and include the spare tire where applicable.
6. Should I change the engine oil before a long road trip?
Change the engine oil if it is due based on your vehicle’s recommended maintenance interval or will become due during the journey. Always use the oil grade and specification recommended by the manufacturer.
7. Should I check my spare tire before leaving?
Yes. Confirm that the spare tire is properly inflated and free from visible damage or deterioration. Also make sure the jack, lug wrench, and wheel lock key are available and suitable for your vehicle.
8. Can I take a long trip with the check engine light on?
It is not advisable to start a long journey without diagnosing an illuminated check engine light. A steady light indicates a detected fault that needs investigation. A flashing light can indicate a serious engine misfire, so stop driving when safe and arrange professional assistance.
9. Does carrying heavy luggage affect fuel economy and handling?
Yes. Additional weight increases the energy required to move your vehicle and can affect fuel economy, braking distance, tire wear, and handling. Distribute luggage evenly, secure heavy items low, and never exceed the manufacturer’s permitted vehicle load.
10. Does this road trip checklist apply to electric cars?
Most of the checklist also applies to electric vehicles. Although EVs do not require traditional engine oil changes, they still need tire, brake, suspension, lighting, wiper, coolant-system, and 12-volt battery checks where applicable. You should also plan charging stops and carry the appropriate charging cable.
11. How can I reduce the chances of a car breakdown during a road trip?
Follow your vehicle’s maintenance schedule, inspect essential components before departure, maintain correct tire pressure, test the battery, check fluid levels, and address warning lights or unusual symptoms. Carry basic emergency equipment and plan your fuel or charging stops ahead of time.
12. Is a professional car inspection necessary before every long trip?
Not necessarily. A professional inspection may not be required before every journey if your car is properly maintained and has no known issues. However, it is strongly recommended when servicing is overdue, the vehicle has a questionable maintenance history, or you have noticed unusual performance or mechanical problems.