
To clean synthetic leather car seats, remove loose dirt, wipe with a soft cloth lightly dampened with the cleaner your vehicle manufacturer recommends, then remove any residue and dry the surface. Work gently, use as little moisture as practical, and keep liquid out of seams and perforations.
The important detail is the seat material, not whether a bottle says “leather cleaner.” Faux leather and vegan leather can have different surface coatings, so a product intended for natural hide is not automatically suitable. Your owner’s manual or the manufacturer’s upholstery-care instructions should guide the cleaner you use, especially for stains or disinfecting.
What Kind of Synthetic Leather Is in Your Car?
Synthetic leather is a manufactured upholstery material designed to resemble leather rather than animal hide. It commonly uses a polymer surface over a backing, but the construction and finish vary. Those differences affect which cleaners the surface can tolerate.
Faux and Vegan Labels Don’t Specify the Coating
“Faux leather,” “leatherette,” and “vegan leather” are broad descriptions, not complete cleaning instructions. Synthetic upholstery may use polyurethane, vinyl, or another manufacturer-specific material. A vegan label alone does not establish its chemical compatibility.
Find the upholstery description in the vehicle’s manual, care guide, or original specifications. Some seats also combine materials, so a smooth center panel, textured bolster, and fabric insert may need different treatment.
Perforations and Seams Need Less Moisture
Perforated upholstery has small openings that can let liquid reach material beneath the surface. Stitching, panel joints, and seat edges are also places where excess cleaner can collect.
Use a barely damp cloth around these areas rather than spraying the seat. Heated or ventilated seats still need the same care against excess moisture; their features do not make saturation safe.
Which Cleaners Suit Synthetic Leather Seats?
Start with the least aggressive method that your vehicle’s care instructions allow. Cleaner compatibility matters more than fragrance, foam, or promises to restore a new-car shine.
Manufacturer Approval Matters More Than Product Branding
Choose a cleaner explicitly suitable for your upholstery and consistent with the vehicle manufacturer’s directions. A general leather cleaner, all-purpose interior cleaner, or household wipe may contain ingredients the seat maker does not recommend.
A mild soap solution is an option only when the care instructions permit it. Follow the specified product and dilution rather than guessing: extra soap can leave a film and create more wiping work.
A Hidden-Area Test Can Reveal Immediate Problems
Test the approved cleaning method on a discreet area with the same material and finish. Let it dry, then look for color change, uneven sheen, tackiness, or surface softening before treating visible panels.
An obvious surface change means you should stop. A successful spot test does not override a manufacturer’s warning or prove that repeated use will be harmless.
Match the Cleaning Method to the Mess
Loose dust, fresh spills, and transferred dye need different responses. Use these starting points to avoid treating a simple cleanup like a stain-removal job.
| Seat condition | First approach | Important limit |
|---|---|---|
| Dust, crumbs, and grit | Vacuum gently with a clean upholstery attachment | Avoid scraping the coating with hard tool edges |
| Light everyday soil | Wipe with a lightly dampened cloth and the approved cleaner | Do not soak the surface or leave cleaner residue |
| Fresh drink or food spill | Lift solids and blot liquid before cleaning | Keep moisture from spreading into seams or holes |
| Denim dye or ink | Consult the upholstery-specific stain instructions | Avoid experimenting with solvents or repeated scrubbing |
| Sticky, peeling, or cracked finish | Stop aggressive cleaning and seek repair advice | Cleaning cannot replace a failed surface coating |
How to Clean Synthetic Leather Car Seats Step by Step
Clean when the seats are cool and the vehicle is parked somewhere you can work comfortably. Gather clean microfiber cloths, a vacuum with a suitable upholstery attachment, and the manufacturer-approved cleaner or cleaning solution before starting.
1. Inspect the Surface Before Wiping
Look for grit, dried food, stains, cracks, and peeling areas. Note where liquid could enter stitching, perforations, or gaps around the seat controls.
Separate ordinary dirt from damaged finish. If the surface is lifting or flaking, rubbing harder can remove more of the coating rather than make it clean.
2. Remove Loose Dirt Without Scraping
Vacuum crumbs and dust using a clean, soft upholstery attachment. Keep hard nozzle edges from dragging across the seat, and use gentle suction around seams and damaged areas.
Lift loose particles from creases before wiping. Otherwise, the cloth can drag grit over the finish. Avoid sharp picks or stiff brushes for digging debris out of stitching.
3. Prepare a Cloth, Not a Wet Seat
Apply cleaner to a microfiber cloth if the product directions allow that method. The cloth should be damp enough to clean without dripping or releasing liquid when pressed.
For an approved soap solution, follow the vehicle manufacturer’s instructions. Keep the bucket or bottle positioned where a spill cannot soak the upholstery, seat controls, or floor wiring.
4. Wipe One Small Section Gently
Work across a manageable section using light, overlapping strokes. Turn the cloth to a clean face as it collects dirt, and replace it when necessary rather than spreading soil across adjacent panels.
Give bolsters and frequently touched areas careful attention, but do not increase pressure simply because a mark remains. Persistent discoloration may need a different approved treatment, not more abrasion.
5. Remove Residue as Directed
Follow the cleaner’s instructions for residue removal. If a separate water wipe is required, use another cloth lightly dampened with clean water rather than rinsing the seat.
Work carefully around stitching and perforations. Repeated wet passes can introduce more moisture than the original cleaning, so wring the cloth thoroughly and avoid flooding any area.
6. Dry the Seat Before Using It
Wipe away remaining surface moisture with a clean, dry microfiber cloth. Allow the upholstery to finish drying with suitable ventilation, and wait until it is dry before sitting down or installing a seat accessory.
Do not use a hair dryer, heat gun, or seat heater as a drying shortcut. Excess heat can affect the finish, and heating the surface does not address moisture trapped beneath it.
How to Handle Stains Without Overcleaning
Stains call for a targeted response, not a stronger version of the routine wash. First identify what caused the mark and whether the surface is still intact.
Blot Fresh Spills Before They Spread
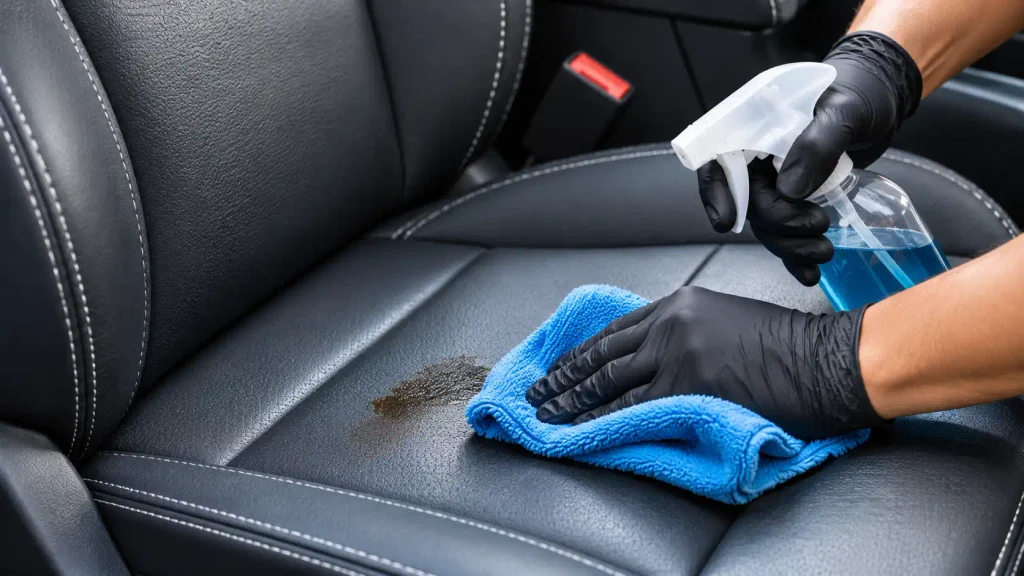
Lift food solids carefully, then blot liquid with an absorbent cloth. Avoid rubbing a fresh spill outward or pressing it into perforations.
Follow with the approved cleaning method. If a substantial spill has entered the seat, seek guidance from the vehicle manufacturer or an upholstery professional rather than assuming a dry surface means the inside is dry.
Treat Ink and Dye Transfer Cautiously
Denim dye and ink can be difficult to remove without affecting the seat’s color or coating. Use only a stain treatment approved for that upholstery, following its contact and removal instructions.
Do not improvise with nail polish remover, solvent-based adhesive remover, or an abrasive sponge. Stop if the finish changes or the stain does not respond to the permitted treatment.
Don’t Mistake Coating Failure for Dirt
A sticky, peeling, or persistently discolored patch may reflect surface deterioration rather than removable grime. More cleaner and harder rubbing can make that damage worse.
An automotive upholstery specialist can help distinguish contamination from coating failure. Cleaning will not repair cracking, replace missing finish, or restore a separated backing.
Cleaning Mistakes That Can Damage Faux Leather
Many avoidable problems come from using too much force, liquid, or product. A clean seat should not need an oily dressing or a heavily perfumed finish to feel maintained.
- Using abrasive tools: Melamine foam, stiff brushes, and scouring pads can alter the coating’s texture or sheen.
- Assuming disinfectants are universally safe: Alcohol, bleach, and other disinfectants have material-specific restrictions. Use them only when the upholstery instructions explicitly permit the product and method.
- Applying natural-leather conditioner automatically: Synthetic upholstery does not have the same care needs as animal hide. Unapproved oils, waxes, or conditioners may leave residue.
- Using steam without approval: Heat and moisture may affect the finish or underlying construction. Do not assume a steam cleaner is safe because it avoids chemicals.
- Covering a damp seat: Seat covers and cushions can slow drying. Let the upholstery dry first and follow vehicle guidance for accessories, especially around seat-mounted airbags.
Frequently Asked Questions
Can I use dish soap on synthetic leather car seats?
Use dish soap only if your vehicle manufacturer permits that type of mild soap solution. Follow its dilution and removal instructions, since concentrated or poorly removed soap can leave residue. Otherwise, choose the recommended upholstery cleaner.
Are baby wipes safe for faux leather seats?
Baby wipes are not automatically suitable for automotive synthetic leather. Their lotions, fragrances, and cleaning ingredients vary, and skin compatibility does not establish upholstery compatibility. A soft cloth used with the approved cleaning method is a more controlled choice.
How often should I clean synthetic leather seats?
Clean spills promptly and remove loose dirt when it accumulates. The need for a full wipe-down depends on use, clothing dye, food, pets, and visible soiling rather than one schedule that suits every vehicle. Avoid repeated chemical cleaning when simple dust removal is enough.
Can synthetic leather seats be disinfected?
Some synthetic upholstery permits specific disinfecting products or procedures, but there is no universal safe disinfectant. Follow both the vehicle’s material-care guidance and the disinfectant label. If their requirements conflict, contact the vehicle manufacturer rather than changing the procedure yourself.
Will cleaning remove scratches or peeling?
Cleaning will not repair scratches, peeling, or missing surface coating. It may remove dirt that makes a mark more visible, but physical damage needs a suitable repair assessment. Avoid scrubbing damaged areas in an attempt to blend them in.
Keep the Finish Clean With Gentle Care
The safest approach to synthetic leather seat care is straightforward: identify the material, remove grit first, use an approved cleaner sparingly, and dry the surface afterward. Treat stubborn stains as a separate problem, not a reason to keep scrubbing. Gentle routine care helps preserve the finish without adding unnecessary products or moisture.