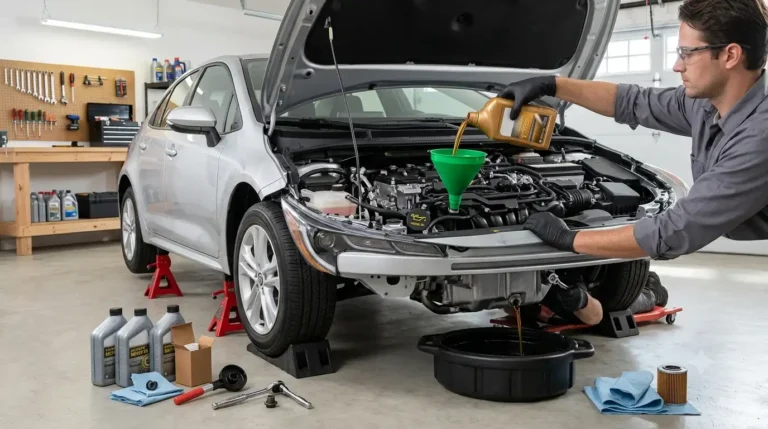
Changing your own oil takes most people 20 to 30 minutes and requires only a few basic tools: a wrench, an oil filter wrench, a drain pan, and a jack if your car sits low. The process itself follows the same seven steps regardless of vehicle, though exact drain plug and filter locations vary by model.
This guide walks through each step in order, the tools and materials you’ll need beforehand, and a few details that trip up first-time DIYers.
What Do You Need Before You Start?
You’ll need new oil in the correct type and quantity for your engine, a new oil filter, a wrench that fits your drain plug, an oil filter wrench, a drain pan, and a funnel. Your owner’s manual lists the exact oil specification and capacity, which is worth checking rather than guessing, since using the wrong viscosity can affect engine performance.
Jack stands or ramps are also necessary on most cars to get enough clearance to work underneath safely. Gloves and a few rags help keep the job clean, since oil changes are inherently a little messy no matter how careful you are.
Step 1: Warm Up the Engine Briefly
Running the engine for three to five minutes before starting thins the oil slightly, which helps it drain faster and more completely. The oil shouldn’t be hot enough to burn you, just warm enough to flow easily rather than sitting thick and slow in the pan.
Turn the engine off and let it sit for a couple of minutes before getting underneath the car. This brief warm-up step alone can noticeably speed up the draining process compared to draining cold oil straight from a car that’s been sitting overnight.
Step 2: Raise the Car and Locate the Drain Plug
Raise the front of the car using a jack, then support it securely with jack stands or drive it onto ramps before going underneath. Never rely on a jack alone to hold the car up while you’re working beneath it.
The drain plug is located at the lowest point of the oil pan, usually visible once you’re underneath looking up toward the engine. Position your drain pan underneath the plug before loosening anything, since oil starts flowing the moment the plug comes free.
Step 3: Drain the Old Oil
Loosen the drain plug with your wrench, then finish removing it by hand, pulling it away quickly as oil begins to flow to avoid it running down your arm. Let the oil drain completely, which usually takes five to ten minutes for it to slow to a steady drip.
Once it’s mostly drained, reinstall the drain plug and tighten it to your manufacturer’s specified torque, since overtightening can strip the pan’s threads or damage the gasket. A plug that’s too loose, on the other hand, risks a slow leak later.
Step 4: Remove and Replace the Oil Filter
Locate the oil filter, usually a cylindrical canister screwed into the engine block, and use an oil filter wrench to loosen it since it’s typically too tight to remove by hand. Position your drain pan underneath it too, since a filter change also releases residual oil.
Before installing the new filter, apply a thin layer of fresh oil to the new filter’s rubber gasket, which helps it seal properly and makes future removal easier. Screw the new filter on by hand until it’s snug, then give it an additional three-quarter turn, without using a wrench to over-tighten it.
Step 5: Add New Oil
Locate the oil fill cap on top of the engine, remove it, and use a funnel to pour in the new oil slowly. Add slightly less than your engine’s full rated capacity at first, since it’s easier to top off than to remove excess oil afterward.
Replace the fill cap securely once you’ve added oil. This step is straightforward, but pouring slowly with a funnel avoids spills onto the engine, which can smoke or smell unpleasant when the engine warms up.
Step 6: Check the Oil Level
Start the engine and let it run for about a minute, which circulates the new oil through the system and fills the filter. Turn the engine off, wait two to three minutes for the oil to settle back into the pan, then check the level using the dipstick.
Pull the dipstick out, wipe it clean, reinsert it fully, then pull it out again to read the level against the markings. Add small amounts of oil as needed until the level sits between the minimum and maximum marks.
Step 7: Dispose of the Old Oil Properly
Pour the used oil from your drain pan into a sealed container, ideally one of the empty oil jugs from your new oil. Most auto parts stores accept used oil for free recycling, and many will also take your old filter.
Never pour used oil down a drain or onto the ground, since it’s a serious environmental contaminant that’s illegal to dispose of that way in most areas. Proper recycling turns the used oil into re-refined oil or other products rather than letting it pollute soil or waterways.
How Do You Know You Did the Job Correctly?
A correct oil change results in an oil level sitting between the dipstick’s minimum and maximum marks, with no visible leaks around the drain plug or filter after the car has run for a few minutes. Checking underneath the car for drips after your first drive is a good habit for peace of mind.
The oil should also look clean and appropriately colored on the dipstick, not immediately dark, which would suggest old oil wasn’t fully drained. If you notice a leak at either the plug or the filter, it usually means one of them wasn’t tightened to the correct torque and needs rechecking.
Conclusion
Changing your own engine oil is one of the easiest and most valuable DIY maintenance tasks you can learn. With the right tools, the correct engine oil, and careful attention to each step, you can complete the job in about 30 minutes while saving money and helping extend your engine’s lifespan. Always use the oil grade recommended by your vehicle manufacturer, replace the oil filter with every oil change, and dispose of used oil responsibly through a recycling center or auto parts store. After finishing, double-check the oil level and inspect for leaks to ensure everything is sealed correctly. Following these simple practices will keep your engine properly lubricated, improve reliability, and give you confidence in maintaining your vehicle at home.
Frequently Asked Questions
How much oil does my car need for an oil change?
Most passenger vehicles require 4 to 8 quarts (3.8–7.6 liters) of engine oil, but the exact amount depends on your engine. Always check your owner’s manual or the oil cap for the correct oil capacity and viscosity. To avoid overfilling, add slightly less than the recommended amount, then check the dipstick and top off as needed.
Can I use the same oil filter wrench on different vehicles?
Yes, many oil filter wrenches fit multiple filter sizes, especially adjustable band or strap-style models. However, not every wrench works with every oil filter. Before starting, make sure your wrench matches your filter’s diameter to prevent slipping or damaging the filter during removal.
What happens if I overtighten the oil drain plug?
Overtightening the drain plug can damage the oil pan threads, crush the drain plug washer, or cause future oil leaks. The best practice is to tighten the drain plug to your vehicle manufacturer’s specified torque using a torque wrench. This ensures a proper seal without risking expensive repairs.
Is it normal for oil to drip after an oil change?
A few small drops of leftover oil immediately after the oil change can be normal. However, continuous dripping or a growing oil spot under the vehicle usually indicates a loose drain plug, improperly installed oil filter, or damaged sealing washer. Recheck both components and inspect for leaks after your first short drive.
How soon can I drive after changing my engine oil?
You can drive your vehicle immediately after changing the oil, provided the oil level is correct and there are no visible leaks. Let the engine idle for about a minute first, then turn it off, wait a few minutes, recheck the dipstick, and inspect underneath the vehicle before driving. It’s also a good idea to check for leaks again after your first 10–15 miles of driving.