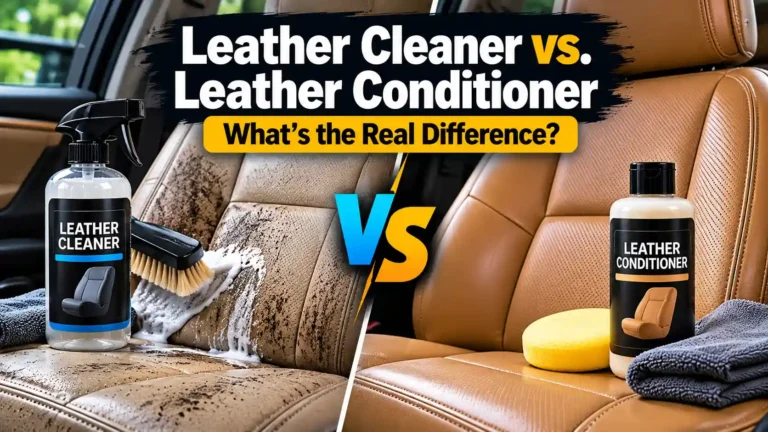
Leather cleaner removes dirt and residue. Leather conditioner is a care treatment used after cleaning when the leather finish and product instructions support it. They serve different purposes, and applying conditioner over a dirty seat does not replace the cleaning step.
The real buying decision also depends on the upholstery. Many automotive leather seats have a protective surface finish, and some interiors combine genuine leather with vinyl or synthetic panels. A product sold for natural leather is not automatically the right treatment for every section of a seat.
This guide explains leather cleaner vs. leather conditioner in practical terms: what each does, when you need it, how a protectant differs, and which purchase makes sense for your car. It uses manufacturer guidance rather than claims from our own product testing.
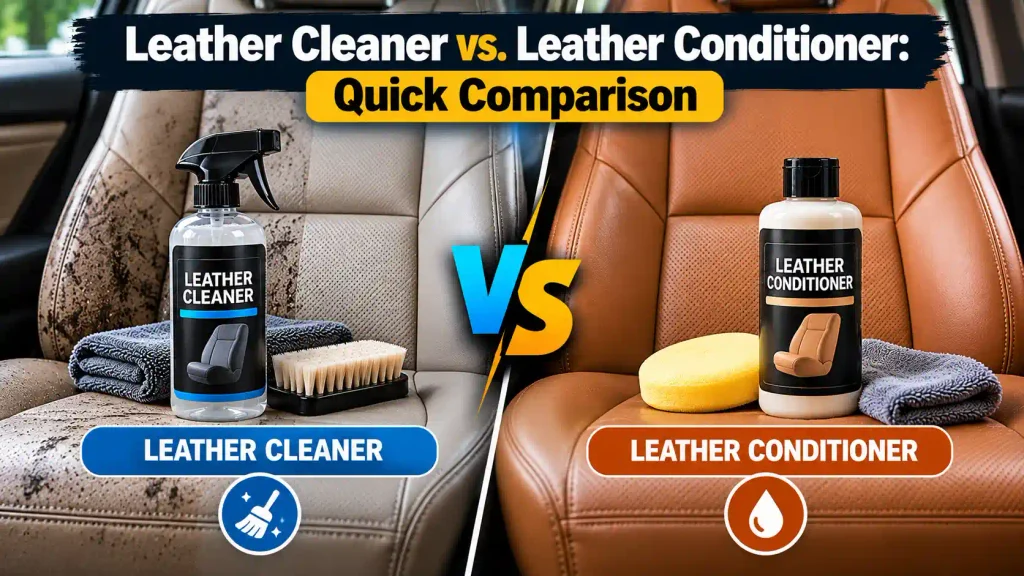
Leather Cleaner vs. Leather Conditioner: Quick Comparison
The main difference between leather cleaner and leather conditioner is the job each performs. Use this comparison to decide whether your seats need contamination removed, an approved care treatment, or a separate surface protectant.
| Buying factor | Leather cleaner | Leather conditioner |
|---|---|---|
| Main role | Remove supported dirt, oils, and residue | Provide the specified care treatment for compatible leather |
| Best starting situation | Grimy, marked, or regularly used seats | Clean leather where conditioning is permitted and appropriate |
| Does it replace cleaning? | It is the cleaning stage | No; ordinary conditioner should not cover existing grime |
| Typical handling | Controlled application, gentle cleaning, residue removal | Thin application and the specified absorption or finishing process |
| Compatibility | Depends on finish, material, and formula | Depends on leather type, surface finish, and formula |
| Common misuse | Scrubbing too hard or soaking the surface | Overapplication that leaves residue or changes appearance |
| Effect on damage | Does not repair tears or worn finish | Does not rebuild cracked coating or missing material |
| Best purchase question | Will this clean my exact upholstery safely? | Does my upholstery actually need and accept this treatment? |
What Does Leather Cleaner Do on Car Seats?
A leather cleaner lifts the contamination its formula is designed to address on approved upholstery. The goal is a clean surface with the intended appearance and feel, not a wet shine or a dramatic color change.
Leather cleaner removes everyday dirt and oils
Seat surfaces collect dust, body oils, spills, and residue from products used inside the cabin. A compatible cleaner helps remove this buildup so it does not remain at contact areas such as bolsters and seat cushions.
Vacuum loose debris first and use controlled cleaning. The cleaner needs to lift soil into the cloth or other approved tool, not simply move it around. Change cloth faces as they become dirty and follow the required residue-removal step.
A shiny seat may be dirty, worn, or overtreated
Shine alone does not tell you exactly what the seat needs. Oily buildup or previous dressing can contribute, but wear and changes in the surface finish can also affect appearance. Make a small test clean before deciding the whole seat needs a stronger chemical.
Do not keep scrubbing until every glossy area becomes matte. If the finish is worn, more cleaning can make damage worse. A cleaner is useful for contamination; it is not a repair for lost pigment or a damaged coating.
Cleaner strength should match the contamination
For routine maintenance, start with the mildest suitable product recommended for the finish. A stronger cleaner may have a role for heavier contamination, but stronger is not automatically better for regular use.
Denim dye transfer, ink, and old stains may need a specific approved treatment or professional assessment. Do not assume a general leather cleaner can safely remove every stain through repeated forceful scrubbing.
What Does Leather Conditioner Do on Car Seats?
A leather conditioner provides the care function described by its manufacturer on compatible leather. Depending on the product and finish, that can involve conditioning suitable material or maintaining the surface’s feel. It is not a substitute for dirt removal or damage repair.
Conditioner suitability depends on the leather finish
Absorbent natural leather and heavily finished automotive leather do not behave identically. A protective top finish can limit how a product reaches the underlying material. Avoid claims that every conditioner necessarily penetrates every car seat deeply.
Choose a product approved for the exact leather and follow its instructions. If it remains on the surface, feels greasy, or changes the finish undesirably, reassess compatibility and application amount instead of adding another layer.
More conditioner does not mean better care
Excess treatment can leave residue, create unwanted shine, or make the surface feel slippery. Use the stated amount, allow the specified working period, and remove excess when directed. Inspect after the surface has settled rather than judging only while it is wet.
Do not apply a rich conditioner automatically after every wipe-down. The vehicle’s instructions, product guidance, seat condition, and exposure should determine whether a conditioning step is appropriate.
Conditioner does not repair cracks, peeling, or missing color
A care treatment may be suitable for leather maintenance, but it cannot rebuild a torn seam or replace a worn surface finish. Peeling synthetic upholstery is another repair problem and should not be diagnosed as natural leather that simply needs more oil.
If the surface is cracked, sticky, shedding color, or coming away from its backing, stop experimenting with treatments. Identify the material and arrange an appropriate repair assessment.
Leather Conditioner vs. Leather Protectant: Is There a Difference?
A leather protectant has a surface-protection role that can differ from conditioning. For newer finished automotive leather, contamination control and wear-related protection may be more relevant than applying a rich conditioning product.
Protectants address a specified surface-care goal
Some products are designed to help limit soiling, clothing dye transfer, or friction-related wear on approved finished leather. Colourlock’s Leather Shield, for example, is positioned for newer pigmented leather and directs users to clean away dirt before protection.
That does not make it a universal product for porous leather, suede, or nubuck. Buy a protectant for its stated surface and purpose. Do not use the words protector and conditioner interchangeably when the labels identify different jobs.
Coated automotive leather may need cleaning and protection
On suitable newer coated seats, a compatible cleaning-and-protection routine can be the more useful starting purchase. An extra conditioner should have a specific reason and approval, rather than being added because every leather-care kit seems to include one.
The vehicle manual takes priority for the upholstery in your car. Manufacturers can specify different care methods, and even recommendations within one brand can vary by vehicle and leather type.
Do Your Car Seats Need Cleaner, Conditioner, or Both?
Your seat’s material and current condition determine which leather-care product to buy. This decision table helps separate routine cleaning from conditioning, protection, and repair.
| Seat condition or material | Sensible first purchase or action | What to avoid |
|---|---|---|
| Finished leather with ordinary grime | Compatible mild cleaner and clean cloths | Conditioner applied over dirt |
| Newer coated leather in good condition | Approved cleaning method; consider suitable surface protection | Unnecessary rich treatment without approval |
| Natural leather where conditioning is permitted | Cleaner plus a compatible conditioner if appropriate | Assuming one conditioner fits every finish |
| Synthetic leather or vinyl | Product approved for that synthetic surface | Automatic use of natural-leather conditioner |
| Suede, nubuck, or suede-like inserts | Dedicated material-specific care method | General smooth-leather liquids |
| Perforated or ventilated leather | Approved method with controlled moisture and application | Filling holes with liquid or thick residue |
| Cracked, peeling, or worn-colored areas | Material identification and repair assessment | Repeated cleaning or conditioning as a repair substitute |
Buy cleaner first when dirt is the problem
If your seats are dirty, a compatible cleaner is the useful first purchase. Add the cloths or tools specified by the product and keep the process gentle. Assess the result once the surface is clean and dry before deciding a second treatment is needed.
This avoids buying a conditioner to solve contamination. It also makes the condition of the finish easier to evaluate without a new layer of residue over it.
Buy conditioner when the finish supports its use
Choose conditioner when the vehicle guidance and exact product approve it for your leather. Clean as directed first, then follow the care-treatment instructions. Test for color and feel changes in a hidden area before treating visible sections.
Some dedicated systems use a different order. Leatherique, for example, identifies Rejuvenator as its first stage and Prestine Clean as the subsequent cleanup stage. Follow the complete system’s instructions rather than mixing that sequence with unrelated products.
Buy a protectant when surface protection is the priority
A compatible protectant may suit newer finished leather when your goal is limiting the specified soiling or wear exposure. Choose it for the finish and protection function stated on the label, with cleaning completed beforehand.
Protection does not make spills or clothing transfer harmless. Continue cleaning promptly and inspecting high-contact areas. A protective layer supplements care rather than replacing it.
Leather Cleaner and Conditioner Buying Guide for Car Interiors
The best leather-care purchase matches the upholstery, contamination, and finish you want to preserve. These checks help avoid buying an unsuitable product or applying several treatments without a clear purpose.
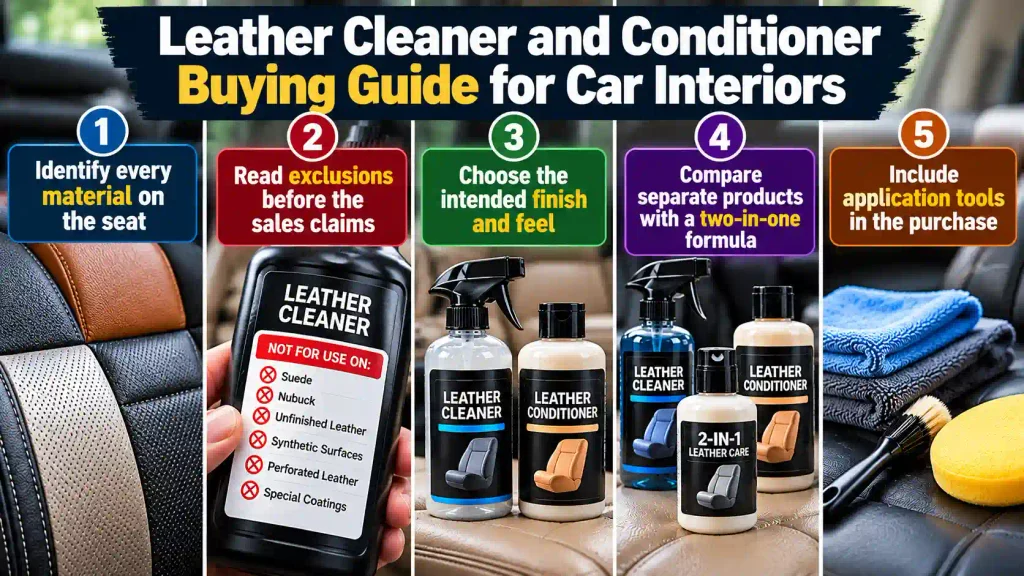
Identify every material on the seat
Consult the vehicle’s upholstery specification and care instructions. A leather-trimmed seat can contain multiple materials, so do not assume the sides, backs, inserts, and seating panels share the same surface.
Names such as Nappa describe aspects of leather quality or construction but do not, by themselves, tell you the complete care method. Confirm the actual finish and approved treatment. Synthetic leather also needs its own compatibility check regardless of leather-like appearance.
Read exclusions before the sales claims
Check for limits involving suede, nubuck, unfinished leather, synthetic surfaces, perforation, or special coatings. Broad “all leather” language should not override a specific exclusion elsewhere on the label.
Likewise, a product advertised as pH-balanced is not automatically approved for every finish. Compatibility and the required method are more useful buying details than one isolated formulation phrase.
Choose the intended finish and feel
Many owners want a clean, natural-looking seat without greasy gloss. Inspect whether the product is a cleaner, conditioner, dressing, or protectant and whether its stated finish suits that goal.
Do not equate shine with healthy leather or softness with complete restoration. A properly cared-for seat should meet the vehicle’s intended appearance and use requirements, not the appearance of freshly applied product.
Compare separate products with a two-in-one formula
Separate cleaner and care products give you control over whether the second stage is needed. That is useful when dirt is heavier, compatibility needs attention, or the seats already have adequate protection.
A compatible cleaner-conditioner can be convenient for light maintenance, but its label defines what it can do. Do not expect a light combined product to remove heavy contamination or repair damage. Choose convenience only when it matches the actual job.
Include application tools in the purchase
Buy clean, suitable cloths and any gentle tools permitted by the product and upholstery maker. A cleaner used with an abrasive pad can become the wrong method even if the liquid itself is suitable.
Keep leather-care cloths separate from greasy dressing or paint-polishing towels. Contaminated cloths can deposit residue on seats and confuse the result. Clean tools and controlled product amounts are part of the purchase decision.
How to Use Leather Cleaner and Conditioner Correctly
A controlled leather-care routine removes contamination without soaking the upholstery and applies extra treatment only when appropriate. Follow the vehicle and product instructions, especially for perforated seats, seat equipment, and specialty leather.
1. Vacuum debris before applying liquid
Use a suitable vacuum attachment to remove loose dust and grit from the seat and seams. Avoid scraping trim or dragging a dirty attachment over the leather. This reduces the need to rub debris into the surface during cleaning.
2. Test the approved product in a hidden area
Use the intended amount and method on a small inconspicuous section. Allow the area to dry or settle as directed and inspect for unwanted changes. Stop if color transfers unexpectedly, the finish changes, or the material reacts poorly.
3. Apply cleaner with controlled moisture
Apply to a cloth or other approved tool when the directions call for it. Work a manageable section without flooding seams, perforations, switches, or nearby equipment. Avoid assuming a foaming product is suitable for every ventilated seat.
Different vehicle instructions can specify different methods, including limits on foam for perforated leather. Use the guidance for your actual vehicle instead of a blanket technique taken from another seat type.
4. Remove residue and allow the surface to dry
Wipe away lifted dirt and cleaner using the stated method. Change to clean cloth faces so the contamination leaves the seat. Inspect the dry surface before continuing to any conditioning or protection stage.
5. Apply only the approved care treatment
If conditioner or protectant is appropriate, use its specified amount and finishing process. Do not combine several products simply because they all mention leather. A supported two-part system is different from an improvised stack of unrelated treatments.
6. Check feel and appearance before using the seat
Allow the required drying or settling period and inspect for residue. Remove excess only as directed. Keep slippery or incompatible treatments off steering wheels, pedals, and other grip-critical surfaces; use their own approved care methods.
Common Leather-Care Mistakes That Damage the Finish
Leather-care mistakes often come from excessive product, aggressive tools, or treating different materials as identical. Avoid these habits to keep cleaning and conditioning focused on the actual surface.
- Applying conditioner to a dirty seat instead of cleaning it.
- Treating every leather-looking panel as natural leather.
- Scrubbing worn glossy areas until pigment or finish is removed.
- Soaking seams or perforations to reach more dirt.
- Using unapproved household cleaners, strong solvents, or abrasive pads.
- Applying rich treatment repeatedly because residue makes the seat appear shiny.
- Ignoring suede, nubuck, coating, and synthetic-material exclusions.
- Trying to fix peeling, tears, or missing color with another care product.
When a method changes the surface unexpectedly, stop and reassess. More product or force is not a reliable response to an unknown reaction.
How Often Should You Clean and Condition Leather Car Seats?
Leather-seat care frequency should follow use, contamination, material, and the relevant instructions rather than one universal monthly schedule. Cleaning and conditioning do not necessarily need to happen together or equally often.
Clean according to exposure and visible contamination
Remove loose debris regularly and address spills promptly using the approved method. High-contact bolsters and light-colored seats may need attention before less-used panels. Gentle maintenance is preferable to allowing heavy buildup and then attempting aggressive removal.
Condition or protect according to the approved care plan
Use the product and vehicle recommendations for the exact finish. An older natural leather surface and a new coated seat may need different care. Do not assume frequent conditioning is beneficial when the product is not being accepted or the manufacturer recommends another approach.
conclusion
Buy a compatible cleaner first when your car seats are dirty. For newer finished leather, check whether cleaning and approved surface protection meet the need. Buy conditioner when the actual leather, vehicle instructions, and product guidance support that treatment.
For synthetic upholstery, suede-like materials, perforated sections, or damaged finishes, identify the surface before shopping. A product formulated for another material can create more work instead of improving the seat.
The useful leather-care kit is the one with a clear purpose for each item. Cleaner removes contamination; conditioner provides its approved care function; protectant addresses its stated surface-protection goal. Purchase the steps your seats need and apply them correctly.
Frequently Asked Questions
1. What Is the Difference Between Leather Cleaner and Leather Conditioner?
Leather cleaner removes dirt and oils, while leather conditioner provides a care treatment for compatible leather. They serve different purposes and are not interchangeable.
2. Should You Clean Leather Seats Before Conditioning?
Yes, clean the seats first when conditioning is appropriate. This removes dirt and residue before treatment. Always follow your product’s instructions.
3. Do Modern Leather Car Seats Need Conditioner?
Not always. Many modern seats have protective coatings and may need only approved cleaning and protection. Check your vehicle’s care instructions first.
4. Can You Use Leather Conditioner on Synthetic Leather?
Only if the product is approved for synthetic leather. Some conditioners designed for natural leather may not be suitable for vinyl or synthetic upholstery.
5. Is Leather Protectant Better Than Conditioner?
Neither is universally better. Conditioner provides a care treatment, while protectant offers specific surface protection. Choose according to your upholstery and its needs.
6. Can Leather Conditioner Repair Cracked Car Seats?
No, leather conditioner cannot repair cracks, peeling coatings, or missing color. Significant damage may require professional repair.
7. How Often Should You Clean and Condition Leather Car Seats?
Clean seats when needed and follow the manufacturer’s instructions. Condition only when appropriate for your leather, as excessive treatment can leave unwanted residue.