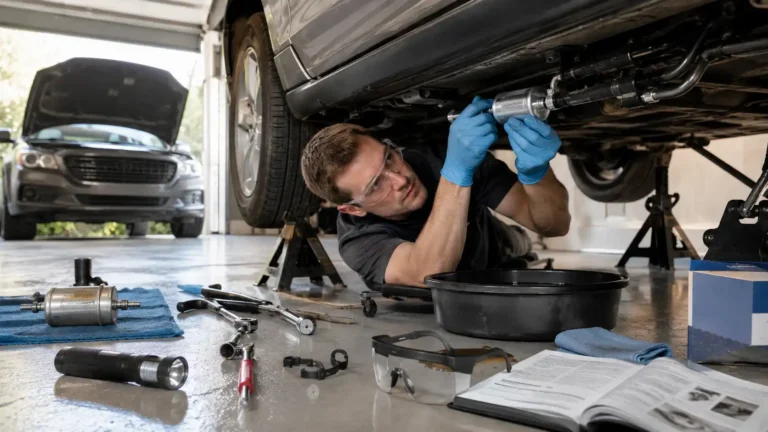
Replacing a fuel filter means relieving fuel system pressure first, then disconnecting and swapping the old filter for a new one in the same orientation, following the fuel line from the tank toward the engine. This job ranges from a simple five-minute task on vehicles with an easily accessible inline filter to a more involved process on vehicles where the filter is integrated into the fuel pump assembly inside the tank.
This guide covers what a fuel filter does, the warning signs it’s clogged, how to relieve fuel pressure safely, the replacement steps, and how filter design differs between older and newer vehicles.
What Does a Fuel Filter Actually Do?
A fuel filter removes dirt, rust particles, and other contaminants from gasoline before it reaches the engine, protecting sensitive components like fuel injectors from damage caused by debris. Fuel injectors have extremely small openings, and even tiny particles can clog or wear them prematurely without adequate filtration upstream.
Over time, a fuel filter accumulates trapped debris until it becomes restrictive enough to limit fuel flow, which is when performance problems begin to show up. This gradual clogging process is normal and expected, which is why manufacturers build a replacement interval into the maintenance schedule rather than expecting the filter to last indefinitely.
What Are the Warning Signs of a Clogged Fuel Filter?
A failing fuel filter produces a fairly recognizable set of symptoms, since restricted fuel flow affects engine performance in predictable ways.
- Engine hesitation or sputtering under acceleration – the engine struggles to get enough fuel when demand increases suddenly.
- Difficulty starting the engine – reduced fuel flow can make it harder for the engine to get the fuel it needs during startup.
- Stalling, particularly at idle or low speeds – a severely clogged filter may restrict flow enough to cause the engine to stall unexpectedly.
- Reduced power when climbing hills or under load – fuel demand increases under these conditions, and a clogged filter can’t keep up.
- Poor fuel economy – the engine control system may compensate for inconsistent fuel delivery in ways that reduce overall efficiency.
These symptoms can overlap with other issues, like a failing fuel pump or dirty injectors, so a clogged filter isn’t always the only possible explanation. Still, it’s one of the most common and least expensive causes to rule out first.
How Do You Relieve Fuel System Pressure Before Starting?
Modern fuel injection systems hold pressurized fuel in the lines even when the engine is off, and this pressure must be released before disconnecting any fuel line to avoid a dangerous spray of gasoline. The most common method involves locating the fuel pump relay or fuse, removing it, then starting the engine and letting it run until it stalls from lack of fuel, which clears most of the residual pressure from the lines.
Some vehicles include a dedicated Schrader valve on the fuel rail, similar to a tire valve, that allows you to safely bleed off pressure using a small tool designed for this purpose. Checking a repair manual for your specific vehicle’s recommended pressure relief method before starting the job is worth doing, since the exact process and component locations vary between makes and models.
Where Is the Fuel Filter Located on Your Vehicle?
The location of a fuel filter depends on your vehicle’s make, model, and year. Older vehicles typically have an external inline fuel filter that is easy to access, while most modern vehicles use a fuel filter integrated into the fuel pump module inside the fuel tank. Knowing your filter’s location before starting the job helps determine the tools, time, and level of difficulty required.
1. Inline Fuel Filter (Under the Vehicle or in the Engine Bay)
Many older gasoline vehicles use an inline fuel filter mounted along the fuel line between the fuel tank and the engine. It’s commonly attached to the vehicle’s frame rail, underneath the car, or occasionally inside the engine compartment. Because it is externally mounted, replacing this type of filter is usually a straightforward DIY task that requires only basic hand tools.
2. In-Tank Fuel Filter (Inside the Fuel Pump Module)
Most vehicles manufactured over the last 15–20 years have a fuel filter integrated into the fuel pump assembly inside the fuel tank. Replacing this type of filter typically requires removing the fuel tank or accessing the fuel pump through a service panel located beneath the rear seat or cargo area. Since the filter is part of the fuel pump module, replacement is more time-consuming and often more expensive than replacing an inline filter.
3. External Fuel Filter Near the Fuel Tank
Some trucks, SUVs, and a few passenger vehicles use an external fuel filter mounted close to the fuel tank. While it remains outside the tank, access may require lifting the vehicle for additional clearance. This design is generally easier to service than an in-tank filter but may require fuel line disconnect tools depending on the connector type.
How Do You Replace an Inline Fuel Filter (Step by Step)
Replacing an inline fuel filter is a relatively simple DIY maintenance job on vehicles with an externally mounted filter. After safely relieving fuel system pressure, you can remove the old filter, install the new one in the correct direction, and check the fuel system for leaks before driving.
Step 1: Locate the Fuel Filter
Find the inline fuel filter by following the fuel line from the fuel tank toward the engine. On most vehicles, the filter is mounted underneath the vehicle along the frame rail or, less commonly, inside the engine bay. It is typically secured with a bracket and connected using quick-connect fittings or hose clamps.
Step 2: Prepare the Work Area
Place a drain pan or small container underneath the fuel filter to catch any gasoline that may spill when the fuel lines are disconnected. Keep shop towels nearby to wipe up any fuel immediately, and wear safety glasses and fuel-resistant gloves for protection.
Step 3: Disconnect the Fuel Lines
Carefully disconnect the fuel lines from both ends of the old filter. Depending on your vehicle, you may need a fuel line disconnect tool to release quick-connect fittings. If hose clamps are used, loosen them with the appropriate screwdriver or pliers before removing the filter.
Avoid forcing the connectors, as damaged fuel line fittings can cause leaks after installation.
Step 4: Check the Fuel Flow Direction
Before removing the old filter completely, locate the flow-direction arrow printed on its housing. This arrow indicates the direction of fuel flow from the fuel tank toward the engine.
Installing the new filter in the wrong direction can restrict fuel flow and cause poor engine performance or starting problems.
Step 5: Install the New Fuel Filter
Install the replacement fuel filter in the same position and orientation as the original. Make sure the flow-direction arrow points toward the engine.
Secure the filter in its mounting bracket and verify that it sits firmly without excessive movement.
Step 6: Reconnect the Fuel Lines
Reconnect the fuel lines to both ends of the new filter until the quick-connect fittings click securely into place or the hose clamps are tightened properly. Gently pull on each connection to confirm it is fully seated.
Loose or improperly connected fuel lines can lead to dangerous fuel leaks.
Step 7: Prime the Fuel System
Reinstall the fuel pump relay or fuse if it was removed earlier. Turn the ignition key to the “ON” position for about five seconds without starting the engine, then switch it off. Repeat this process two to three times to allow the fuel pump to rebuild pressure in the fuel system.
This helps fill the new fuel filter with fuel before the engine starts.
Step 8: Start the Engine and Inspect for Leaks
Start the engine and let it idle for several minutes while carefully inspecting both ends of the fuel filter for leaks. Look for dripping fuel, damp fittings, or the smell of gasoline.
If you detect any leak, turn the engine off immediately and tighten or reconnect the affected fitting before driving the vehicle.
Why Are In-Tank Fuel Filters More Complicated to Replace?
Vehicles with a fuel pump module design combine the filter with the fuel pump itself inside a single assembly submerged in the fuel tank, which means accessing it typically requires either dropping the tank or removing an access panel, often located under the rear seat or in the trunk floor. This design became more common because it protects the filter from external contamination and reduces the number of external fuel line connections, both of which improve overall reliability.
The tradeoff is that a DIY replacement on this design requires more time, more tools, and in some cases dealing with a nearly full tank of fuel, which many home mechanics prefer to have professionally serviced. If your vehicle uses this design, it’s worth weighing the labor savings against the added complexity and mess before deciding whether to tackle it yourself.
How Often Should a Fuel Filter Be Replaced?
Replacement intervals vary significantly depending on filter type and vehicle design, ranging from every 20,000 to 30,000 miles for some inline filters to essentially the life of the fuel pump for certain in-tank designs that aren’t intended to be serviced separately. Checking your owner’s manual for the specific interval that applies to your vehicle avoids both premature replacement and running an old, restrictive filter longer than intended.
Vehicles that frequently use lower-quality fuel or are driven in areas with older fuel infrastructure may benefit from more frequent filter checks, even if the manufacturer’s standard interval suggests a longer timeframe. Fuel quality directly affects how quickly a filter accumulates the debris that eventually restricts flow.
Conclusion
Replacing a fuel filter is an important maintenance task that helps keep your engine running efficiently by ensuring a steady supply of clean fuel to the injectors. On vehicles with an accessible inline filter, it’s a relatively simple DIY project that can be completed with basic tools after safely relieving fuel system pressure. Newer vehicles with in-tank fuel filters require considerably more labor and may be better left to experienced technicians.
Whether you’re replacing the filter as part of routine maintenance or diagnosing fuel delivery problems, installing the correct filter in the proper orientation and checking carefully for leaks afterward are essential steps. Following your vehicle manufacturer’s recommended service schedule can improve engine performance, extend fuel pump life, and help prevent costly fuel system repairs in the future.
Frequently Asked Questions
How difficult is it to replace a fuel filter yourself?
Replacing an inline fuel filter is generally an easy DIY task that takes about 20 to 60 minutes using basic hand tools. However, vehicles with fuel filters integrated into the fuel pump inside the fuel tank require significantly more work and are often better suited for professional repair.
What are the symptoms of a bad fuel filter?
Common signs of a clogged fuel filter include:
- Engine hesitation during acceleration
- Hard starting
- Engine stalling
- Loss of power when driving uphill
- Reduced fuel economy
- Rough engine performance
These symptoms can also indicate a failing fuel pump or dirty fuel injectors, so proper diagnosis is important.
How often should a fuel filter be replaced?
Service intervals depend on your vehicle. Many older vehicles require replacement every 20,000–30,000 miles, while many newer vehicles use lifetime in-tank filters that are only replaced with the fuel pump assembly if necessary. Always follow your owner’s manual for the correct maintenance schedule.
Can I drive with a clogged fuel filter?
Yes, but it is not recommended. A partially clogged fuel filter can reduce engine performance, while a severely clogged filter may cause stalling, poor acceleration, or prevent the engine from starting. Continuing to drive with a restricted filter can also place additional strain on the fuel pump.
Do I need to relieve fuel pressure before replacing a fuel filter?
Yes. Fuel injection systems remain pressurized even after the engine is turned off. Relieving fuel pressure before disconnecting any fuel line helps prevent gasoline from spraying out, reducing the risk of fire and personal injury.
How much does it cost to replace a fuel filter?
A DIY inline fuel filter replacement typically costs $15–$40 for the replacement part. Professional replacement usually costs $60–$150 for an inline filter, while replacing an in-tank fuel filter or fuel pump module may cost $200–$500 or more, depending on the vehicle.
Can a clogged fuel filter damage the fuel pump?
Yes. A clogged fuel filter restricts fuel flow, forcing the fuel pump to work harder to maintain fuel pressure. Over time, this added workload can shorten the fuel pump’s lifespan and lead to premature failure.
How can I tell if my vehicle has an inline or in-tank fuel filter?
The easiest way is to check your owner’s manual or manufacturer service information. In general, many vehicles built before the early 2000s have replaceable inline filters, while most newer vehicles use an in-tank filter integrated with the fuel pump assembly.
Should I replace the fuel filter when replacing the fuel pump?
Yes. If your vehicle uses a serviceable inline filter, replacing it whenever the fuel pump is replaced is considered good preventive maintenance. For vehicles with an integrated fuel pump module, the filter is usually replaced as part of the complete assembly.