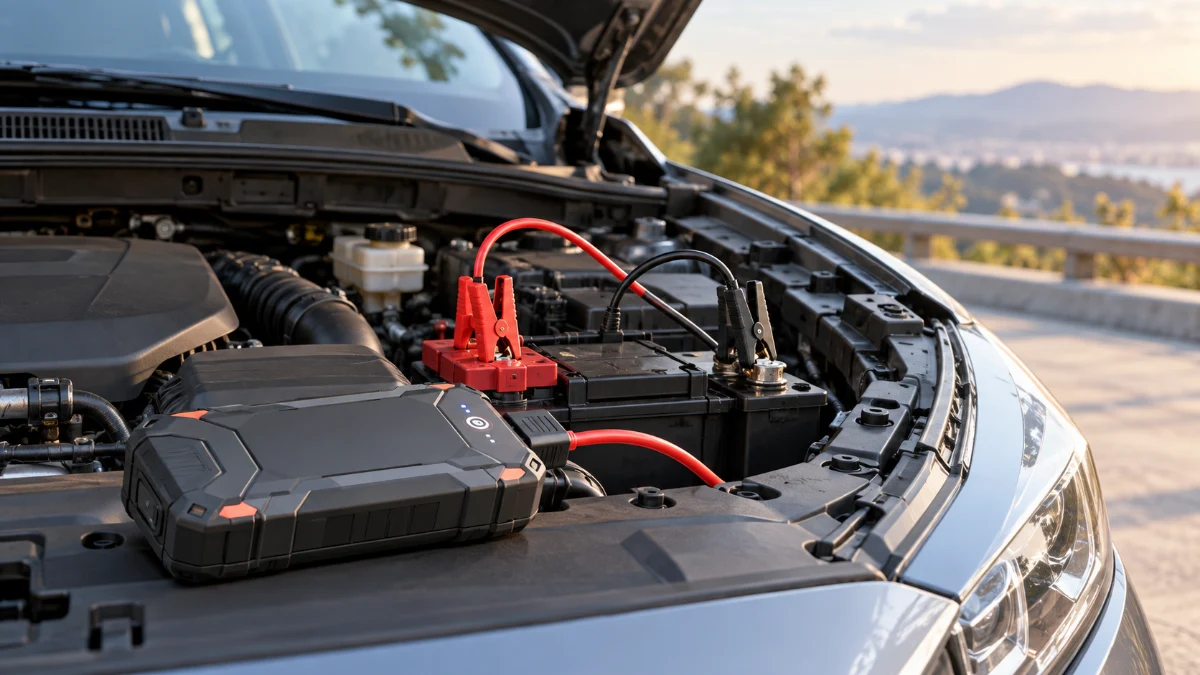
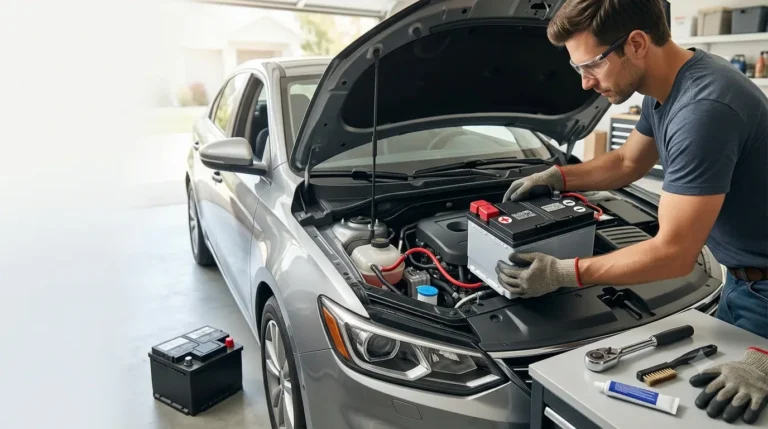
Replacing a car battery yourself is one of the more manageable DIY maintenance jobs for most car owners. If your vehicle uses a conventional 12-volt battery in an accessible location, you usually need only basic hand tools, the correct replacement battery, and about 30–60 minutes.
The process is straightforward, but the order of the battery connections matters. When removing the old battery, disconnect the negative (-) terminal first and then the positive (+). When installing the new battery, reverse the order: positive (+) first and negative (-) last.
Some newer cars use battery management systems, start-stop technology, or battery registration procedures. Before starting, check your owner’s manual for any vehicle-specific instructions.
Quick Answer: How Do You Replace a Car Battery?
To replace a car battery yourself, safely disconnect the old battery, remove its mounting hardware, install the correct replacement battery, and reconnect the terminals in the proper order. For most conventional cars, the complete process is relatively simple.
Follow these steps:
- Park safely and switch the vehicle off.
- Locate the battery and identify both terminals.
- Disconnect the negative (-) terminal first.
- Disconnect the positive (+) terminal.
- Remove the battery hold-down.
- Lift out the old battery.
- Clean the battery tray and terminal connectors.
- Install the new battery.
- Secure the battery with the hold-down.
- Connect the positive (+) terminal first.
- Connect the negative (-) terminal last.
- Start the vehicle and check that everything works.
The easiest rule to remember is:
Negative off first. Negative on last.
Before You Start: Make Sure You Can Replace the Battery Yourself
Most under-hood 12-volt car batteries can be replaced at home, but battery replacement is not equally simple on every vehicle. Modern cars may use additional electronics or require a specific procedure after the new battery is installed.
Be more cautious if your vehicle has:
- A battery mounted under a seat or inside the trunk
- Multiple 12-volt batteries
- Start-stop technology
- A Battery Management System (BMS)
- An AGM or EFB battery
- A battery vent tube
- Electronic sensors attached to the battery terminals
- A hybrid or electric powertrain
- Manufacturer-specific battery registration requirements
Some vehicles require a battery reset, relearn, adaptation, or registration after replacement. If your owner’s manual provides specific battery replacement instructions, follow those instructions instead of relying entirely on a general procedure.
This guide covers the conventional 12-volt automotive battery. It does not cover servicing the high-voltage traction battery used in hybrid and electric vehicles.
What You’ll Need to Replace a Car Battery
Having the correct tools ready before disconnecting the battery makes the job faster and reduces the chance of leaving the vehicle partially disassembled while searching for equipment.
For a typical car battery replacement, you may need:
- Correct replacement battery
- Safety glasses
- Protective gloves
- Socket and ratchet
- Combination wrench or adjustable wrench
- Battery terminal brush or wire brush
Depending on the vehicle, you may also need:
- Socket extension
- Battery terminal puller
- Battery carrying strap
- Battery terminal protector
- Battery cleaning solution
- Shop towels
- Memory saver
- OBD-II scanner or battery service tool
Battery terminal and hold-down fastener sizes vary by vehicle, so verify the correct tool size before applying force.
Step 1: Buy the Correct Replacement Battery
Choosing the right replacement battery is the first important step. A battery may physically fit inside your car while still having the wrong terminal layout, capacity, battery chemistry, or electrical specifications.
Check the owner’s manual, existing battery label, or a reliable vehicle-specific battery application guide before buying.
Check the Battery Group Size
Battery group size identifies important physical characteristics of the battery. Installing the correct group size helps ensure that the replacement battery fits the tray and factory mounting hardware correctly.
Group size can determine:
- Physical dimensions
- Terminal position
- Terminal style
- Battery mounting configuration
The new battery should sit securely inside the original battery tray without modification.
Check the Cold Cranking Amps
Cold Cranking Amps, commonly abbreviated as CCA, indicate how much starting current a battery can provide under cold conditions.
Choose a replacement battery that meets the minimum CCA requirement specified by the vehicle manufacturer. Installing an undersized battery may cause poor starting performance, particularly in cold weather.
Check the Battery Type
Modern vehicles may require a specific type of battery rather than a standard flooded lead-acid battery.
Common automotive battery types include:
- Flooded lead-acid
- Enhanced Flooded Battery (EFB)
- Absorbent Glass Mat (AGM)
If the vehicle originally uses an AGM or EFB battery, do not automatically replace it with a less expensive conventional battery. Start-stop systems and sophisticated charging systems may depend on the correct battery technology.
Check the Terminal Orientation
Compare the position of the positive and negative battery posts before buying the replacement.
A battery with reversed terminal positions may not work because the original cables may not safely reach the correct posts.
When selecting a battery, match it using your vehicle’s:
- Year
- Make
- Model
- Engine
- Trim, when required
Step 2: Park the Car Safely
Before removing a car battery, park the vehicle in a safe area with enough room to work around the engine compartment. The vehicle should remain completely stationary throughout the replacement.
Park on a flat, dry surface and then:
- Put an automatic transmission in Park.
- Put a manual transmission in gear.
- Apply the parking brake.
- Turn off the engine.
- Switch off lights and accessories.
- Remove the key if applicable.
- Keep the key fob away from the vehicle if recommended.
- Allow hot engine components to cool.
Do not smoke or create sparks or open flames near the battery. Lead-acid batteries can release hydrogen gas, which is highly flammable.
Remove metal jewelry such as rings, watches, and bracelets before working around the battery terminals.
Step 3: Put On Safety Glasses and Gloves
Battery replacement involves electrical connections, corrosive residue, and a heavy battery, so basic personal protection is important even when the battery appears to be in good condition.
Wear:
- Safety glasses or goggles
- Suitable protective gloves
- Clothing that covers exposed skin reasonably well
If the old battery is cracked, leaking, badly swollen, frozen, or otherwise damaged, avoid handling it as a routine DIY battery replacement. Professional assistance may be safer.
Step 4: Locate the Car Battery
The 12-volt battery is commonly installed in the engine compartment, but its exact location depends on the vehicle design. Some manufacturers place batteries in less accessible areas to improve weight distribution or packaging.
Possible battery locations include:
- Engine compartment
- Under a plastic cover
- Inside the trunk
- Under a rear seat
- Beneath the floor
- Inside a separate battery compartment
If you cannot locate the battery immediately, check the owner’s manual before removing unrelated components.
Step 5: Identify the Positive and Negative Battery Terminals
Before loosening any connections, positively identify both battery terminals. Connecting or disconnecting the wrong cable can create sparks or potentially damage electrical components.
The negative terminal is marked with:
–
The negative cable is commonly black.
The positive terminal is marked with:
+
The positive cable is commonly red and may have a red protective cover.
Always use the + and – symbols on the battery as the primary identification method rather than relying entirely on cable colors.
Taking a quick photo before disconnecting anything can also help you remember battery orientation, cable routing, covers, and mounting hardware.
Step 6: Disconnect the Negative Terminal First
The negative battery terminal should be disconnected first during most conventional car battery replacements. This reduces the risk of accidentally creating a short circuit while working around the positive terminal.
Use the appropriate wrench or socket to loosen the clamp on the negative (-) battery post.
Then:
- Carefully move the connector off the battery post.
- Move the negative cable away from the battery.
- Position it where it cannot accidentally contact the terminal again.
Do not force a seized battery terminal with excessive leverage against the battery case. If the terminal will not come off easily, a battery terminal puller may be safer.
Why Remove the Negative Terminal First?
The negative battery cable is normally connected to the vehicle’s chassis or ground system. Disconnecting it first breaks that connection and reduces the chance of your wrench completing a circuit between the positive battery terminal and the vehicle’s metal body.
This is why the normal battery removal sequence is:
Negative first → Positive second
Step 7: Disconnect the Positive Terminal
After the negative cable has been safely disconnected and moved aside, you can remove the positive battery connection.
Loosen the positive (+) terminal clamp and carefully remove it from the battery post.
Keep your wrench or other metal tools from touching the positive battery terminal and a metal component of the vehicle at the same time.
Move the positive cable safely away from the battery after removing it.
At this point, the battery should be electrically disconnected from the vehicle.
Step 8: Remove the Battery Hold-Down
Car batteries are secured to prevent them from moving while the vehicle is driving. Before removing the battery, you need to remove the bracket, clamp, strap, or other hold-down system.
Common battery restraints include:
- Top-mounted crossbars
- Metal brackets
- Bottom retaining clamps
- Battery straps
- Bolts and brackets
Remove the mounting hardware carefully and keep the fasteners somewhere safe.
Pay attention to the way the hold-down is installed because you will need to reinstall it with the new battery.
Never leave a replacement car battery unsecured.
Step 9: Remove the Old Battery
Once the cables and hold-down are removed, carefully lift the old battery out of the vehicle. Car batteries are compact but often surprisingly heavy.
Lift using both hands and keep the battery upright.
If the battery is difficult to grip, a battery carrying strap can make removal easier.
Place the old battery upright on a stable surface where it cannot fall over.
If the battery has a vent hose, note exactly how it is connected before completely removing the battery.
Step 10: Inspect and Clean the Battery Tray
Before installing the new battery, inspect the battery tray and cable connections. Cleaning the area now can improve the new battery’s electrical connection and prevent existing corrosion from being carried over.
Check for:
- Dirt
- Moisture
- Rust
- Battery corrosion
- Damaged cables
- Cracked terminal clamps
- Damaged mounting hardware
Use a battery terminal brush or suitable cleaning product to clean corrosion from the terminal connectors.
For residue around a conventional lead-acid battery, a baking-soda-and-water solution is commonly used to help neutralize acidic contamination.
Avoid allowing cleaning solution or debris to enter any battery openings.
If a cable or terminal clamp is badly damaged rather than simply dirty, repair or replace it before installing the new battery.
Step 11: Compare the New Battery With the Old Battery
Before lowering the replacement battery into the vehicle, compare it directly with the old one. This quick check can prevent installation problems caused by an incorrect battery.
Compare:
- Battery dimensions
- Overall height
- Positive terminal location
- Negative terminal location
- Battery type
- Hold-down configuration
- Vent connection, if present
If the batteries clearly do not match, stop and verify the replacement battery application.
Do not stretch battery cables or modify the battery mounting system simply to make an incorrect battery fit.
Step 12: Install the New Battery
Carefully lower the replacement battery into the battery tray in the same orientation as the original battery.
Make sure:
- The battery sits flat.
- The positive post is on the correct side.
- The negative post is on the correct side.
- Both battery cables reach naturally.
- No cables are trapped beneath the battery.
Keep the battery upright during installation.
Step 13: Secure the Battery Hold-Down
Once the replacement battery is correctly positioned, reinstall the factory battery hold-down system. The battery should remain firmly in place during acceleration, braking, cornering, and driving over rough roads.
Reinstall the:
- Clamp
- Bracket
- Strap
- Crossbar
- Mounting bolts
The battery should not slide or rock in the tray.
However, avoid overtightening the hold-down to the point that it cracks, deforms, or damages the battery case.
Use the vehicle manufacturer’s torque specification when available.
Step 14: Connect the Positive Terminal First
The connection sequence during installation is the reverse of the removal sequence. The positive battery cable should normally be installed before the negative cable.
Place the positive (+) terminal connector fully onto the positive battery post.
Then:
- Make sure the clamp is fully seated.
- Tighten the fastener securely.
- Check that the terminal cannot easily rotate or lift off.
Do not overtighten the clamp. Excessive tightening can damage the battery post or terminal connector.
Step 15: Connect the Negative Terminal Last
After the positive terminal is securely connected, install the negative (-) terminal.
Push the negative connector fully onto the battery post and tighten it securely.
Check that neither battery terminal moves by hand after tightening.
The normal connection sequence is:
Removal: Negative → Positive
Installation: Positive → Negative
Remembering this sequence makes future battery work much easier.
Step 16: Reinstall Covers and Vent Connections
After both battery terminals are connected, reinstall any components that were removed to access or replace the battery. Missing covers or vent connections can create problems later.
Check for:
- Battery covers
- Insulation blankets
- Positive terminal covers
- Vent hoses
- Cable retainers
- Plastic trim
- Air-intake components
If the battery uses a vent tube, reconnect it according to the manufacturer’s instructions.
Battery venting is particularly important when the 12-volt battery is installed inside the passenger compartment or trunk.
Step 17: Start the Car
After completing the installation, start the vehicle normally. This confirms whether the new battery is connected properly and provides enough power to crank the engine.
A successful installation should normally provide:
- Strong engine cranking
- Normal engine start
- Stable electrical power
- Normal accessory operation
Check the dashboard after starting.
Some vehicle settings may reset when the old battery is disconnected. This does not necessarily indicate a problem with the new battery.
Step 18: Check the Battery and Charging System
A new battery can solve a weak or failed battery problem, but it will not fix a faulty charging system. If the previous battery repeatedly lost its charge, another electrical issue may be responsible.
Possible causes include:
- Alternator problems
- Charging-system faults
- Loose battery connections
- Parasitic electrical drain
- Corroded ground connections
- Starter problems
Consider having the battery and charging system tested if you are unsure why the old battery failed.
If the battery warning light remains illuminated after installation, investigate the charging system rather than automatically assuming the new battery is defective.
Step 19: Reset or Relearn Vehicle Systems if Necessary
Disconnecting battery power can reset certain electronic systems or stored settings. What needs to be reset depends heavily on the vehicle.
You may need to restore or relearn:
- Clock
- Radio presets
- Power windows
- Sunroof
- Steering-angle functions
- Idle characteristics
- Seat memory
- Infotainment settings
Some vehicles provide simple manual reset procedures, while others may require diagnostic equipment.
Check the owner’s manual if a feature behaves differently after replacing the battery.
Does a New Car Battery Need to Be Registered?
Some modern vehicles require the replacement battery to be registered, adapted, or reset in the Battery Management System. Battery registration tells the vehicle that a new battery has been installed so the charging system can manage it correctly.
Depending on the manufacturer, this procedure may be called:
- Battery registration
- BMS reset
- Battery adaptation
- Battery initialization
- Battery relearn
Battery management systems may monitor characteristics such as:
- Battery age
- Battery capacity
- Battery type
- State of charge
- Charging history
There is no universal procedure that applies to every vehicle.
Check the owner’s manual or manufacturer-specific service information for your exact year, make, model, and engine.
Should You Use a Memory Saver When Changing a Car Battery?
A memory saver provides limited electrical power to the vehicle while the main battery is disconnected. Its main purpose is to preserve certain stored settings during battery replacement.
It may help retain:
- Radio presets
- Clock settings
- Seat positions
- Certain electronic memory settings
A memory saver is not required for every battery replacement.
If you decide to use one, confirm that the procedure is appropriate for your vehicle and follow the device manufacturer’s instructions carefully.
In many vehicles, completing the required reset procedures after battery replacement is sufficient.
What If the Car Won’t Start After Replacing the Battery?
If your car does not start after installing a new battery, begin by checking the battery installation before assuming another major component has failed. Loose or incorrectly connected terminals are common causes of problems immediately after replacement.
1. Check Both Battery Terminals
Make sure both battery terminals are:
- Connected to the correct posts
- Fully seated
- Tight
- Free from excessive corrosion
A loose battery terminal can cause slow cranking, intermittent electrical problems, or a complete no-start condition.
2. Verify the Battery Polarity
Confirm that:
Positive cable → Positive terminal
Negative cable → Negative terminal
If the battery was connected backward, stop troubleshooting. Reverse polarity can damage fuses and sensitive electrical components.
3. Check the Battery Charge
A replacement battery should normally arrive ready for use, but it may not always be fully charged.
If the engine still cranks slowly, test the battery’s state of charge.
4. Check for Security-System Issues
Some vehicles may require an immobilizer, anti-theft, or electronic reset procedure after battery power is disconnected.
Check the owner’s manual for vehicle-specific instructions.
5. Consider Another Starting-System Problem
Replacing the battery will not fix a problem that was caused by another component.
Possible causes of a continued no-start include:
- Failed starter
- Faulty alternator
- Poor ground connection
- Blown fuse
- Wiring fault
- Ignition or fuel-system problem
Further diagnosis may be required.
Common Car Battery Replacement Mistakes
Most DIY battery replacements are straightforward, but avoiding a few common mistakes can prevent electrical damage, poor connections, and premature battery problems.
Disconnecting the Positive Terminal First
Remove the negative cable first. This reduces the risk of accidentally creating a short circuit between the positive terminal and the vehicle’s metal body.
Connecting the Negative Terminal First
During installation, connect the positive terminal first and the negative terminal last.
Reversing Battery Polarity
Never rely entirely on cable colors. Always verify the + and – markings on the battery before connecting anything.
Buying the Wrong Replacement Battery
Check battery size, electrical specifications, chemistry, mounting style, and terminal orientation before installation.
Leaving the Battery Unsecured
Always reinstall the battery hold-down. An unsecured battery can move and damage its connections.
Overtightening the Battery Terminals
Battery terminals should be secure, but excessive tightening can damage the clamp or battery post.
Ignoring Corrosion
Do not install a new battery onto heavily corroded connectors without cleaning them first.
Ignoring Battery Registration
Modern vehicles may require a BMS reset, relearn, or battery registration procedure after replacement.
Forgetting the Battery Vent Tube
If the original battery uses external venting, reconnect the vent tube correctly.
How Long Does It Take to Replace a Car Battery?
A straightforward DIY car battery replacement usually takes around 30–60 minutes for someone doing the job for the first time. An experienced person can often complete an easily accessible battery replacement much faster.
The job may take longer if:
- The battery is difficult to access.
- Significant corrosion is present.
- Covers or other components must be removed.
- Battery terminals are seized.
- Battery registration is required.
- Electronic systems require relearning.
Working carefully is more important than completing the replacement quickly.
How Heavy Is a Car Battery?
Car batteries can weigh several dozen pounds despite their relatively small size. Battery weight depends on the battery’s dimensions, construction, and capacity.
Use both hands when removing or installing the battery.
A battery carrying strap can make lifting easier, especially when the battery is located deep inside the engine compartment.
If you cannot lift the battery comfortably from its mounting location, ask for help rather than risking injury or dropping the battery.
What Should You Do With the Old Car Battery?
Used automotive lead-acid batteries should be recycled rather than placed in ordinary household waste. Most of the materials inside a car battery can be recovered and reused.
You can usually return an old battery to:
- Automotive parts retailers
- Battery retailers
- Repair shops
- Recycling facilities
- Approved battery collection locations
Many battery retailers also use a core-charge system that encourages customers to return their old batteries.
Transport the old battery upright and prevent its terminals from contacting metal objects.
When Should You Not Replace a Car Battery Yourself?
DIY battery replacement is practical when the battery is accessible and the procedure is straightforward. Professional assistance is more appropriate when the job involves damaged batteries, complex electronics, or procedures you are not equipped to perform.
Consider professional help when:
- The battery is leaking.
- The battery case is cracked or severely swollen.
- Wiring is badly damaged.
- Corrosion is extensive.
- Significant vehicle disassembly is required.
- You cannot identify the battery terminals confidently.
- Battery coding or registration requires equipment you do not have.
- Manufacturer instructions specify special equipment.
- The vehicle has a hybrid or EV high-voltage system.
- Electrical problems remain after installing the new battery.
There is little benefit in forcing a DIY repair when proper diagnosis or specialized equipment is required.
Car Battery Replacement Checklist
Before finishing the job, review the installation one final time. A short inspection can catch loose terminals, missing covers, or forgotten mounting hardware before you drive.
Check that:
- The correct battery is installed.
- The battery is sitting in the proper orientation.
- The hold-down is securely installed.
- The positive terminal is securely connected.
- The negative terminal is securely connected.
- Terminal covers are replaced.
- The vent tube is connected if required.
- No tools remain in the engine compartment.
- The engine starts normally.
- No unexpected warning lights remain.
- Necessary vehicle settings have been reset.
- Battery registration or relearning is complete if required.
- The old battery is ready for proper recycling.
Frequently Asked Questions
These common questions address the areas that cause the most confusion when replacing a car battery at home, particularly terminal order, electronic resets, and post-installation checks.
Which Battery Terminal Do I Remove First?
Remove the negative (-) battery terminal first, followed by the positive (+) terminal. Disconnecting the negative connection first helps reduce the risk of accidentally shorting the positive battery terminal against grounded metal parts of the vehicle.
Which Battery Terminal Do I Connect First?
Connect the positive (+) battery terminal first when installing the replacement battery. Connect the negative (-) terminal last.
Can I Replace a Car Battery Myself?
Yes, many car owners can replace a conventional 12-volt battery themselves using basic hand tools. The job becomes more complicated when the battery is difficult to access or the vehicle requires battery registration, coding, or special reset procedures.
Check your owner’s manual before starting.
Do I Need to Drive After Replacing the Battery?
You normally do not need to drive a car simply because you installed a new battery. A properly prepared replacement battery should already have sufficient charge to start and operate the vehicle.
However, some vehicles may have specific relearn procedures after battery replacement. Follow the manufacturer’s instructions rather than relying on a universal driving rule.
Will Disconnecting the Battery Reset My Car?
Disconnecting the battery can reset certain electronic settings. You may lose the clock, radio presets, seat memory, or other stored information.
Some vehicles may also require power-window, steering, idle, or other system relearning.
Do I Need to Reset the Computer After Replacing a Car Battery?
It depends on the vehicle.
Some cars require no manual reset. Others automatically relearn battery information, while certain models require a BMS reset or formal battery registration.
Check the manufacturer’s procedure for your exact vehicle.
What Happens If I Connect a Car Battery Backward?
Connecting a car battery with reversed polarity can create sparks, blow fuses, and potentially damage electronic modules or other electrical components.
If you accidentally reverse the battery connections, disconnect the battery safely and inspect the electrical system before continuing.
Conclusion
Replacing a car battery yourself can be a practical way to handle basic vehicle maintenance when you have an accessible 12-volt battery and the correct replacement.
The most important sequence to remember is:
Disconnect negative first → disconnect positive → remove the old battery → install and secure the new battery → connect positive first → connect negative last.
Take a few extra minutes to clean the battery connections, secure the battery properly, confirm the terminal orientation, and check whether your vehicle requires battery registration or electronic relearning.
Doing those things correctly is more important than simply swapping the old battery for a new one as quickly as possible.