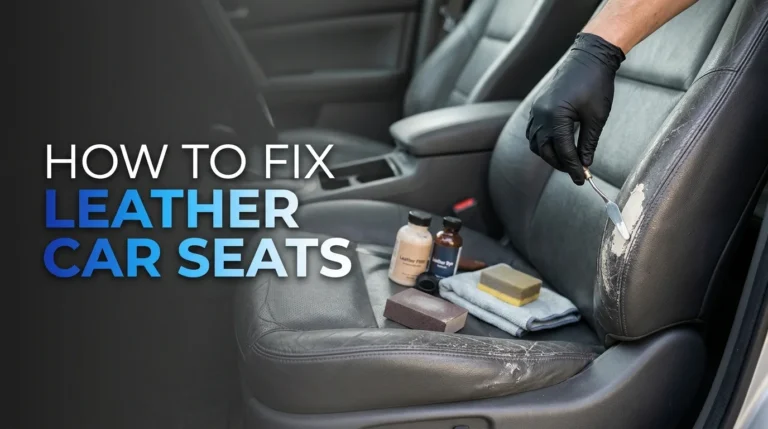
Fixing leather car seats starts with identifying what has failed: the colored surface coating, the upholstery itself, a stitched seam, or the foam underneath. A small cut in otherwise sound upholstery may suit a compatible flexible repair system. A split seam, missing material, or damaged airbag seam usually calls for an automotive upholsterer.
The goal isn’t just to hide the opening. A useful repair must hold while the seat flexes, avoid a hard ridge, and blend reasonably with the surrounding finish. This guide covers tears, cuts, and patches, with clear limits on when a DIY repair makes sense.
Identify the Seat Material and Type of Damage
Before buying supplies, confirm what the damaged panel is made from. A seat described as leather may combine leather seating surfaces with vinyl or other synthetic material on its sides and back. Check the vehicle’s upholstery information or have an upholstery shop identify the panel; appearance alone can be misleading.
Examine the damage without pulling the edges apart:
- A cut or tear through the upholstery: The panel has an actual opening, sometimes exposing its backing or the cushion.
- A failed stitched seam: Thread has broken or the material has torn along the stitch holes. This needs a different repair from a cut through a panel.
- Peeling or surface cracking: The coating may be failing without a hole through the upholstery. Filling a tear won’t necessarily solve that problem.
- Missing or stretched material: The edges no longer meet naturally, making a discreet bonded repair harder.
- Cushion damage: Collapsed or missing foam may leave the repaired surface unsupported.
If the problem is mainly a worn finish or shallow cracking, assess whether you need to restore leather car seats rather than patch an opening. Brittle upholstery with several nearby splits is also a poor foundation for a small spot repair.
When to Use an Automotive Upholsterer
Get professional advice before repairing damage near a seat-mounted airbag, an airbag label, or a designated deployment seam. Do not glue, patch, stitch, or cover that area without an approved repair approach. The seam is part of the seat’s safety design, not simply decorative stitching.
Professional repair is also the sensible choice when:
- A factory seam has opened or the upholstery has torn around its stitches.
- A tear spreads when someone sits down or crosses a heavily loaded bolster.
- Material is missing, badly stretched, or brittle around the opening.
- Foam, wiring, heating components, or other internal parts are damaged or exposed.
- You want a close-to-original appearance on a prominent seating panel.
An upholsterer may be able to replace one panel rather than the entire seat covering. Ask whether the proposed work repairs the existing material or replaces it, and how the shop will handle matching color, grain, and stitching.

Supplies for a Small DIY Tear Repair
For a localized cut away from seams and safety components, choose a repair system explicitly compatible with the panel material. A kit intended for coated automotive leather may not be appropriate for suede, nubuck, perforated upholstery, or every synthetic leather.
Depending on the system’s instructions, you may need:
- A compatible upholstery cleaner and any specified preparation product.
- Clean, soft cloths and a vacuum with a suitable attachment.
- The backing material specified by the repair system.
- Flexible adhesive or repair compound approved for that application.
- A small applicator and the system’s recommended finishing tools.
- Compatible colorant and protective topcoat, if required.
- Gloves and ventilation as directed on the product labels.
Prefer components designed to work together. Mixing an unrelated adhesive, filler, and color coating can create adhesion or flexibility problems. Also check whether the system requires heat, sanding, or specialist equipment before purchasing it.
How to Fix a Small Tear in a Leather Car Seat
The following sequence explains the repair stages, not a universal recipe for every kit. Follow the exact product instructions for preparation, backing placement, application, and cure time. Stop if the edges won’t align without tension or if the surrounding material starts breaking apart.
1. Clean and Inspect the Repair Area
Vacuum loose debris from around the damage without dragging the nozzle across the torn edges. Then clean the surrounding upholstery using a method approved for its material. When you clean leather car seats, keep liquid from soaking into openings, perforations, and the cushion.
Let the area dry as directed before proceeding. Dirt, oily dressings, and conditioner residue can interfere with bonding, but that doesn’t justify using a stronger household solvent. Use only the preparation cleaner specified for the repair system and upholstery.
Inspect again once the surface is clean. If you discover several connected cracks, a loose surface layer, or weakened edges, reconsider a spot repair.
2. Check Whether the Edges Meet Naturally
With the seat unoccupied, gently bring the torn edges toward their original positions. Don’t stretch them together or overlap them to close the gap. A repair made under tension may be stressed again as soon as someone sits down.
Avoid trimming away material simply to make the opening look tidy. Any trimming should follow the repair instructions and remove only material the system specifically directs you to remove. If a section is missing, decide whether a visible patch is acceptable or whether panel replacement would give a better result.
3. Install the Specified Backing
If the repair system calls for backing beneath the opening, position it according to the kit’s directions. The backing supports the damaged area and provides a foundation for the repair; it should lie flat rather than bunch up beneath the surface.
Use the specified adhesive placement and amount. Don’t flood the opening or bond the cover indiscriminately to the foam underneath. If you cannot place the backing without disturbing internal seat components, stop and consult an upholsterer.
Some systems use a different construction or repair sequence. Don’t add a backing layer merely because another kit uses one.
4. Rebuild the Surface in Controlled Layers
Apply the compatible repair compound as directed, keeping it confined to the necessary area. Systems that call for thin layers need each layer processed or cured before the next is added. A thick mound can leave a conspicuous raised spot and may not cure as intended.
Reproduce texture only with the tools and method approved for that system. Likewise, sand or apply heat only when the instructions specifically require it. Do not substitute a household iron or heat gun for a controlled process.
5. Match the Color and Finish
Test the compatible colorant in an inconspicuous location before finishing the repair. Let the test dry fully, then compare it with the surrounding panel in daylight. A wet match isn’t enough to judge the final result.
Pay attention to sheen as well as color. A glossy repair can stand out on a matte seat even when its shade is close. Apply the required finishing coat without extending into incompatible materials, perforations, or safety seams.
6. Allow Full Cure Before Using the Seat
Keep weight, rubbing, and cleaning products off the repair for the full period specified by the manufacturer. Dry to the touch does not necessarily mean ready for someone to sit on it. Temperature and other application conditions must also stay within the product’s stated limits.
After curing, inspect for lifting edges, tackiness, cracking, or separation during ordinary seat movement. Don’t pull hard on the repair to test it. If it opens again, reassess the material and loading rather than repeatedly adding thicker layers of compound.
Choosing Between a Bonded Repair, a Patch, and Panel Replacement
A bonded repair is most reasonable when the damage is localized and the surrounding upholstery remains sound. Its appearance still depends on the opening’s shape, material condition, texture, and color match. Don’t assume an invisible result.
An adhesive surface patch leaves a visible border and changes the feel of the seat. Use one only when it is suitable for the material and location, and never over an airbag deployment area. Treat it as a cosmetic compromise, not proof that the underlying upholstery has regained its original strength.
Panel replacement becomes more attractive when a tear sits on a heavily used bolster, material is missing, or the surrounding area keeps splitting. Covering weak upholstery with a larger patch may hide the problem without providing a durable foundation.
Protect the Repaired Area From Further Damage
Once the repair has fully cured, follow the repair system’s cleaning and maintenance instructions. Don’t immediately apply conditioner or dressing over it unless the manufacturer permits that treatment.
Reduce the stress that caused the damage where possible. Avoid sliding tools, sharp pocket hardware, or bulky objects across the bolster, and lift yourself into the seat rather than dragging across its outer edge. If the cover moves excessively because of damaged foam or an underlying fit problem, have that issue inspected rather than relying on another surface repair.
Conclusion
A small tear in sound leather or synthetic upholstery may be repairable with a compatible backing, flexible repair system, and careful finish matching. Split seams, weak material, damaged cushions, and airbag areas deserve professional assessment. Choose the repair based on the condition and location of the damage, not just the size of the opening.
Frequently Asked Questions
Can I use superglue to fix a leather car seat?
Ordinary superglue is not a suitable substitute for a flexible automotive upholstery repair adhesive. It can leave a hard bond or visible residue on material that needs to bend. Use an adhesive explicitly approved for the upholstery and repair method.
Will the vehicle’s interior color code guarantee a matching repair?
No, an interior color code does not guarantee that a repair colorant will match the seat as it looks today. Wear, sunlight, previous repairs, and differences between panels can affect appearance. Use the code as a starting reference, then assess a fully dried test sample.
Can a heated or ventilated leather seat be repaired?
Some surface damage on heated or ventilated seats can be repaired, but the method must account for the internal components and upholstery construction. Do not insert tools deeply, saturate the cushion, or block ventilation perforations. Seek professional assessment when the damage reaches beneath the cover or the repair system doesn’t address that application.
Do I need to remove the seat to repair a small tear?
A small, accessible surface repair may be possible with the seat installed. Seat removal introduces vehicle-specific concerns involving wiring, airbags, mounting hardware, and sometimes calibration procedures. Don’t remove it without the applicable service information and appropriate skills.
Can I condition the seat to close a tear?
No, leather conditioner cannot reconnect torn upholstery or replace missing material. It is a care product, not a structural repair. Applying it before a bonded repair can also leave residue that must be addressed using the repair system’s approved preparation method.