

Changing spark plugs involves removing the ignition components, replacing each plug with the correct part, and tightening it to the vehicle manufacturer’s specification. On some engines, the plugs are easy to reach. On others, access requires removing parts that make the job better suited to a professional.
Before buying tools or removing a plug, check your owner’s manual and the service information for your exact vehicle. You’ll need the specified plug type, gap, and installation torque. This guide explains the general process and highlights the points where vehicle-specific instructions matter.
Before You Start: Check Your Vehicle
This procedure applies to gasoline engines with spark plugs. Conventional diesel engines use a different ignition process and do not have spark plugs.
Find the correct procedure for your vehicle’s year, make, model, and engine. Check:
- Replacement interval: Use the maintenance schedule rather than guessing from mileage or plug material.
- Plug specification: Match the part number or an approved equivalent for your engine. Thread dimensions, reach, heat range, and electrode design matter.
- Plug gap: Find the specified gap and any instructions for checking it.
- Installation torque: Use the value and thread conditions specified for your vehicle and replacement plugs.
- Access requirements: Determine whether covers, intake components, or other parts must come off.
Some engines have more than one spark plug per cylinder, while others have plugs that are difficult to reach behind the engine. If the procedure involves removing an intake manifold or working around unfamiliar electrical components, consider having a technician do the job.
For a hybrid vehicle, follow its service instructions for disabling the vehicle and working around its electrical systems. Do not touch high-voltage wiring or components. If you cannot identify the required precautions, use a qualified technician.
Tools and Materials for Changing Spark Plugs
The exact tools depend on the engine, but a typical job requires:
- Correct replacement spark plugs
- A spark plug socket of the correct size, with a retaining insert or magnet
- Ratchet and suitable extension
- Torque wrench that covers the specified torque range
- Tools needed to remove engine covers or ignition coils
- Spark plug gap gauge, if checking the gap is permitted
- Safety glasses and a clean cloth
- A way to label ignition wires or connectors, if applicable
A swivel extension can help with access on some engines, but it can also make it harder to keep the socket aligned. Use the tool setup and torque method specified in the service procedure.
You may also need compressed air to clean around recessed plug wells. Wear eye protection and keep your face away from the area when using it. Follow the equipment’s safety instructions.
How to Replace Spark Plugs
Replacing spark plugs involves removing the ignition coils or spark plug wires, taking out the old plugs, and installing new ones according to your vehicle manufacturer’s specifications.
To replace spark plugs safely, allow the engine to cool completely, use the correct replacement parts, and tighten each plug with a torque wrench to the specified value.
You will typically need a spark plug socket, ratchet, extension, and torque wrench. Follow these step-by-step instructions to replace your car’s spark plugs, avoid common installation mistakes, and check that the engine runs properly afterward.
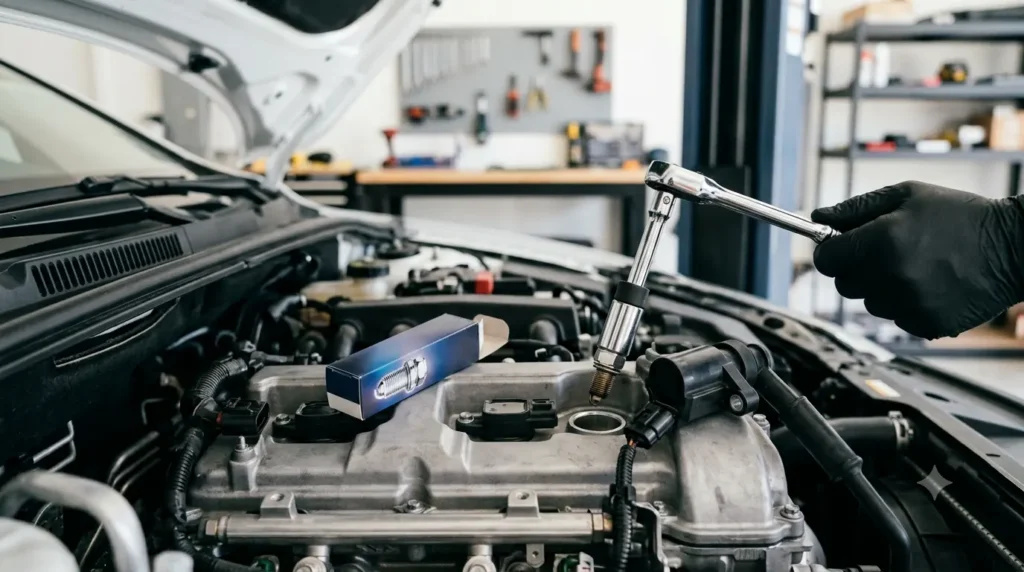
1. Park Safely and Let the Engine Cool
Park on level ground, shift into Park or the appropriate gear, and set the parking brake. Turn the ignition off and remove the key or keep the key fob away from the vehicle.
Allow the engine to cool fully before working. Hot components can burn you, and removing plugs from a hot cylinder head can increase the risk of thread damage.
Follow the vehicle’s service procedure for battery disconnection. If it calls for disconnecting the battery, follow its sequence and precautions. Some vehicles have settings or systems that need attention after power is restored.
2. Locate the Spark Plugs
Remove any engine cover as directed by the service information. Many vehicles have an individual ignition coil mounted over each plug. Others use ignition wires connected to a coil or distributor.
If your engine has individual wires, label their positions before removal. Reconnecting them to the wrong locations can prevent the engine from running correctly. Working on one cylinder at a time also reduces the chance of mixing up parts.
Look closely before disconnecting anything. Electrical connectors often have locking tabs, and forcing a tab can break it.
3. Remove the Ignition Coil or Plug Wire
For a coil-on-plug setup, release the electrical connector, remove any retaining fastener, and carefully pull the coil out according to the vehicle’s instructions. A gentle twisting motion may help release a stuck boot, but avoid forcing the coil or prying against fragile parts.
For an engine with plug wires, grip the boot rather than pulling on the wire itself. Remove the boot as the manufacturer directs.
Inspect the boot and coil for obvious cracks or damage. Oil or coolant in a plug well, a damaged boot, or a badly corroded connector deserves further investigation before you install a new plug. Replacing the plug alone may not solve the underlying problem.
4. Clean Around the Plug
Remove loose dirt from around the plug before taking it out. On a recessed plug, use compressed air where appropriate to clear the well, while wearing safety glasses.
The goal is to keep grit from falling into the cylinder when the plug is removed. If debris has already fallen into the opening, do not simply install the new plug over it. Seek a suitable removal method or professional help.
5. Remove the Old Spark Plug
Fit the spark plug socket squarely over the plug. Attach the extension and ratchet, then loosen the plug carefully.
Once it turns freely, remove it and keep it associated with its cylinder if you want to compare its condition with the other plugs. If the plug resists strongly, binds as it turns, or appears likely to break, stop. Excessive force can damage the plug or cylinder-head threads and make the repair more involved.
Do not rely on a plug’s appearance alone to diagnose an engine problem. Heavy deposits, oil, physical damage, or an unusually different appearance between cylinders are reasons to consult the service information or a technician.
6. Check the Replacement Plug
Confirm that the replacement matches the specified part before installation. Compare its general shape with the old plug, but do not assume it is correct solely because it looks similar.
Check the gap against the vehicle specification if the plug manufacturer permits it. Some plugs are supplied with a preset gap, but that does not replace checking the instructions for the specific part. Fine-wire electrodes can be damaged by the wrong gauge or adjustment method. If the manufacturer says not to adjust the gap, follow that guidance.
If a plug is dropped or its insulator or electrode appears damaged, replace it rather than installing it.
7. Install and Tighten the New Plug
Unless the applicable instructions say otherwise, start the plug by hand using a spark plug socket and extension, without the ratchet. Keep it aligned with the opening and turn gently. It should thread in smoothly without force.
If you feel resistance early, stop, back the plug out, and check its alignment and threads. Forcing it can cross-thread the cylinder head.
Once the plug is seated, tighten it with a torque wrench to the specified value, following the vehicle and plug manufacturer’s instructions. Torque requirements can depend on the plug, cylinder head, sealing design, and whether threads are dry or lubricated.
Do not apply anti-seize or other thread lubricant unless the applicable manufacturer instructions call for it. Lubrication can change the clamping force produced at a given torque setting. Likewise, do not apply grease to the plug threads or electrode unless specifically directed.
8. Reinstall the Coil or Wire
Reinstall the ignition coil or plug wire as directed. Make sure the boot is seated, the electrical connector is locked, and any coil fastener is tightened to its specified value.
Some procedures permit a small amount of dielectric grease in a specified part of the boot. Use it only as directed by the vehicle or component manufacturer; keep it off electrical contacts unless the instructions say otherwise.
Repeat the process for the remaining plugs. Reinstall the engine cover and any other removed components, then reconnect the battery if it was disconnected, following the vehicle’s instructions.
9. Start the Engine and Check Your Work
Make sure tools and loose parts are clear of the engine. Start the vehicle and listen for an unusual idle or other obvious problems. A smooth idle is a useful initial check, though it does not guarantee that every issue has been resolved.
If the engine runs roughly, shut it off and recheck accessible connectors, boots, and wire positions. Follow the service information before removing anything again. A check-engine light, especially a flashing one, or a persistent misfire calls for prompt diagnosis. Avoid continuing to drive a badly misfiring vehicle.
Common Spark Plug Replacement Mistakes
| Mistake | Why it matters | Better approach |
|---|---|---|
| Buying a plug that only looks similar | Plug specifications affect fit and operation. | Confirm the specified part for the exact engine. |
| Mixing up ignition wires | Incorrect connections can cause poor running or prevent starting. | Label wires and work one cylinder at a time. |
| Forcing a plug into the head | Misaligned threads can damage the cylinder head. | Start by hand and stop if it binds. |
| Guessing the torque | Too little or too much tightening can cause problems. | Use the applicable specification and a suitable torque wrench. |
| Ignoring oil in a plug well | A leak can affect ignition components. | Find and address the cause rather than replacing only the plug. |
When Should a Professional Change Your Spark Plugs?
Use a professional if a plug is seized, the threads appear damaged, or the plug breaks during removal. These problems can require specialized tools and repair procedures.
Professional service also makes sense when access requires removing major components, you cannot find reliable torque information, or your vehicle’s hybrid-system precautions are unfamiliar. The cost of help may be worthwhile compared with repairing a damaged cylinder head or ignition component.
Choose the Right Procedure Before You Begin
The most important part of a spark plug change happens before the first plug comes out: confirm the correct replacement parts and the service procedure for your engine. Work on a cool engine, keep dirt out of the cylinders, start each plug by hand, and use the specified tightening method.
If access is straightforward and you have the right tools, the job may be manageable at home. If a plug binds or the instructions are unclear, stop and get help rather than forcing the repair.